
Plans are made up of Weeks. Once you have created your Plans, you can now break them up into subsections. In the dashboard, you will find this as 'Weeks' on the left panel. You can label your Weeks however you like. You should have already created a Plan before creating Weeks, as Weeks belong inside a Plan.
Once you have created a Week, you are able to go back at anytime to make any changes or even to fully delete a Week. Please note that if you delete a Week, it cannot be undone and any changes or deletions will be instantly updated in the end-users phone.
To read the full article on the overview of the Plans section, click here:
How To Edit A Week
Step 1: Log into your Hype Burst Dashboard
Head to https://account.hype-burst.com/admin/login to log into your Hype Burst Dashboard.
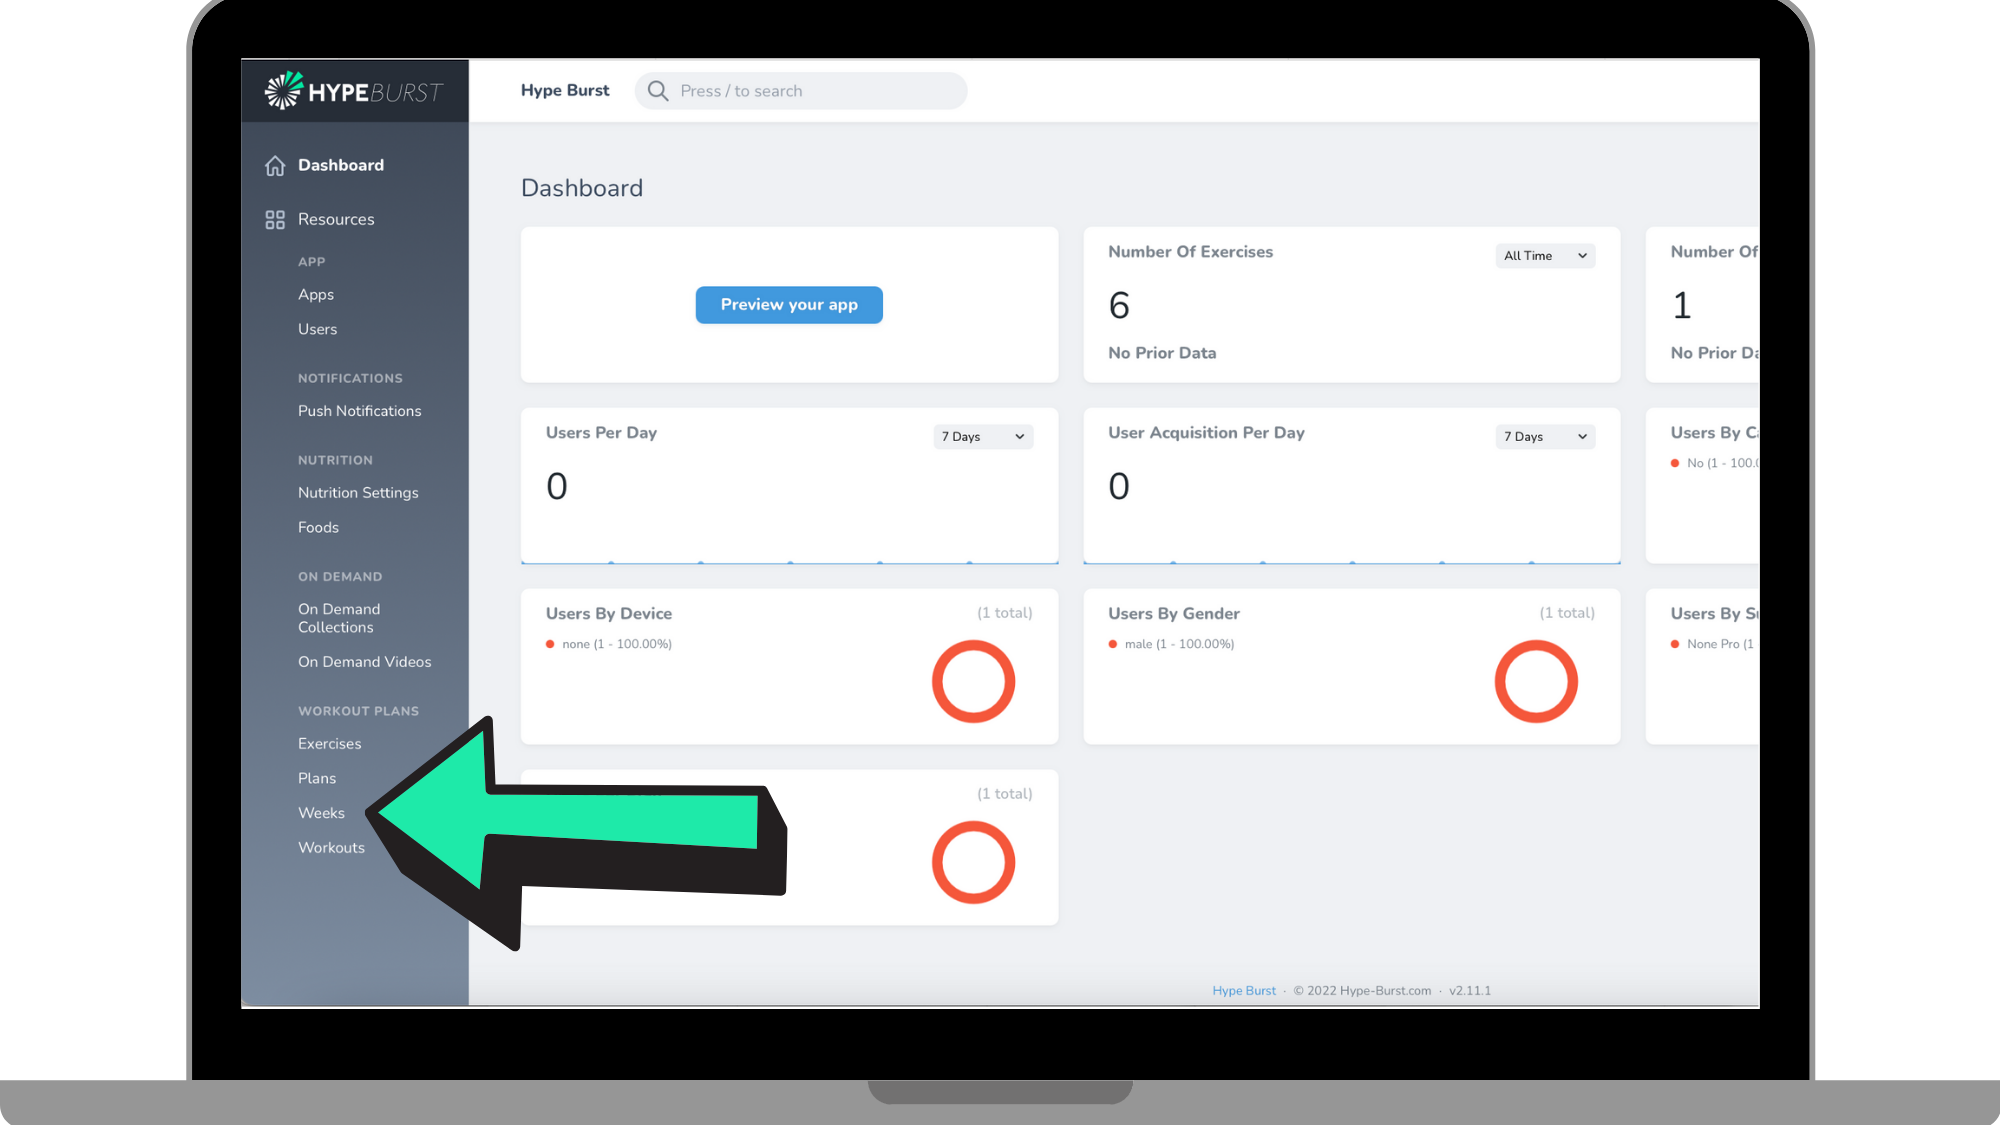
Step 2: Click on 'Weeks'
Under 'Workout Plans' in the panel on the left-hand hand side, click on 'Weeks'.
Step 3: Locate the Week you wish to edit
You can search for the Week in which you want to edit by the search bar at the top or by locating it within the list of Weeks you have created.
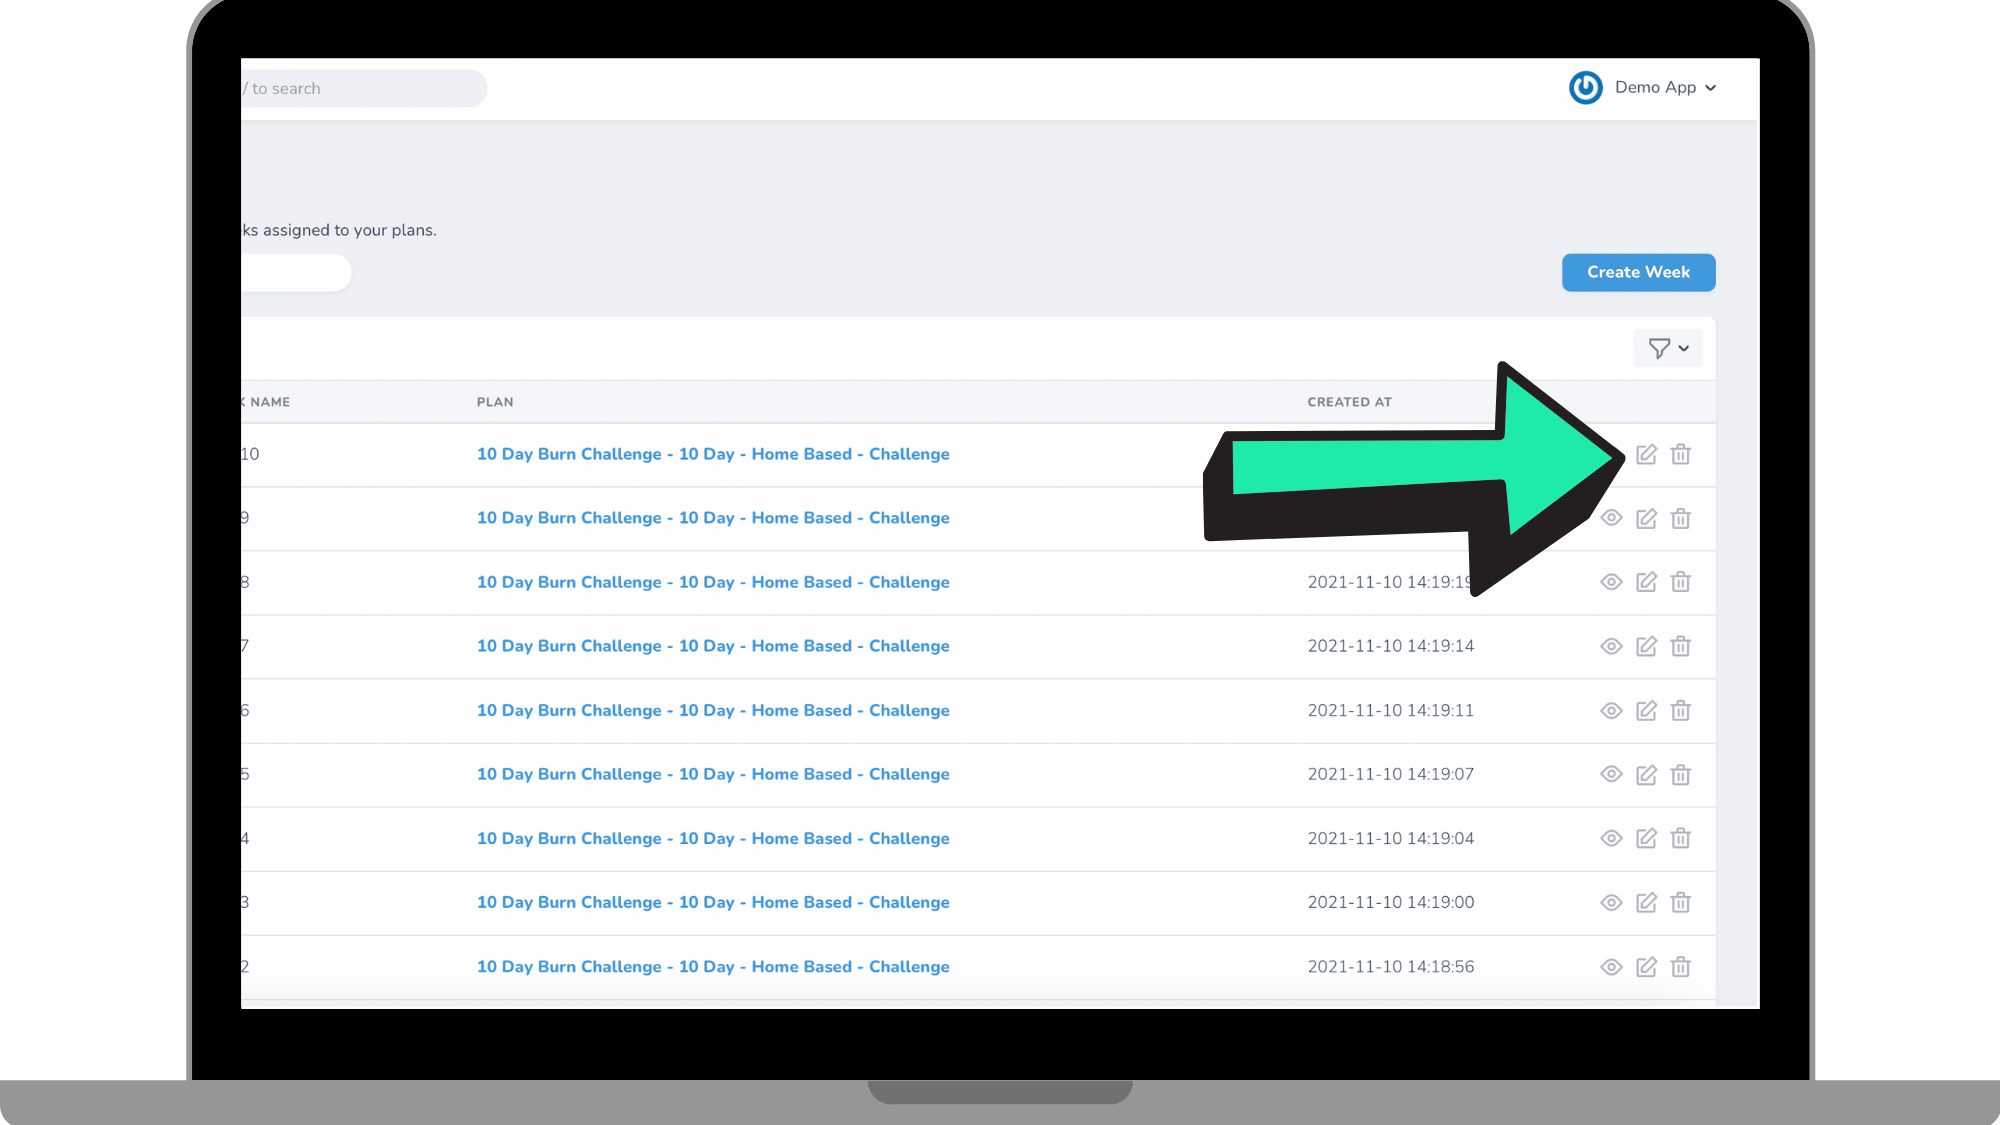
Step 4: Click the 'Edit' icon
Once you have located the Week you want to edit, click the 'Edit' icon next to the Week listing.
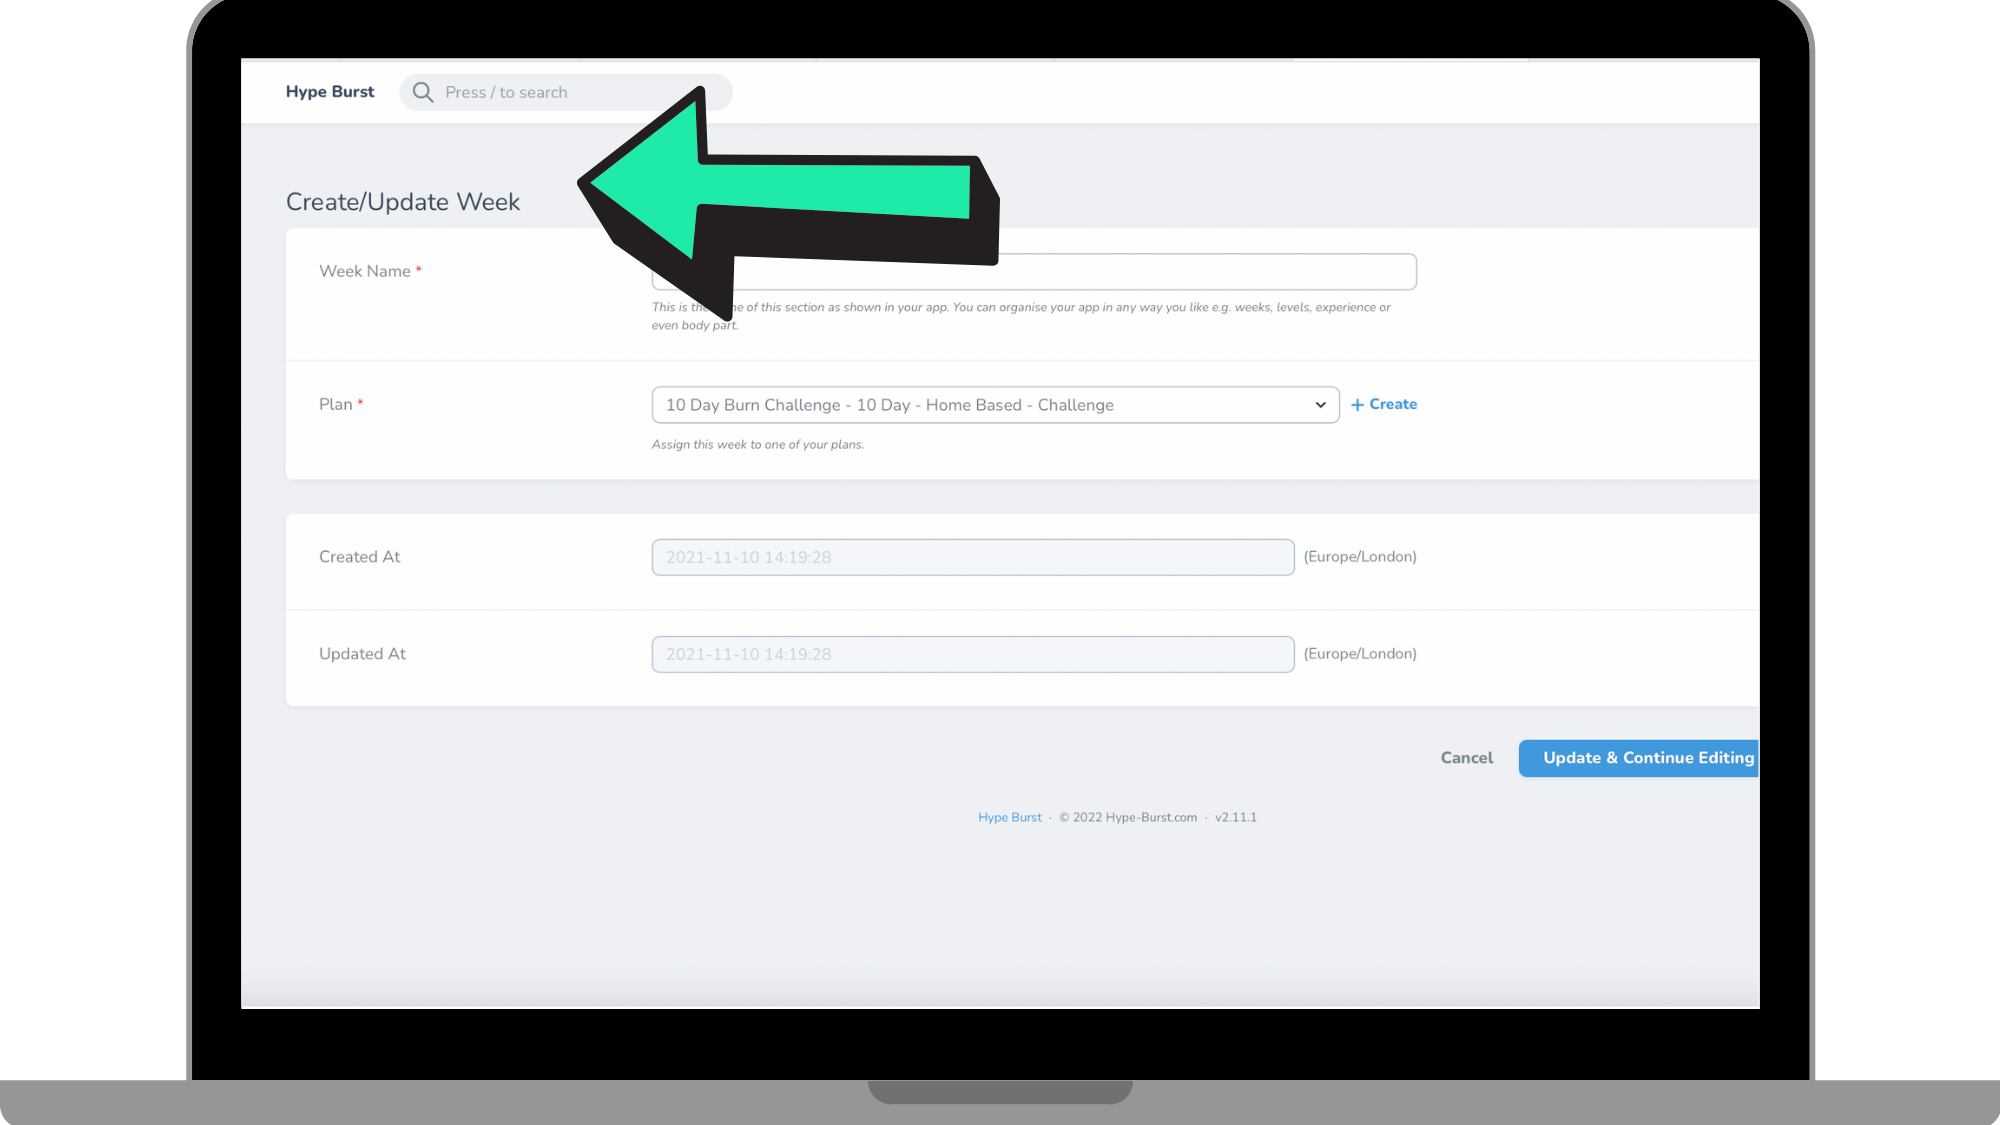
Step 5: Make any necessary changes
Under 'Create/Update Week' you can make changes to the following:
Week Name: This is the name of the Week that will be shown in the user's app when they are choosing which Week to choose for the Plan they are in.
Plan: This is the Plan that the Week can be found in. You can change the Plan it is in by choosing a Plan from the drop-down menu or clicking 'Create' to create a new one.
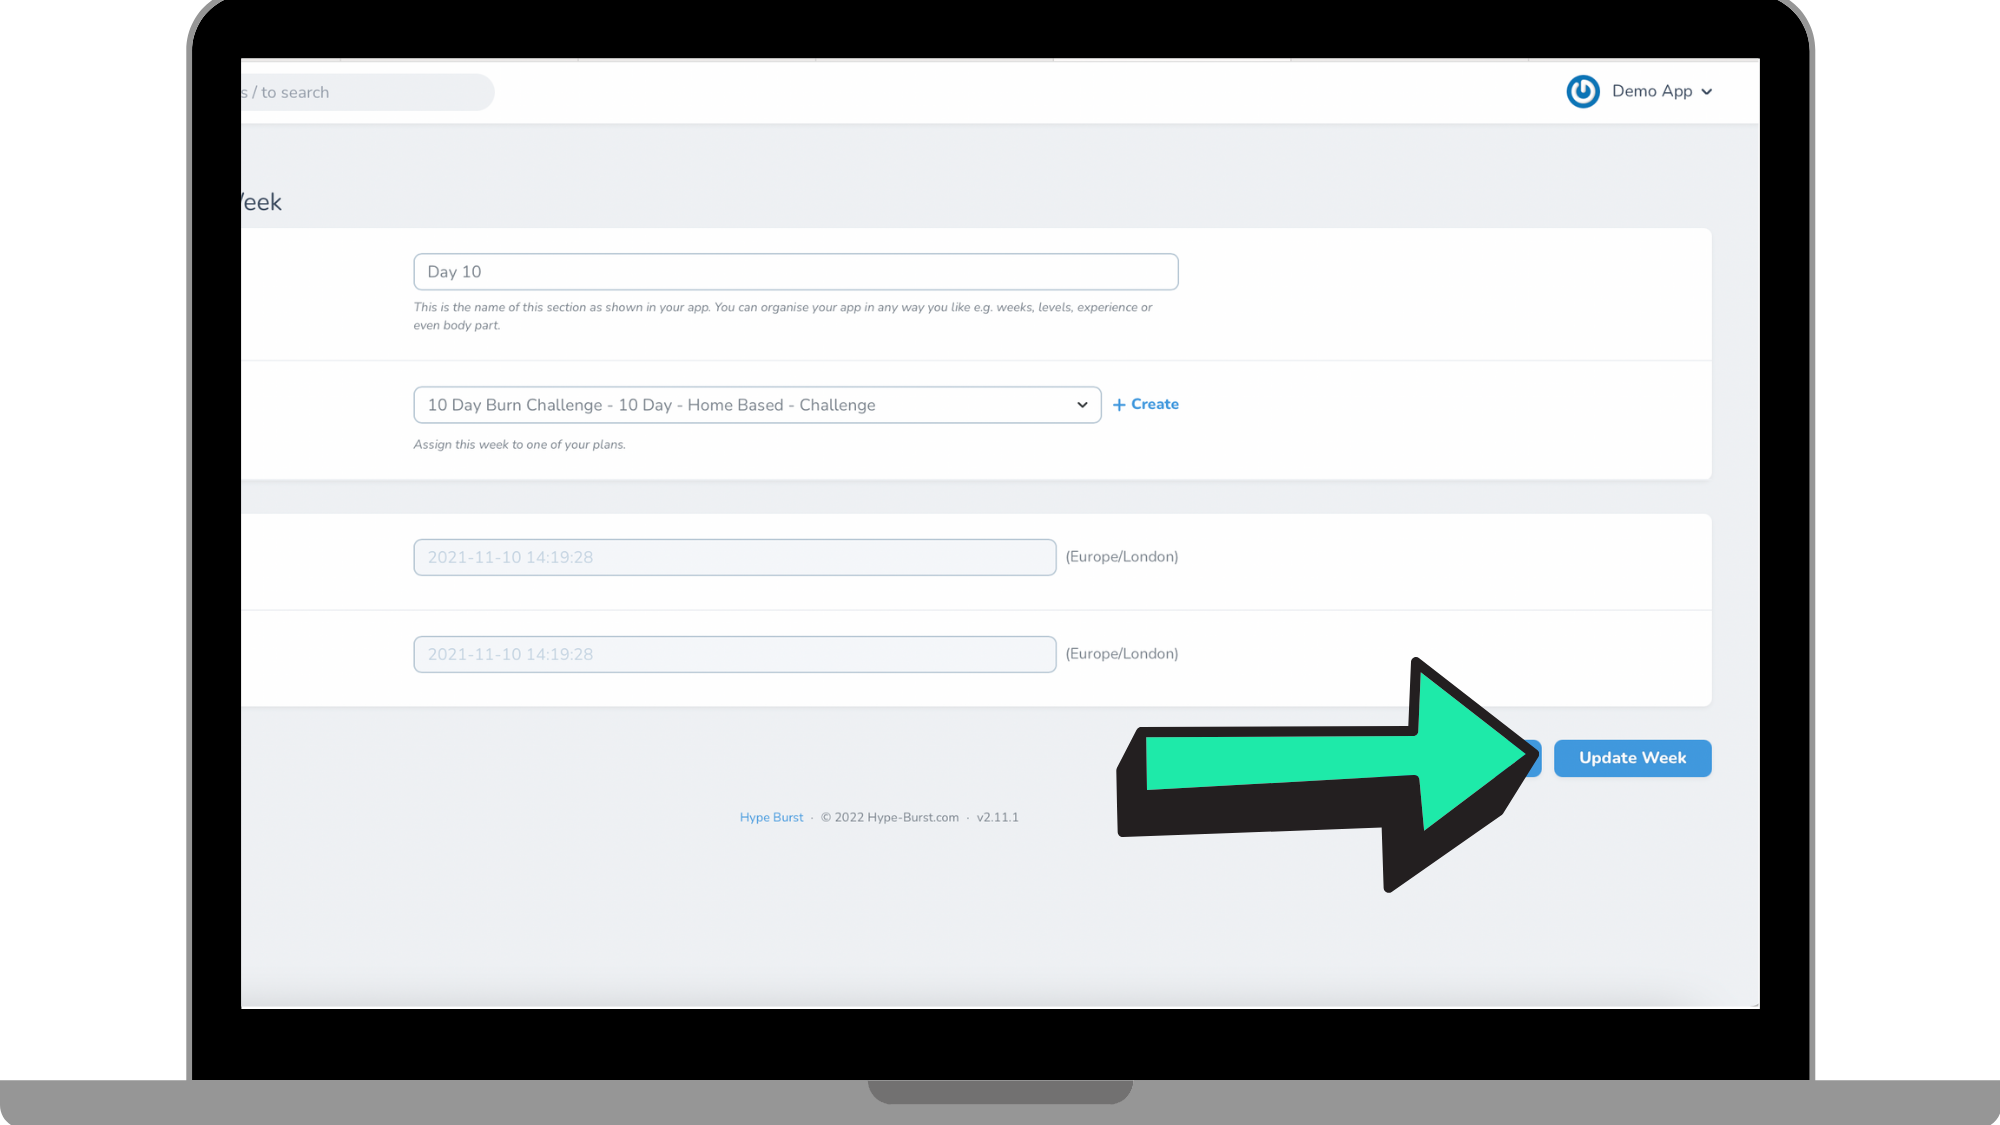
Step 6: Click 'Update Week'
Once you have made all the changes you wish to make to the Week, click 'Update Week' in the bottom right-hand corner of the page. Please note you can go back anytime to change again if you wish.
How To Delete A Week
Step 1: Log into your Hype Burst Dashboard
Head to https://account.hype-burst.com/admin/login to log into your Hype Burst Dashboard.
Step 2: Click on 'Weeks'
Under 'Workout Plans' in the panel on the left-hand hand side, click on 'Weeks'.
Step 3: Locate the Week you wish to delete
You can search for the Week in which you want to delete by the search bar at the top or by locating it within the list of Weeks you have created.
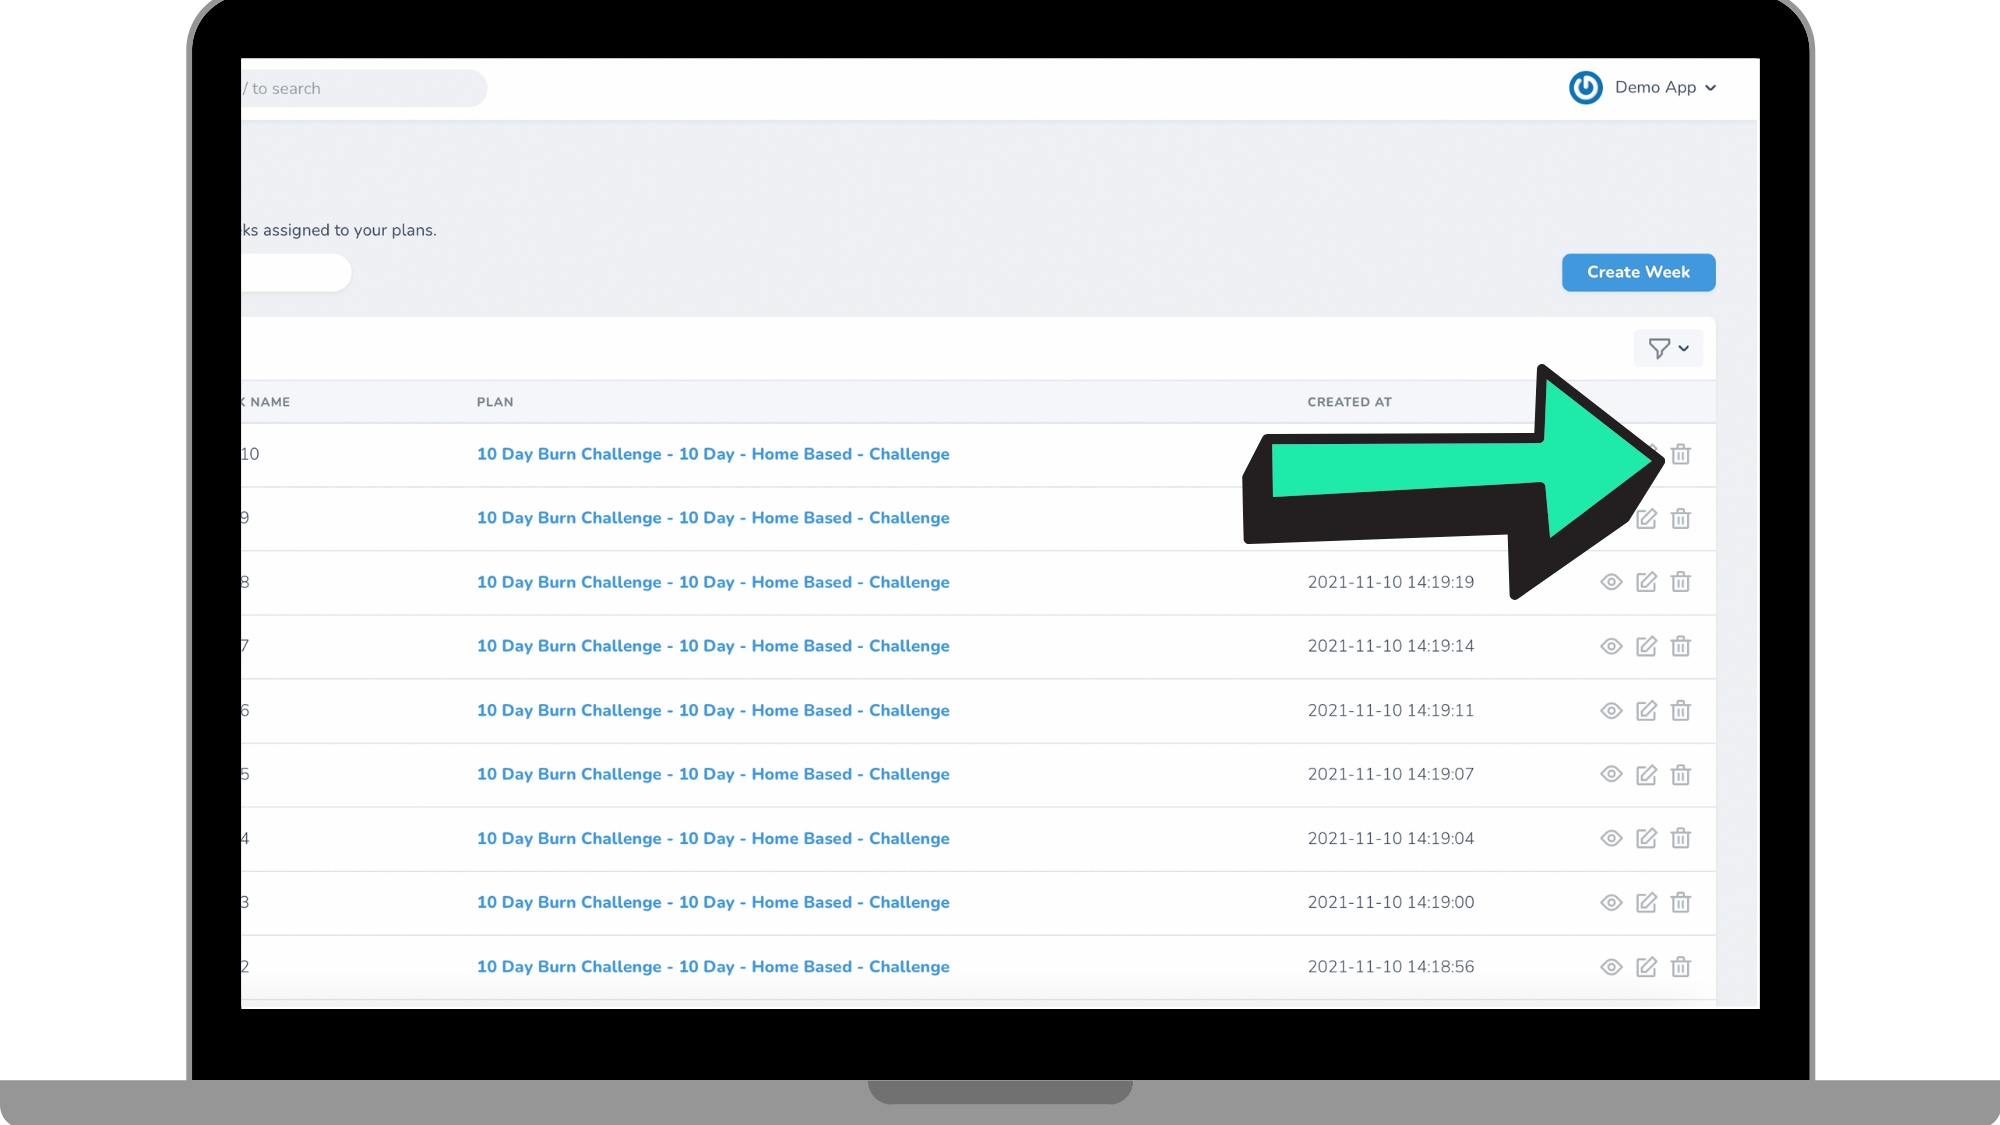
Step 4: Click the 'Delete' icon
Once you have located the Week which you want to delete, click the 'Delete' icon next to the listing.
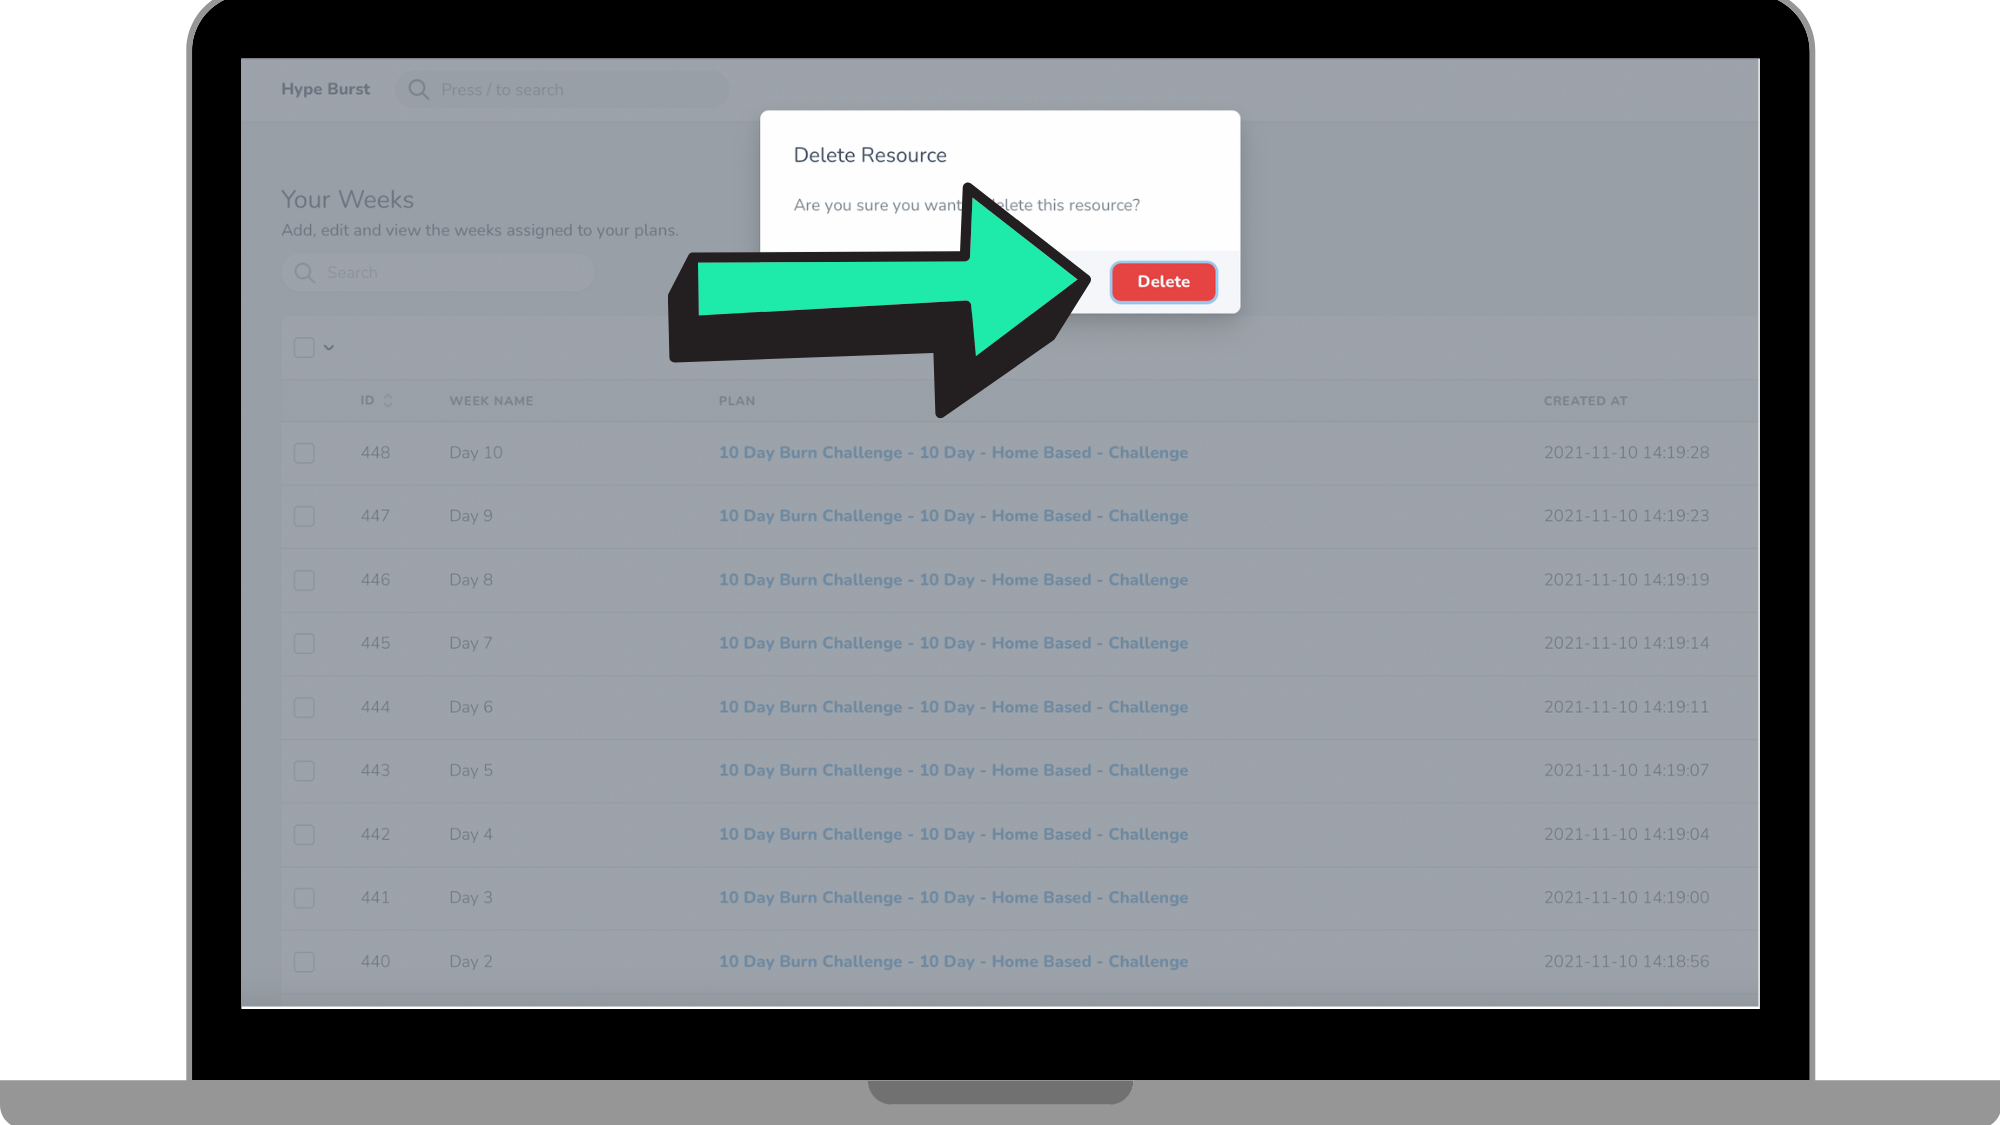
Step 5: Proceed to delete your Week
A mini window will come up where you will have to click 'Delete' to confirm the deletion. If you do not wish to delete it, click 'Cancel'. Please note that all changes are updated instantly on the end-user's phone and once you delete a Week you cannot undo this action.
How To Get Started
Head to https://account.hype-burst.com/admin/login to log into your Hype Burst Dashboard to get started in editing and deleting your Weeks.
Comments
0 comments
Please sign in to leave a comment.