
When you connect your Stripe account to your Hype Burst Dashboard and your fitness app is created, users are able to sign up either through the App Store or through the custom web signup domain we create for you.
If a customer signs up through web subscription, they are able to log in and manage their subscription from their personal Dashboard.
To read more about how Web Subscriptions work, click here.
Steps to get to their subscription information
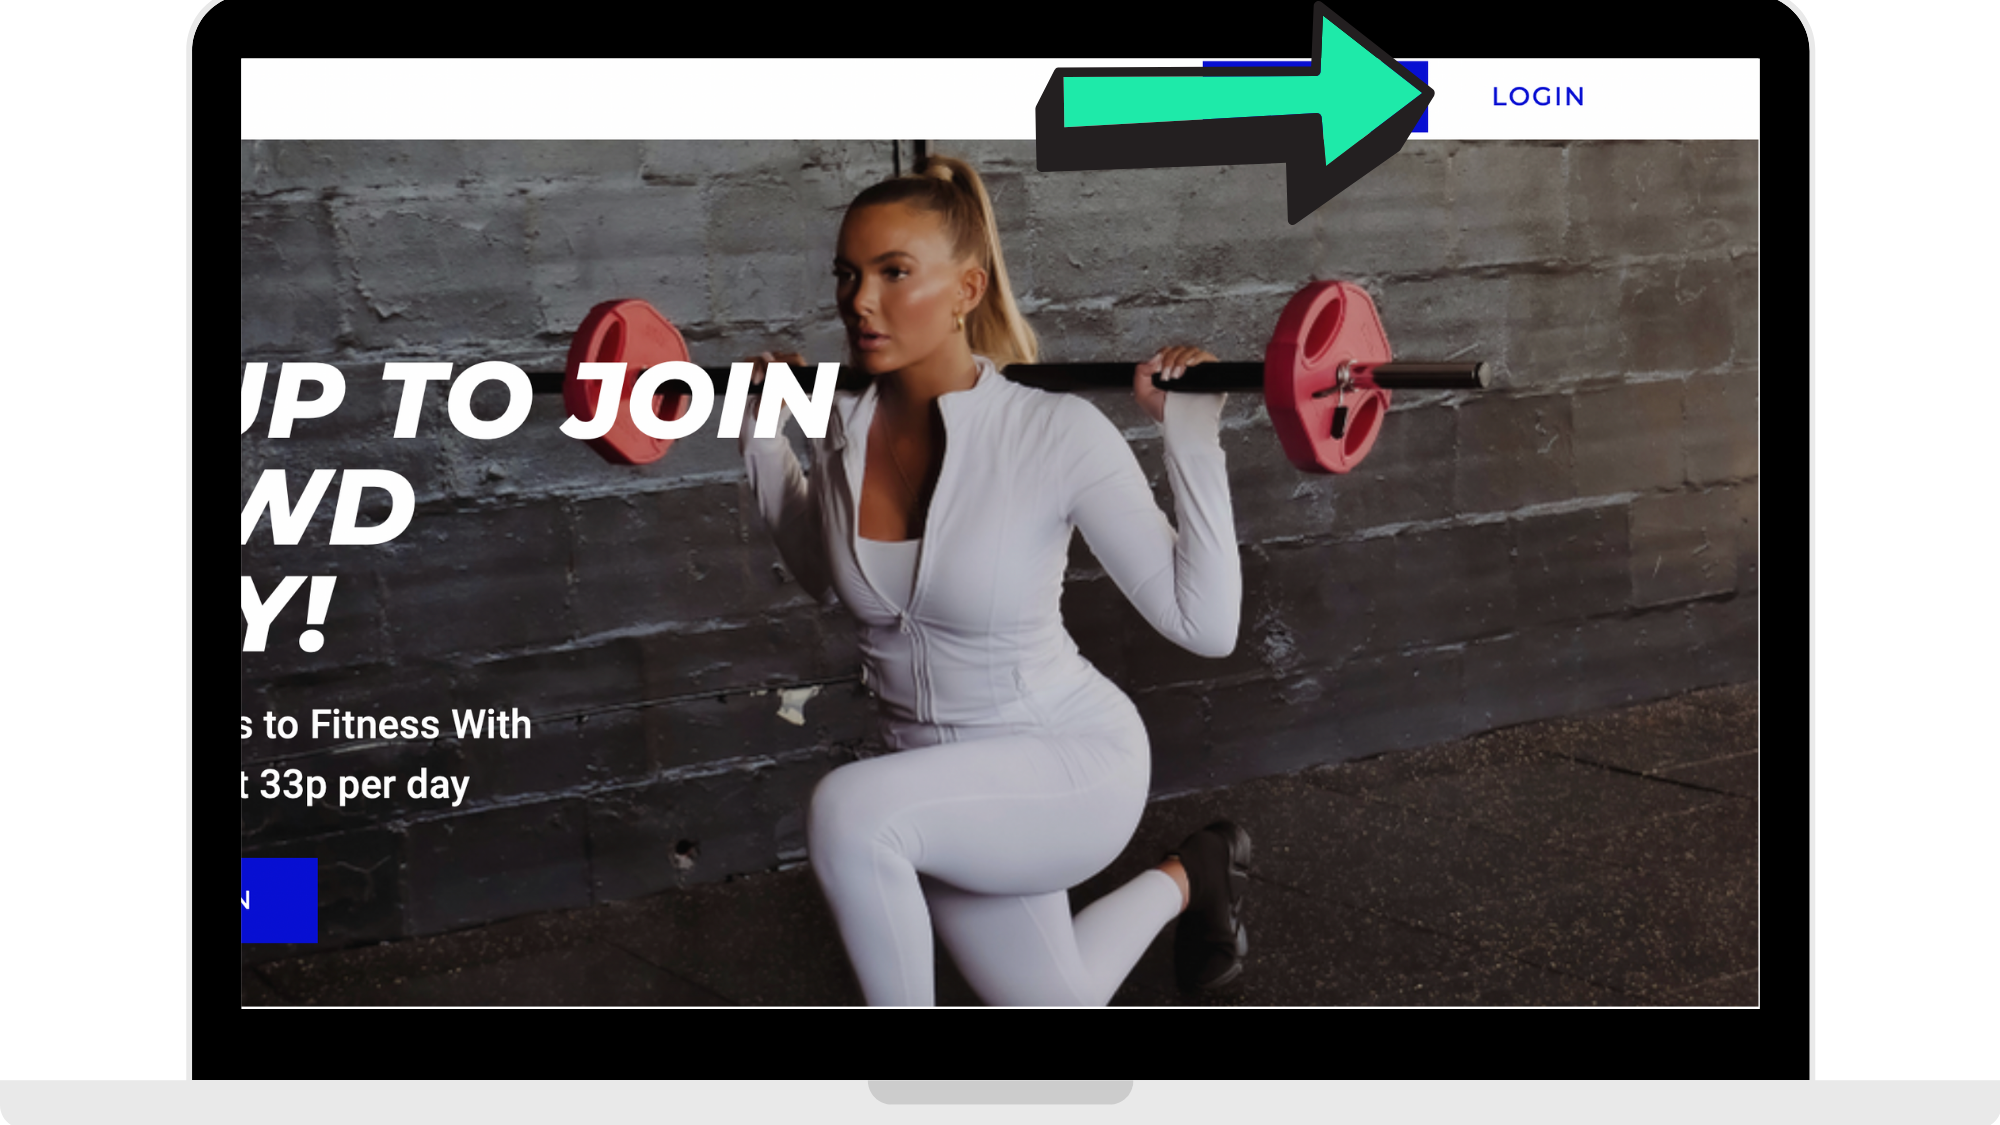
Step 1: The user will log in on your web subscription site
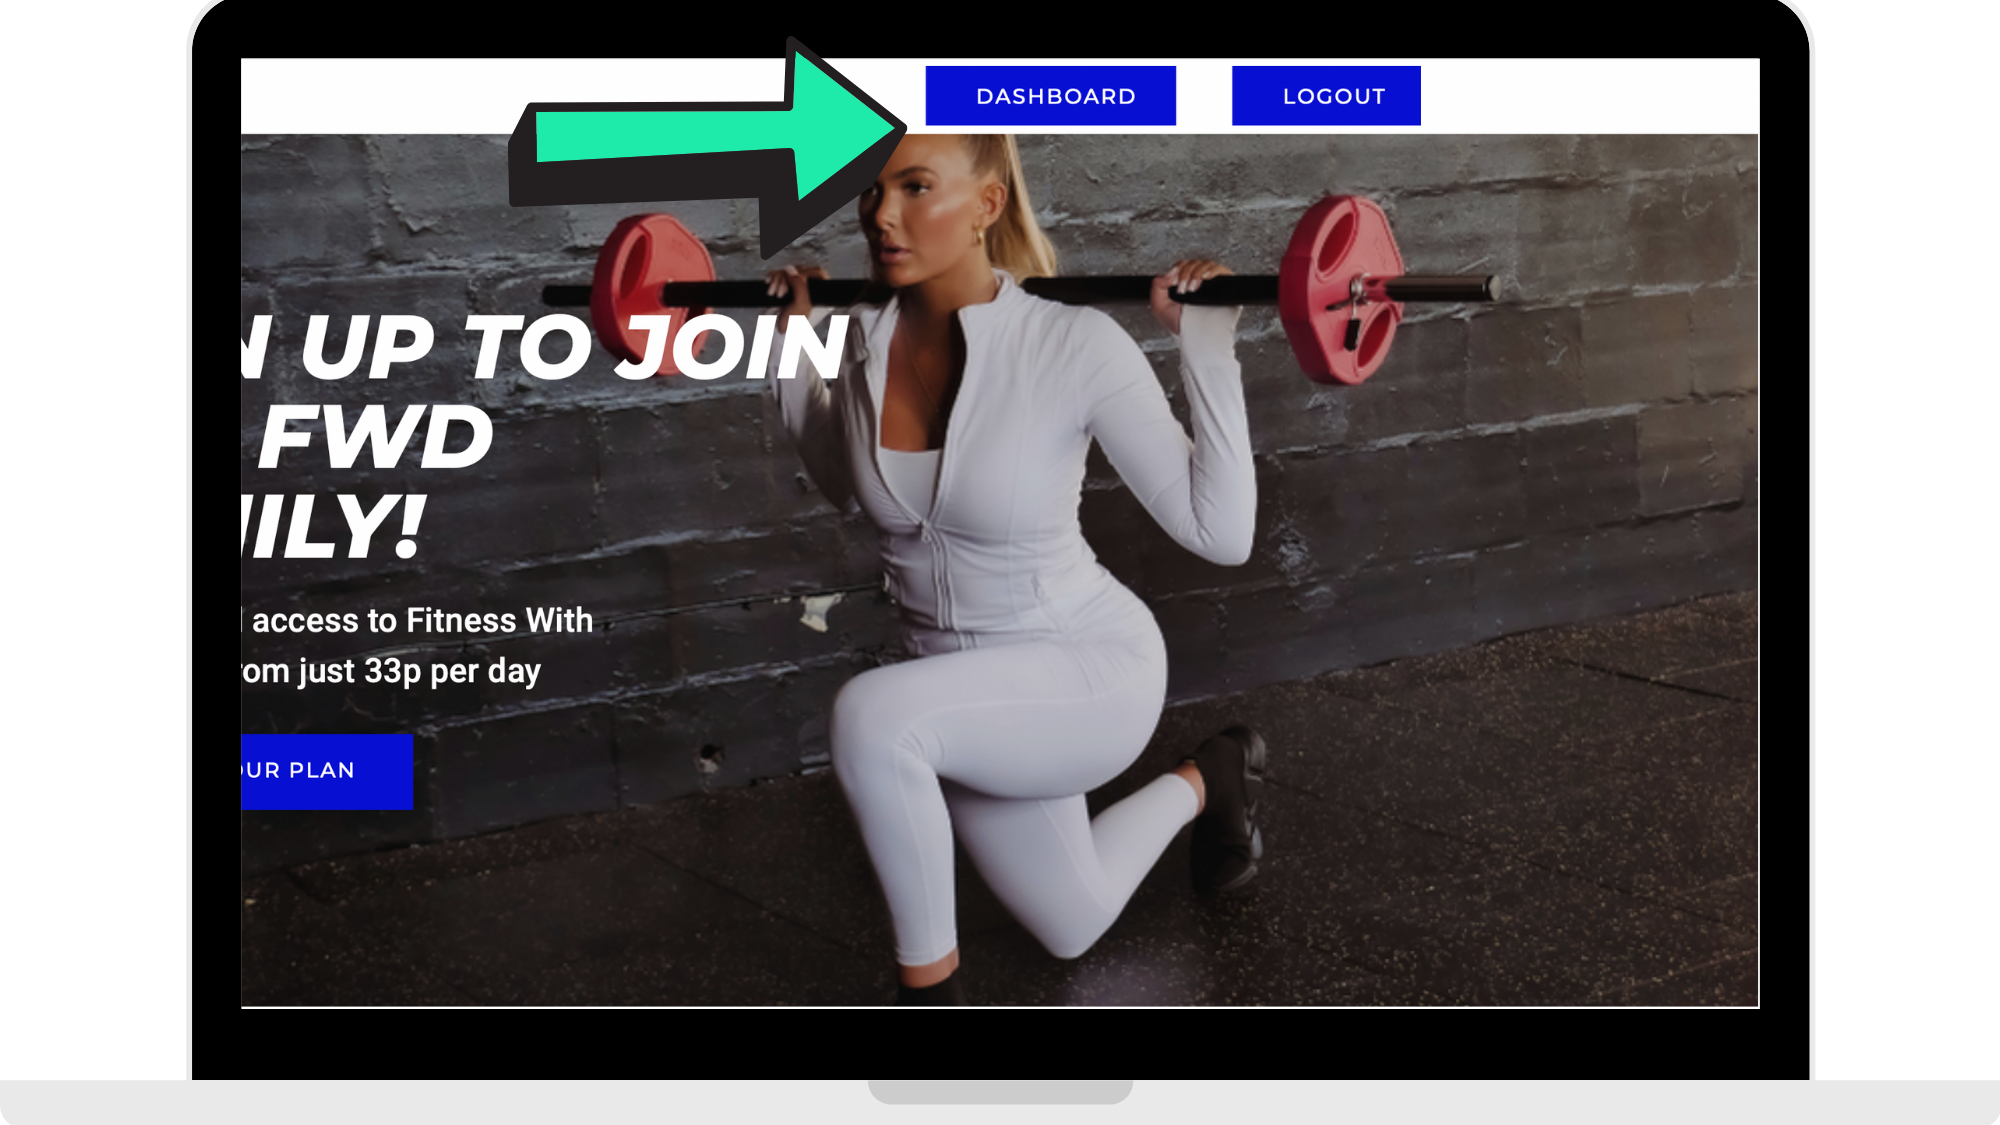
Step 2: The user will click 'Dashboard'
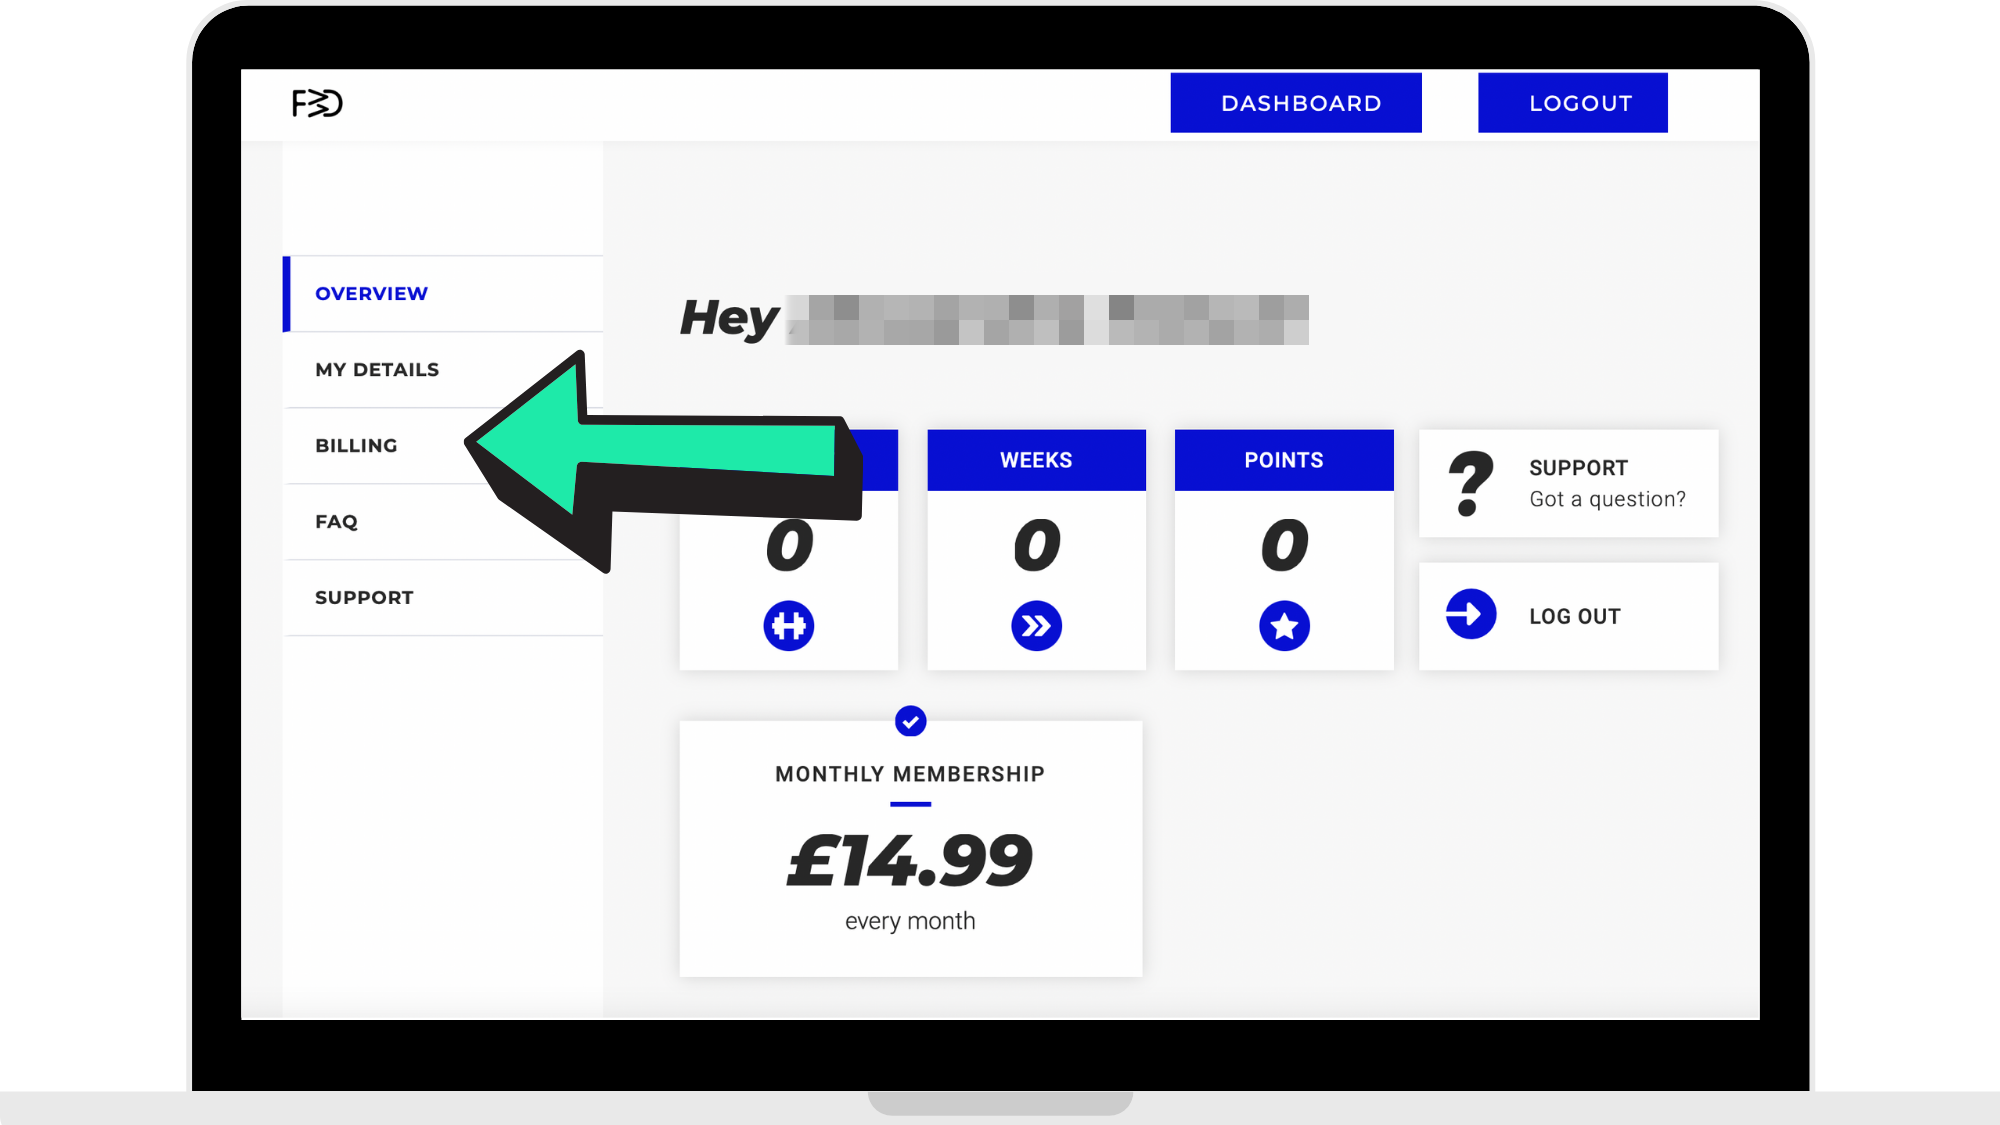
Step 3: The user will click 'Billing'
What a user can do through their billing page
Once the user has gone through the steps to reach their billing page in their Dashboard, they are able to do 3 things when managing their subscription: cancelling their subscription, updating their billing info, and upgrading or downgrading their subscription.
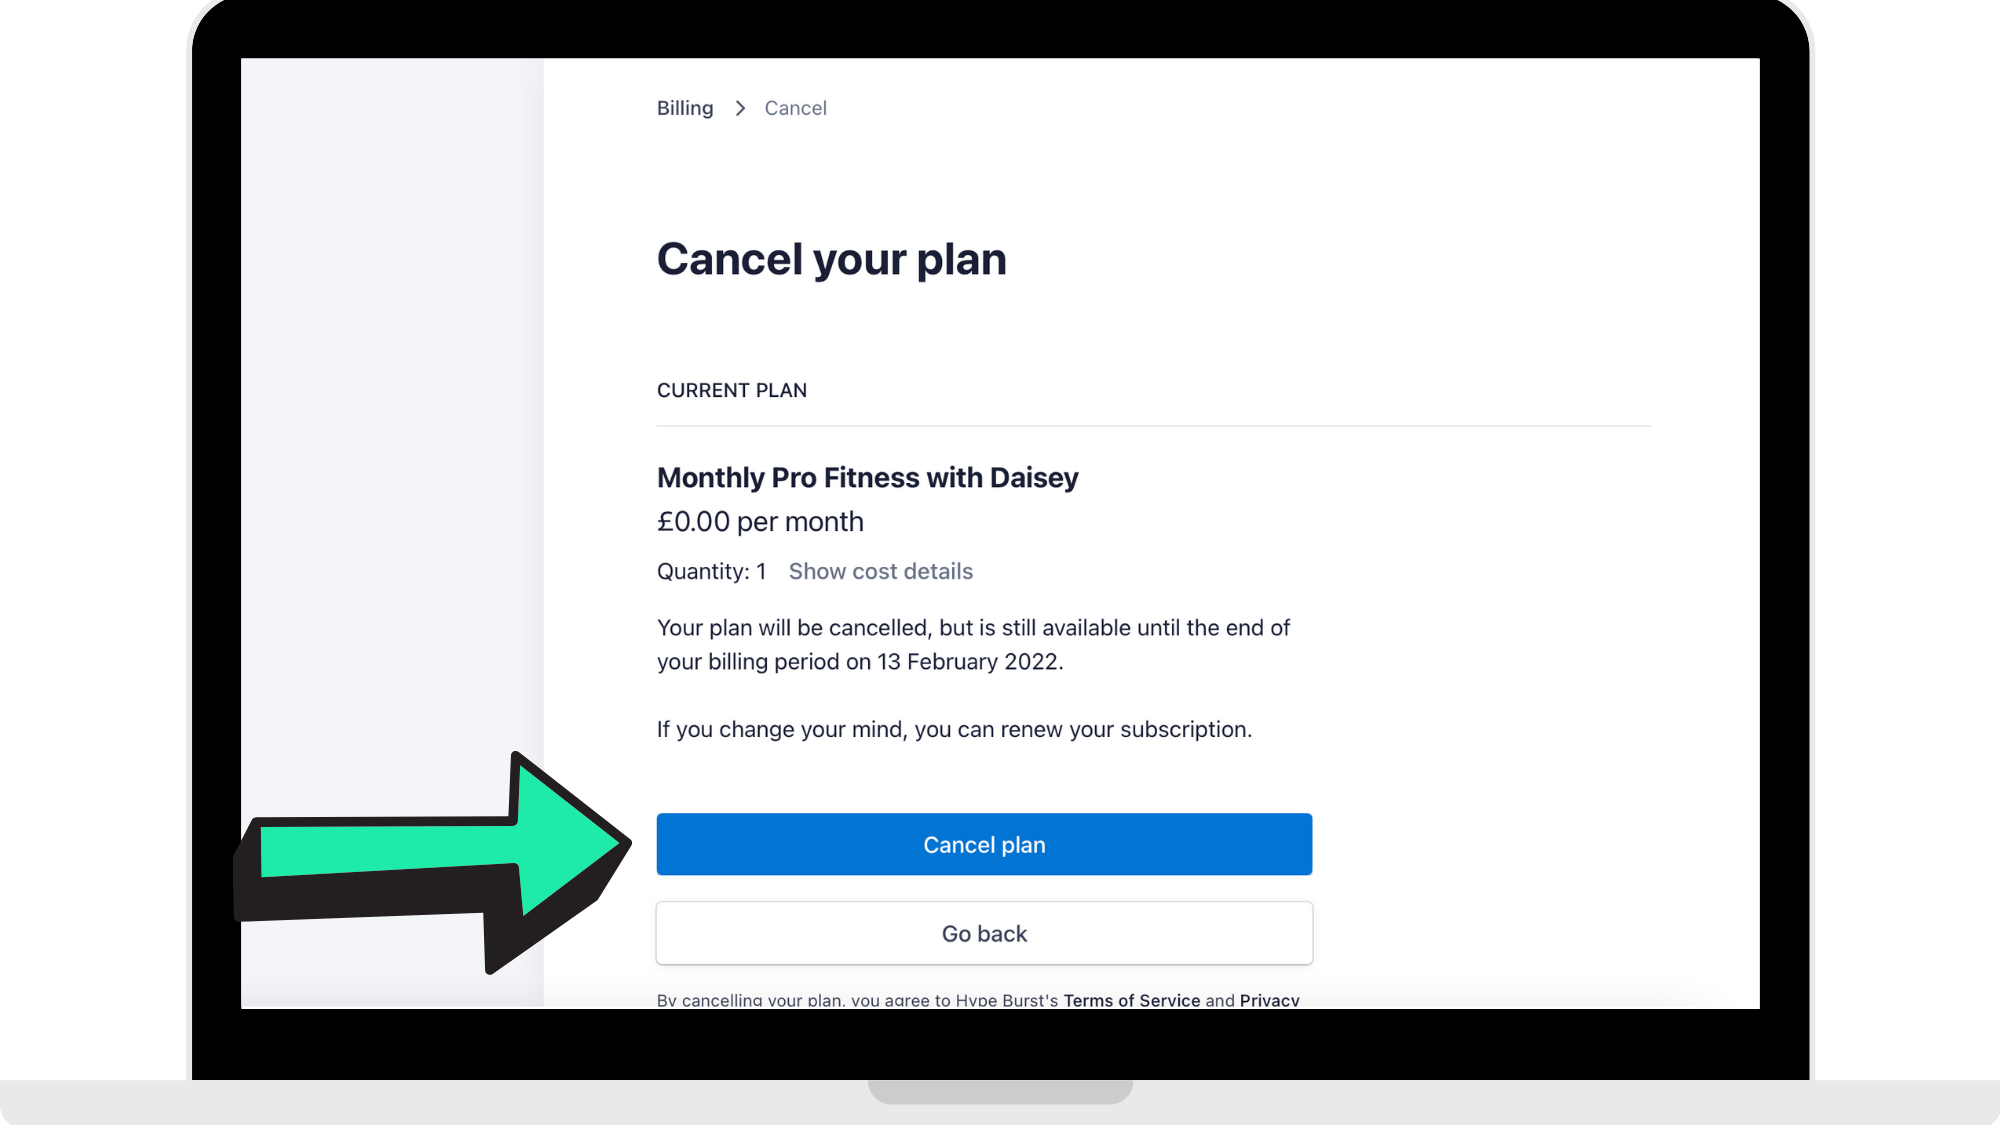
Cancelling their subscription
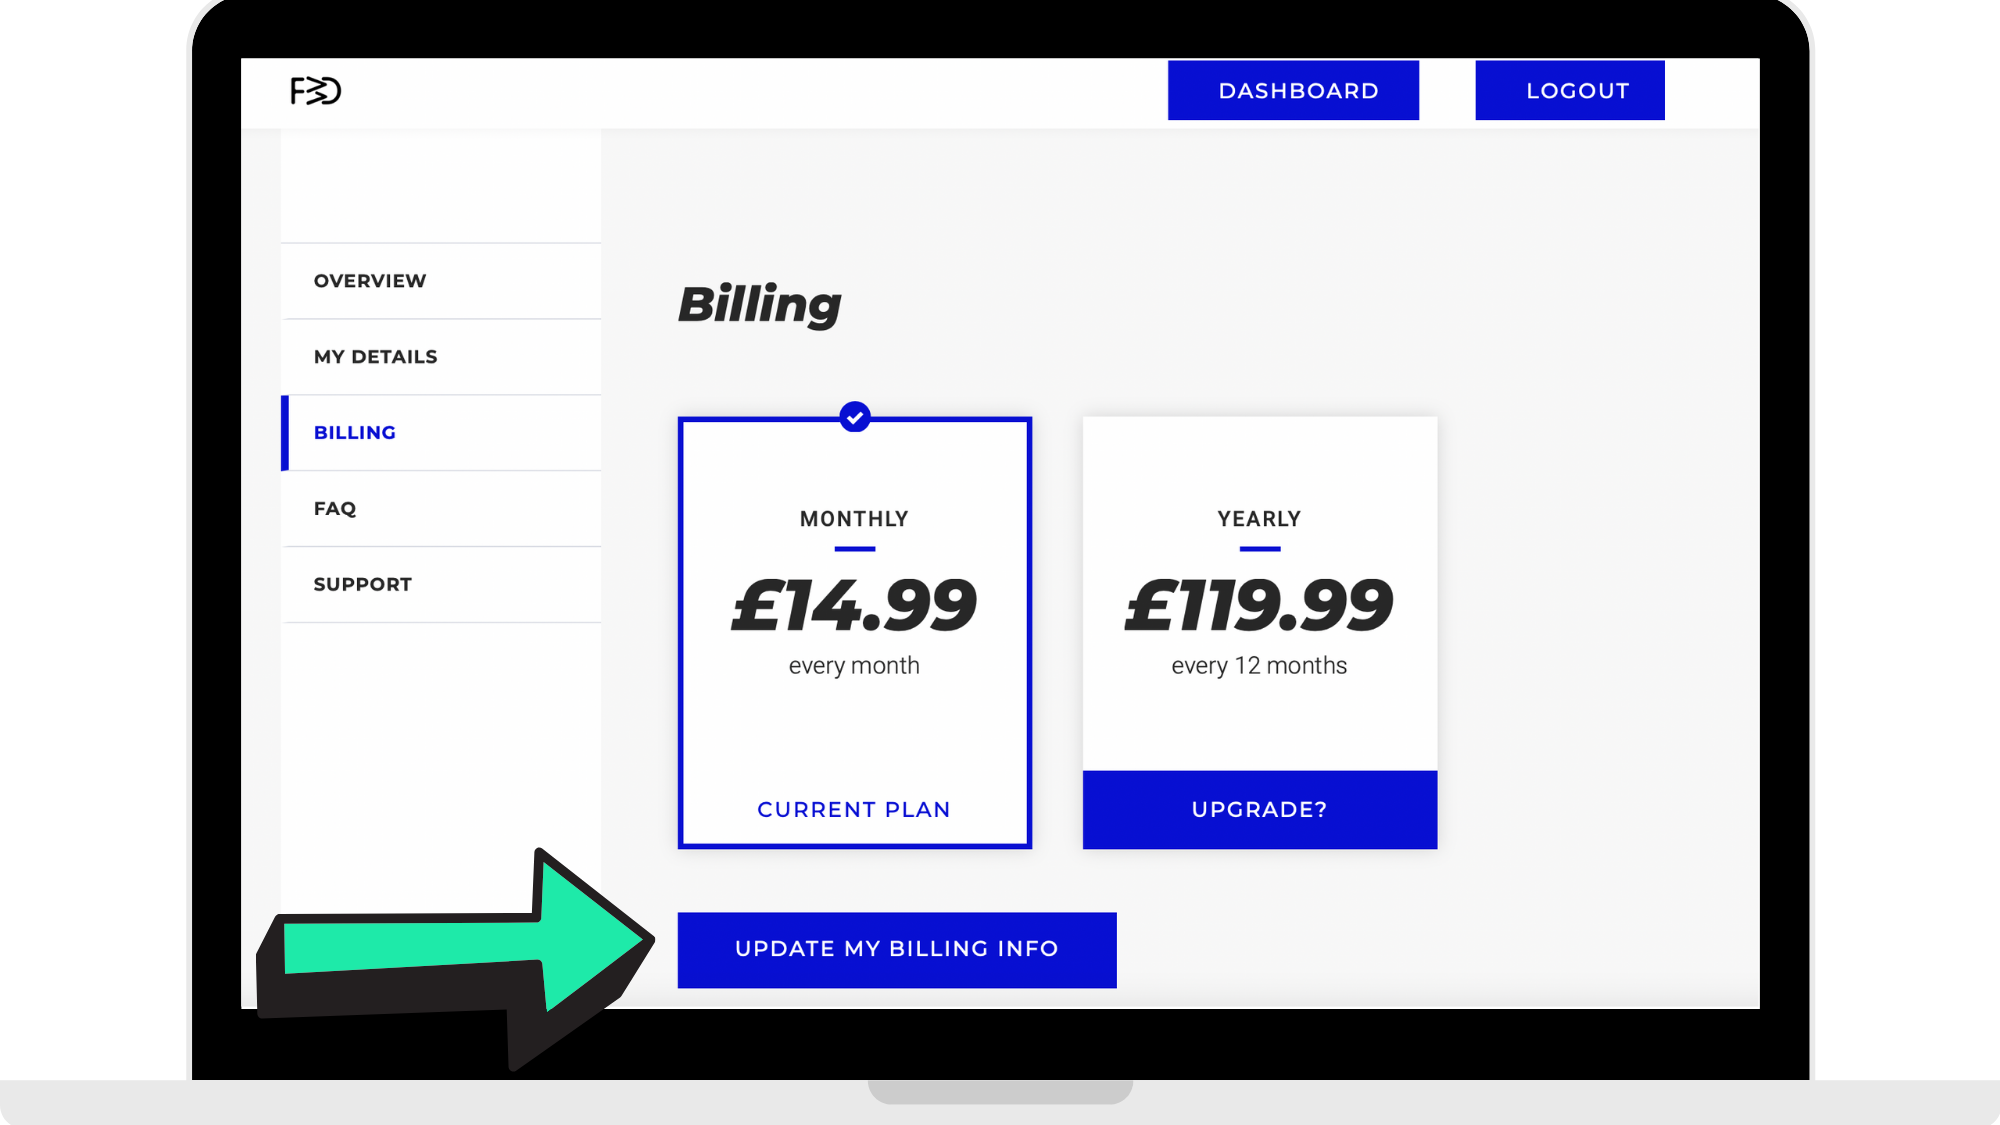
Step 1: Click 'Update My Billing Info'
Once the user is on their billing page, they are able to cancel their subscription by clicking 'Update My Billing Info'.
Step 2: Click 'Cancel Plan'
If they click 'Update My Billing Info', they are able to cancel their subscription. If they wish to cancel their plan, they would click 'Cancel Plan'.
Step 3: Proceed to cancel plan
This is the final step for a user to cancel their plan. Please note they are able to renew it at any time by logging in and going through the same steps.
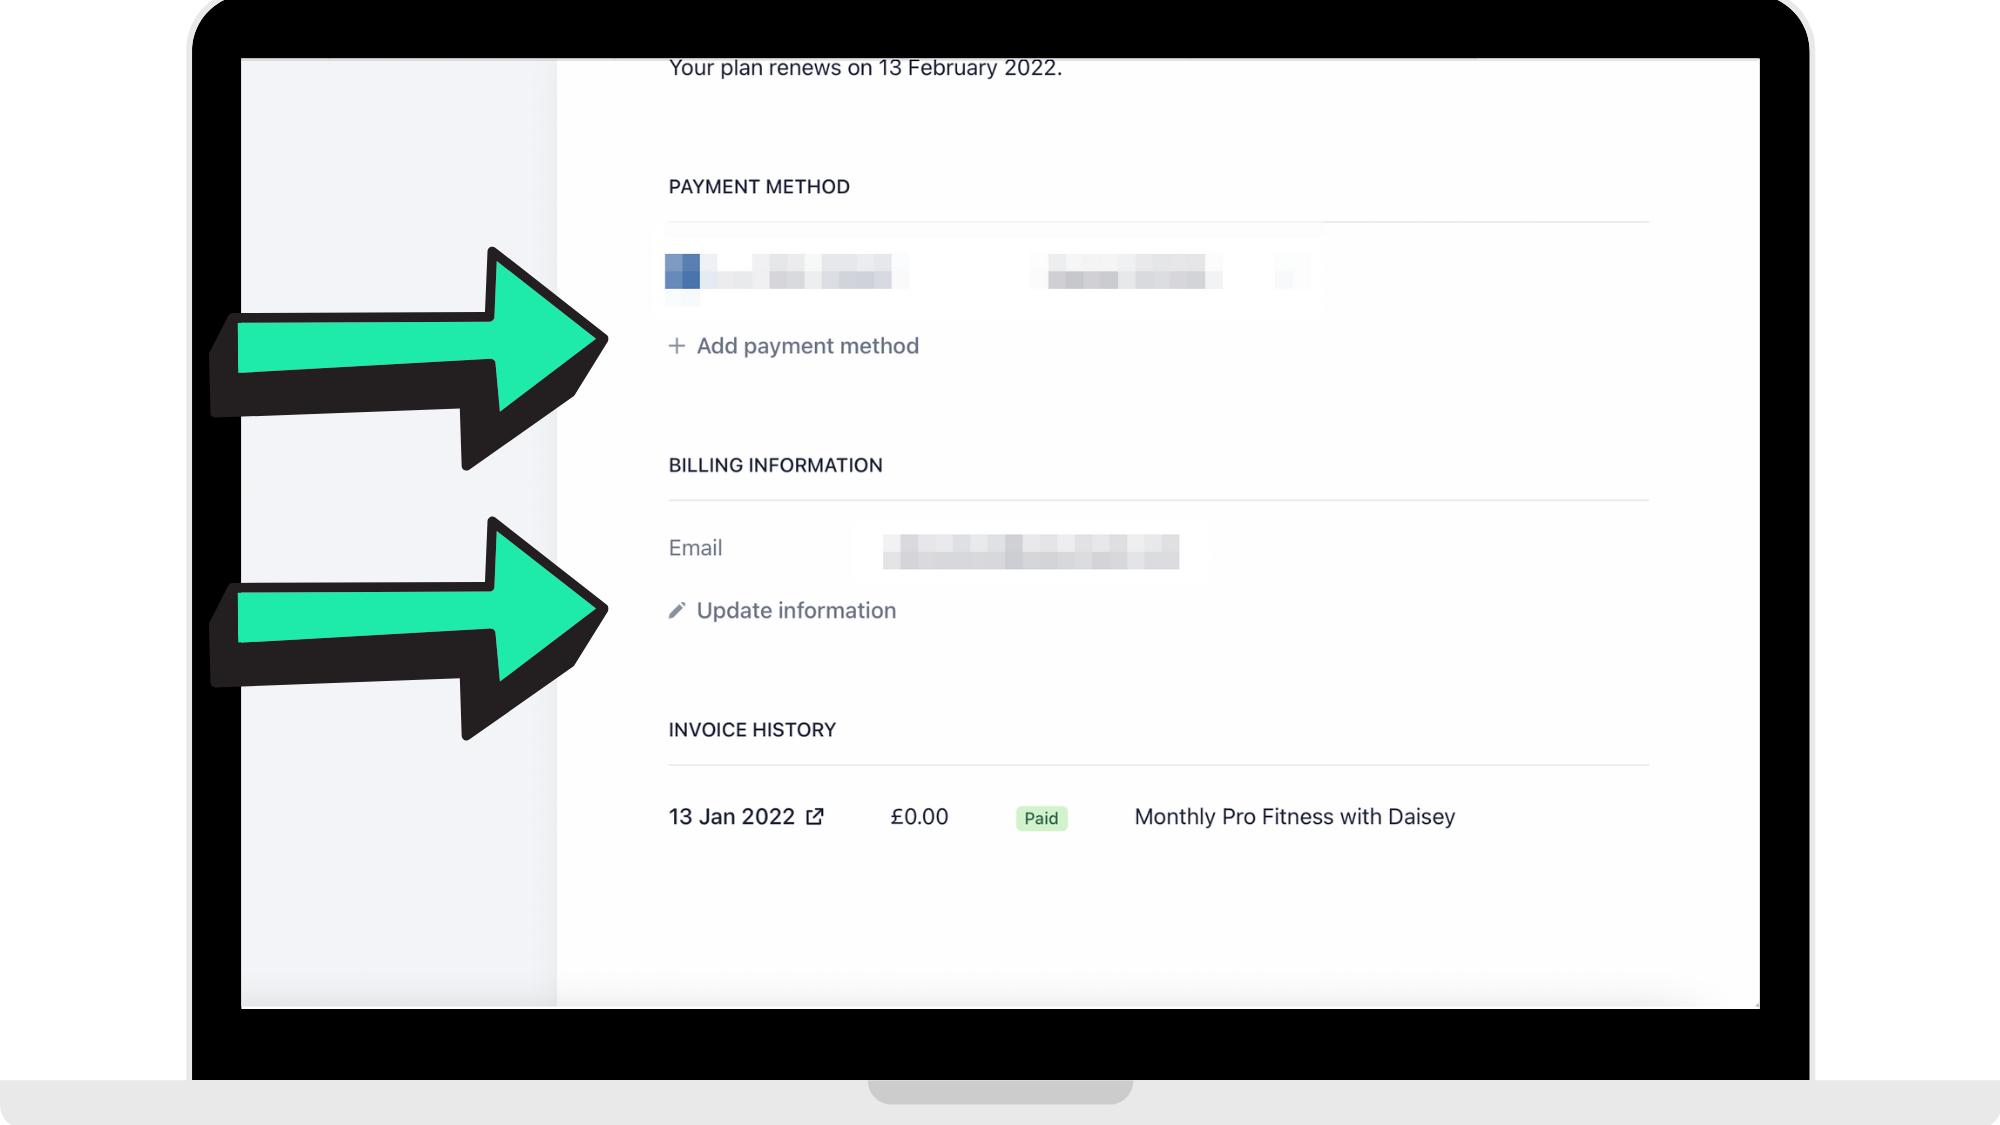
Updating their billing info
Step 1: Click 'Update My Billing Info'
Once the user is on their billing page, they are able to update their billing info by clicking 'Update My Billing Info'.
Step 2: Choosing what they wish to update
Once the user reaches this page, they are able to change 2 things: payment method and billing information.
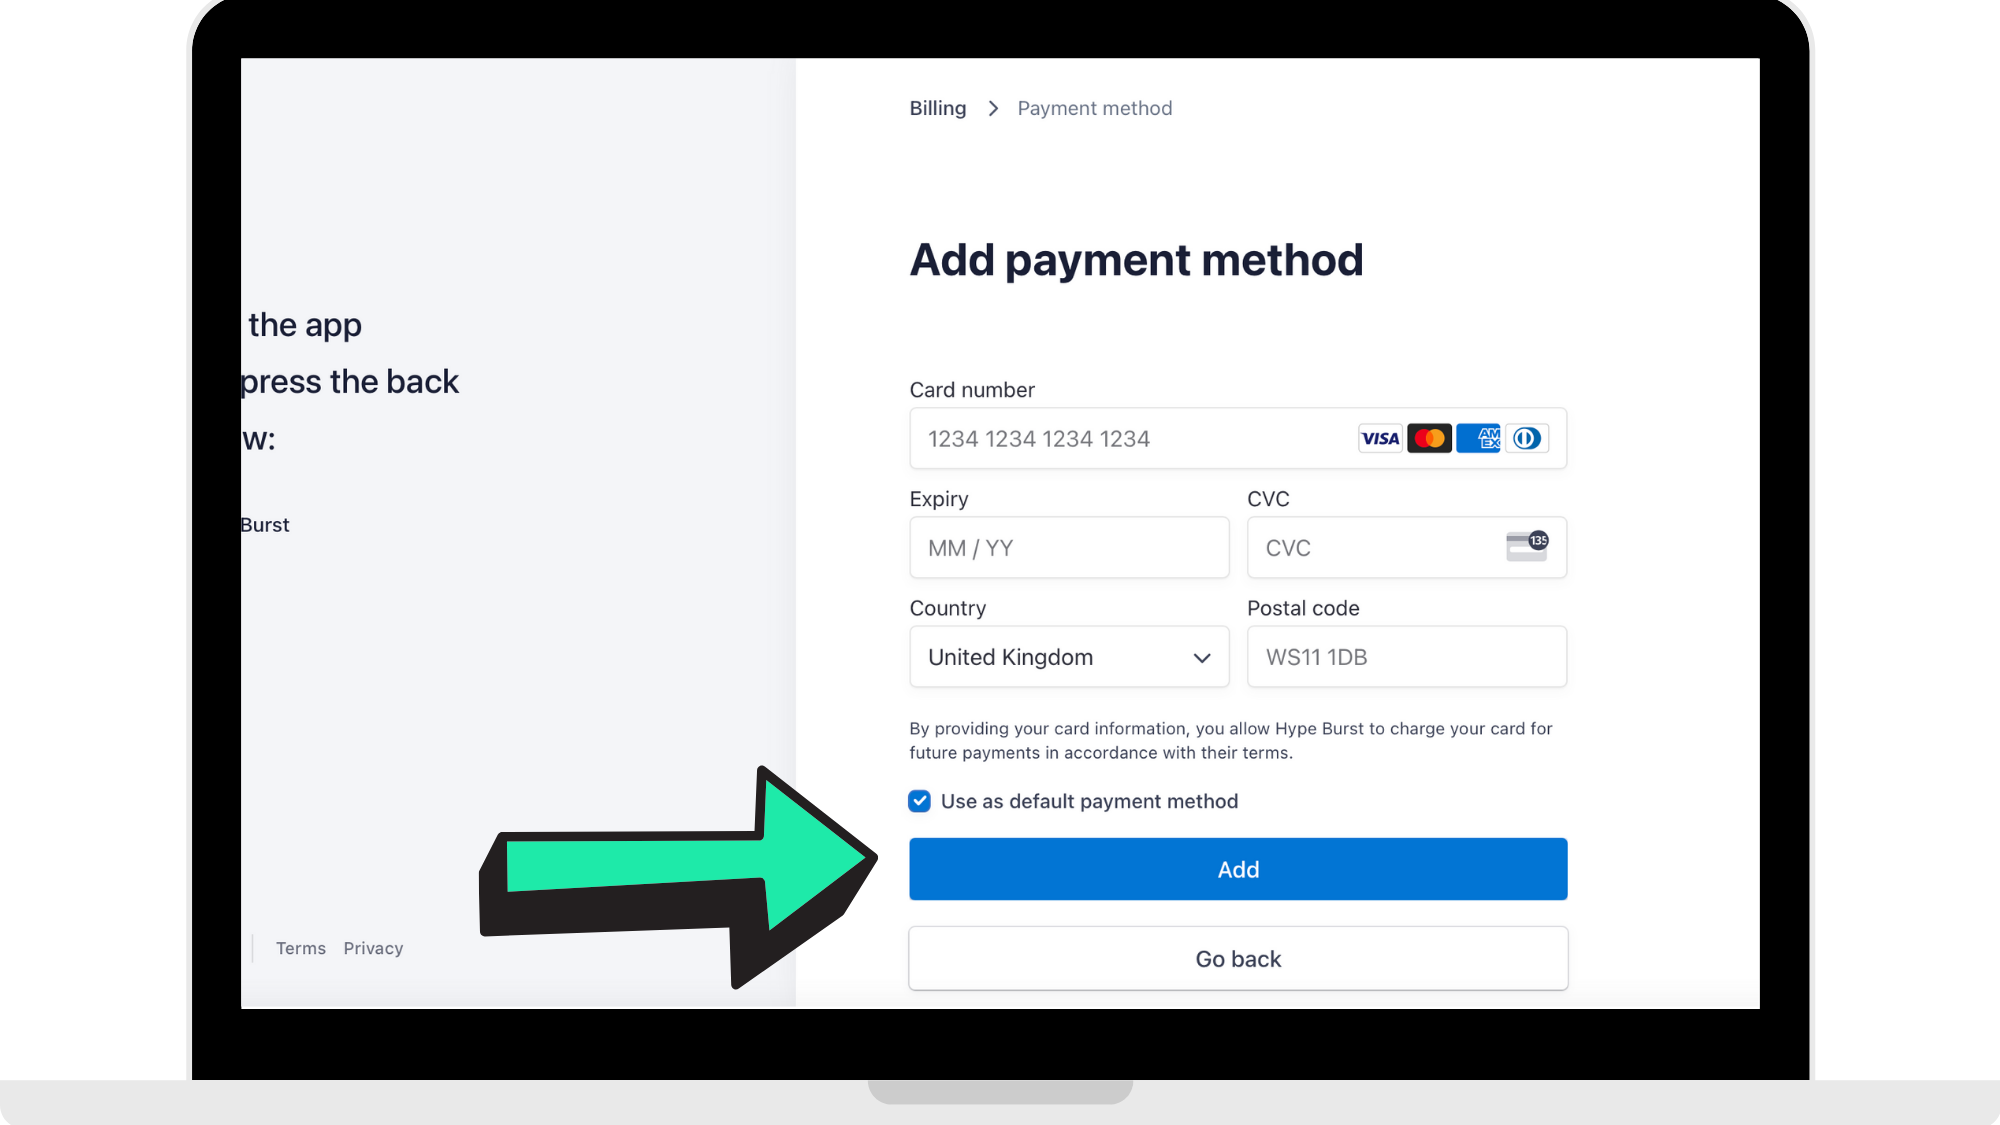
To change their payment method, they select 'Add Payment Method' to get to the page like in reference image below. They then would enter in their updated payment method, choose if they would like it as their default, and click 'Add'.
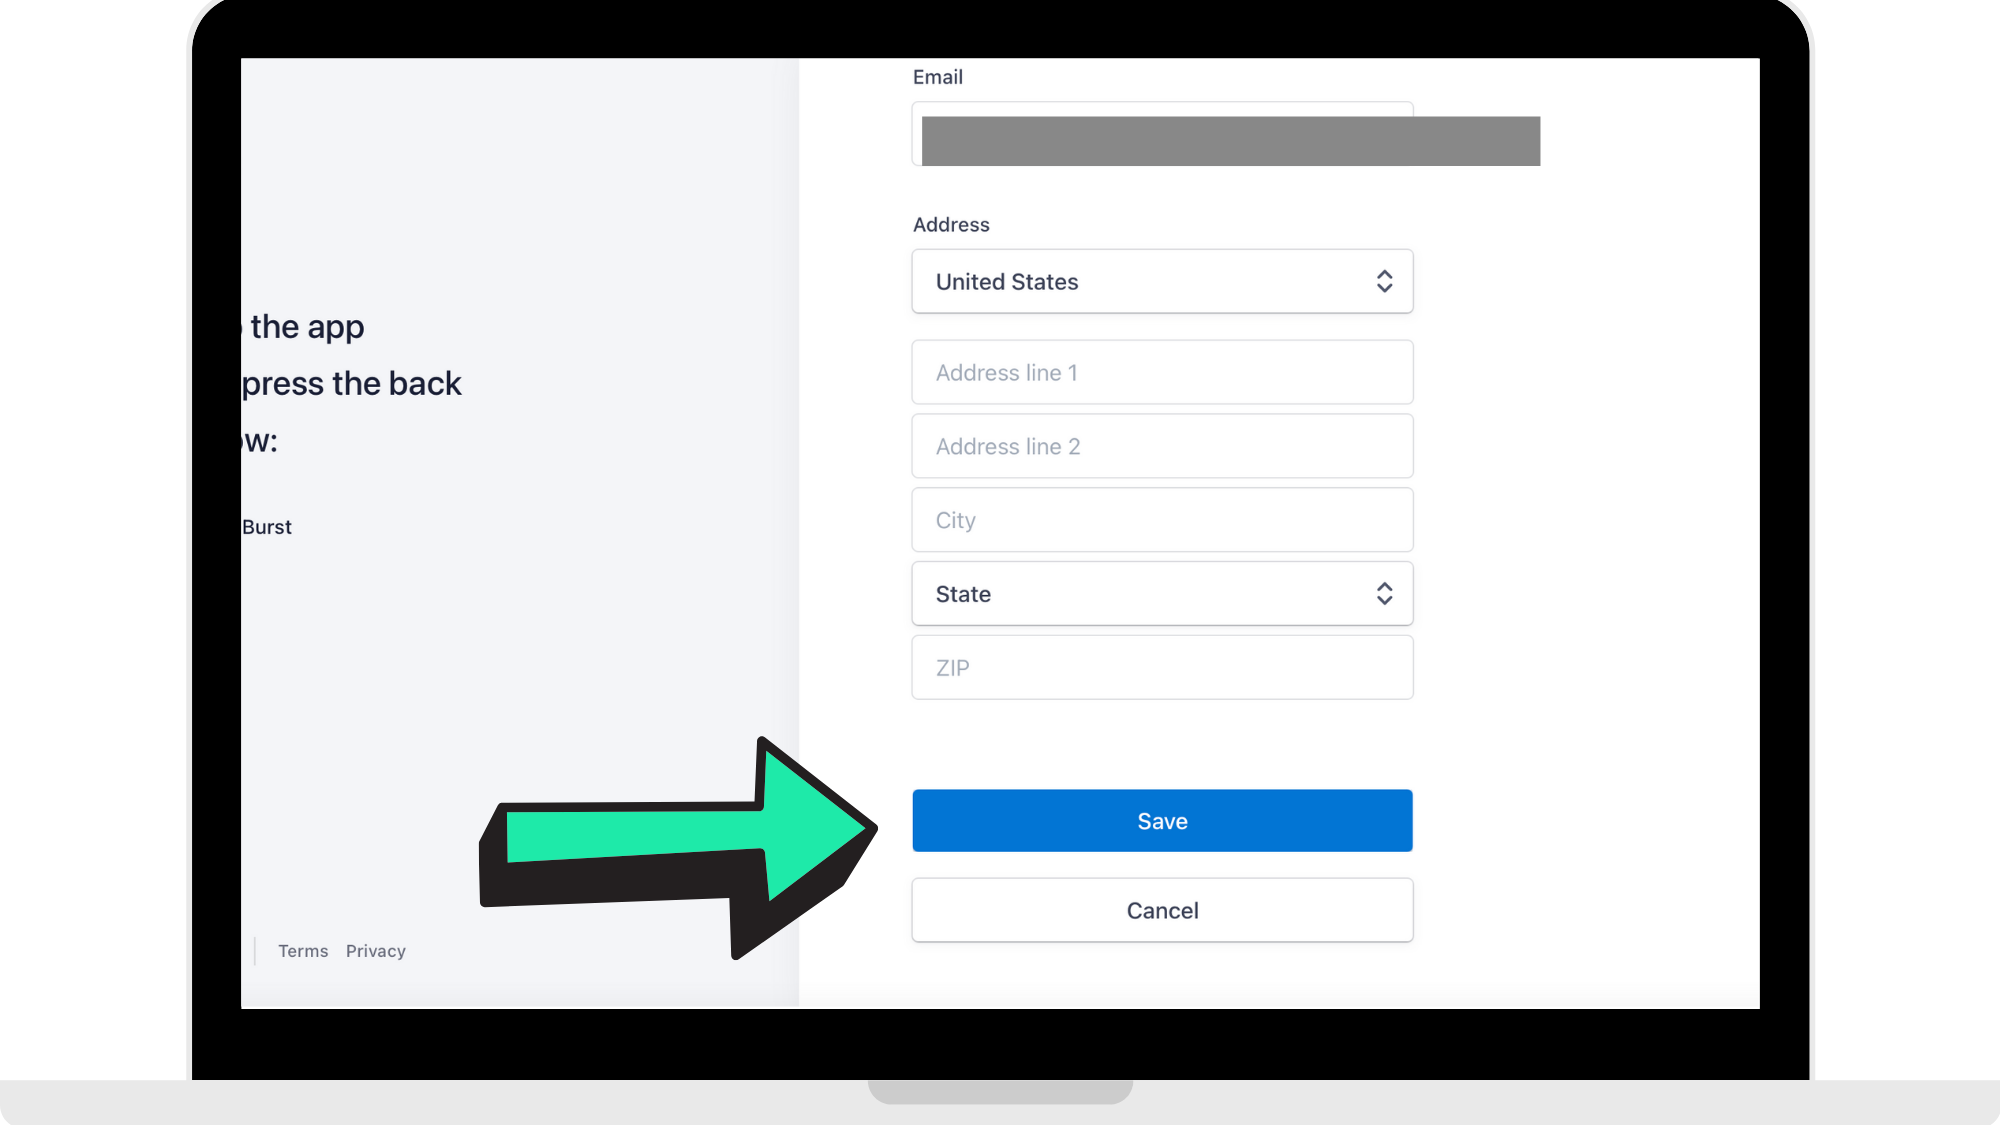
To update their billing information, they would select 'Update Information' under 'Billing Information' to get to the page like in the reference picture below. They then would add in their new email and/or address and click 'Save' when done.
Upgrading or Downgrading their subscription
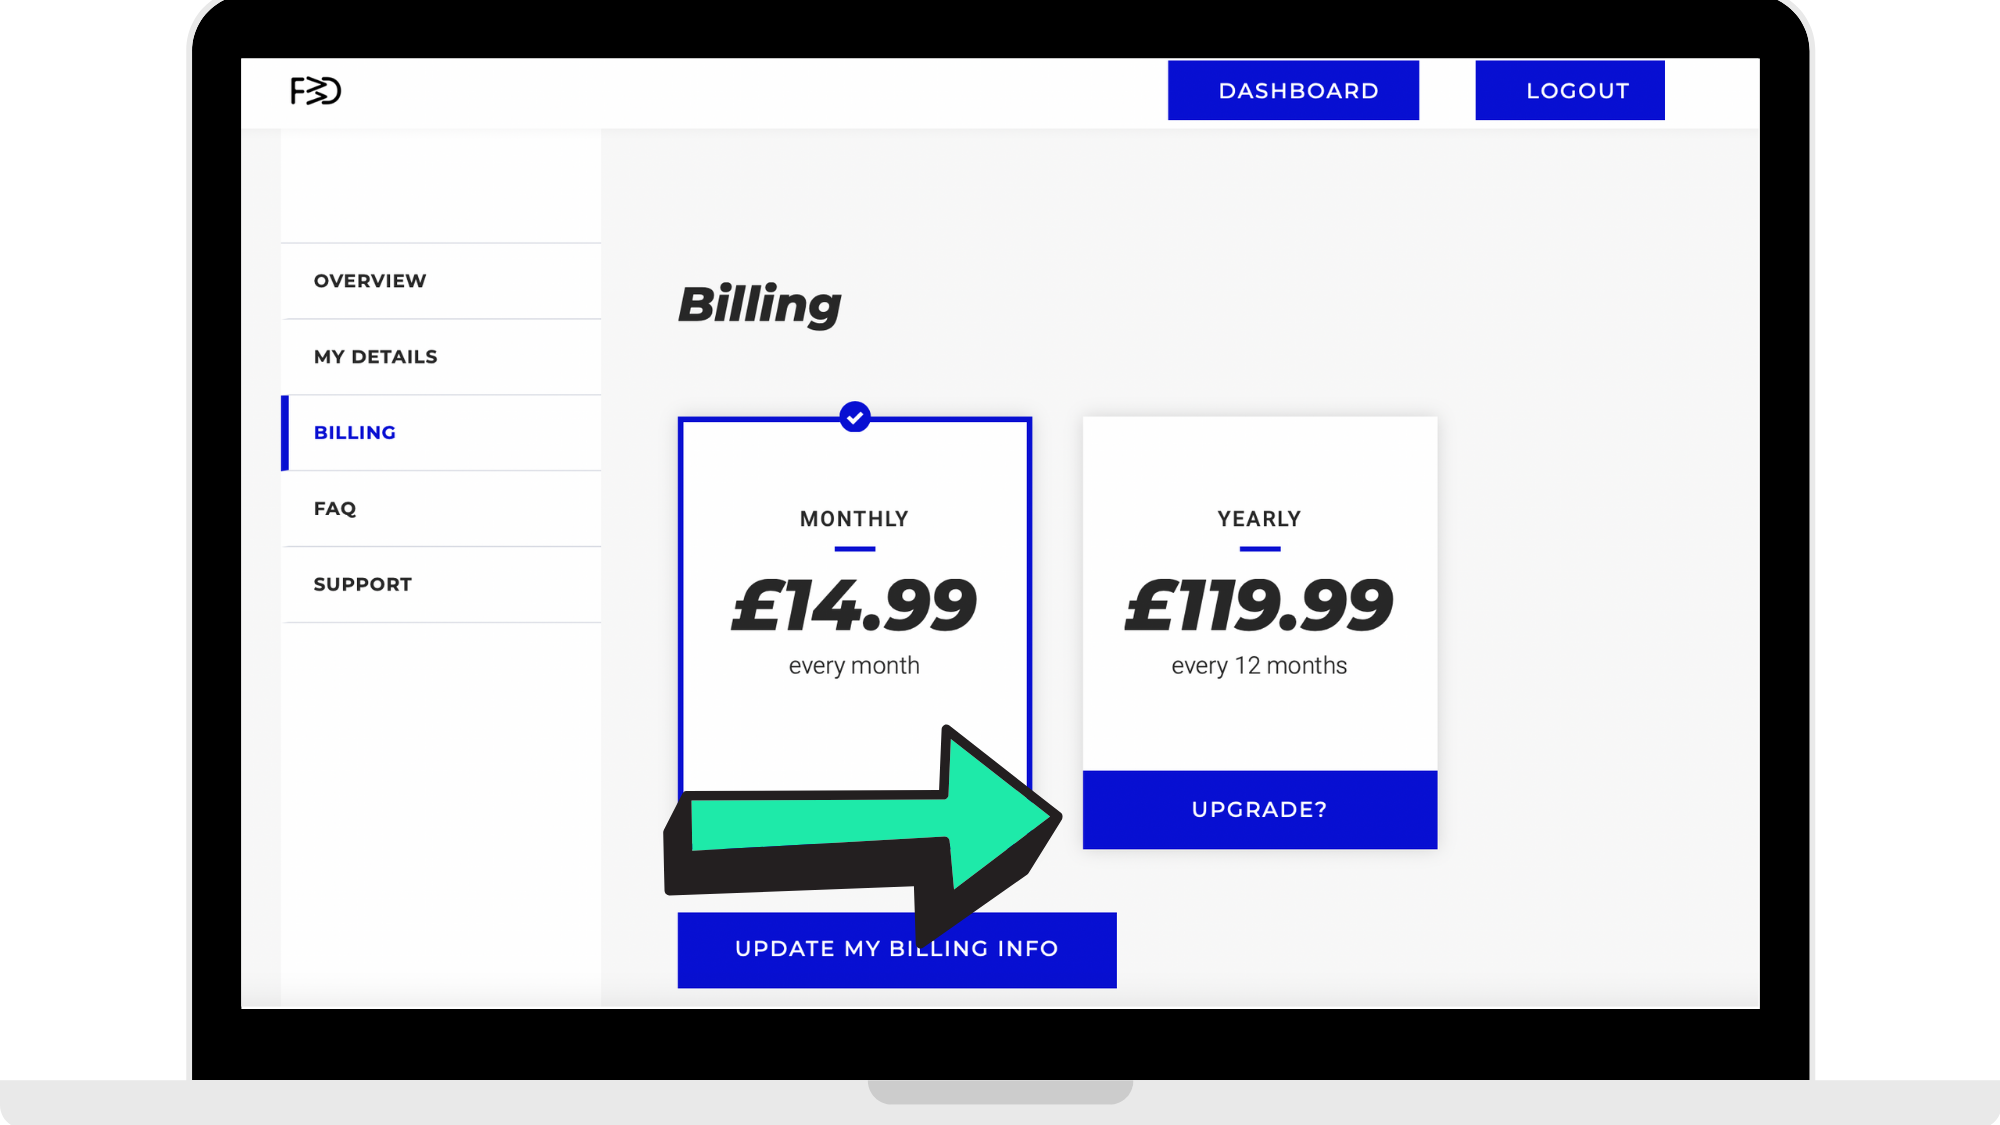
Step 1: Select to upgrade or downgrade subscription
The reference image below is referring to a monthly subscriber 'Upgrading' to a yearly subscriber. If a user is upgrading from monthly to yearly, they would click where the arrow is pointing to in the reference image below labelled 'Upgrade?'. If it is a yearly subscriber wanting to become a monthly subscriber, they would click under 'Monthly' where it would be labelled 'Downgrade?'.
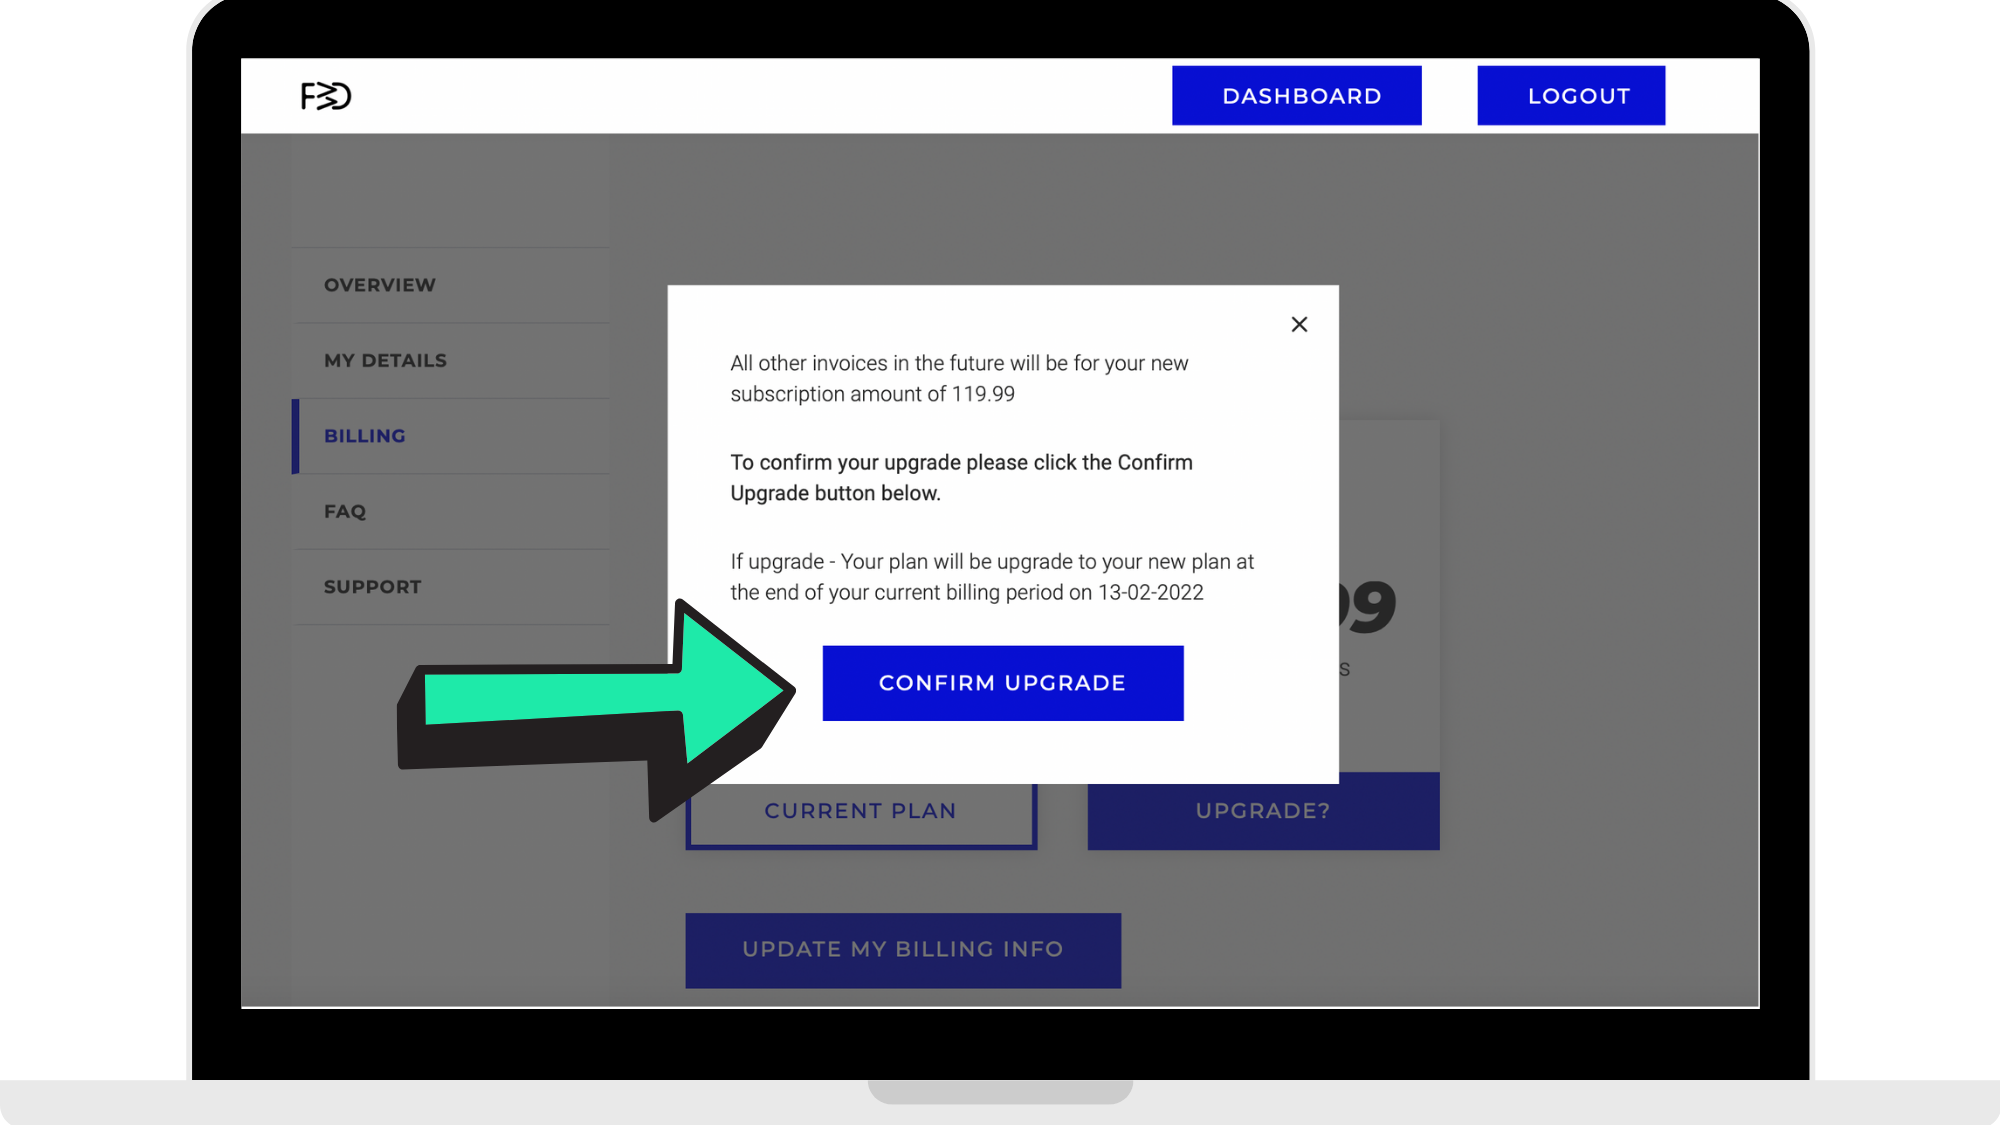
Step 2: Confirm their 'Upgrade' or 'Downgrade'
Once the user has chosen to either upgrade or downgrade their subscription, they will reach a confirmation page like the reference picture below where they need to click where the arrow is pointing to confirm their upgrade or downgrade. Once they confirm, their type of subscription will be changed and updated.
How they can get started
If the user starts by heading to your log in page, they can go through the steps to reach their billing page in their Dashboard and manage their subscription.
Comments
0 comments
Please sign in to leave a comment.