
In order to accept payments for subscriptions via your web sign up page, you need to have a Stripe account. This will allow you to automatically get paid every time someone purchases a monthly or yearly subscription through your Hype Burst fitness account.
With creating subscriptions, you are able to create discount codes for users to enter when signing up to your fitness app through web subscriptions. Please note that you are only able to create discount codes to be used for web subscriptions sign ups, not through the App Store.
To read more about how Web Subscriptions work, click here.
Steps in creating a discount code through Stripe
Before creating a discount code, you should make sure you have your Stripe account set up. If you haven't done this step, please read the full support article here: https://hypeburst.zendesk.com/hc/en-gb/articles/4415857788049-Create-Stripe-Account-
Step 1: Log into your Stripe account
Head to https://dashboard.stripe.com to log into your Stripe account.
Step 2: Click 'Products'
Once you have logged into your Stripe account, you will be in your Dashboard. Click 'Products' in the panel along the top.

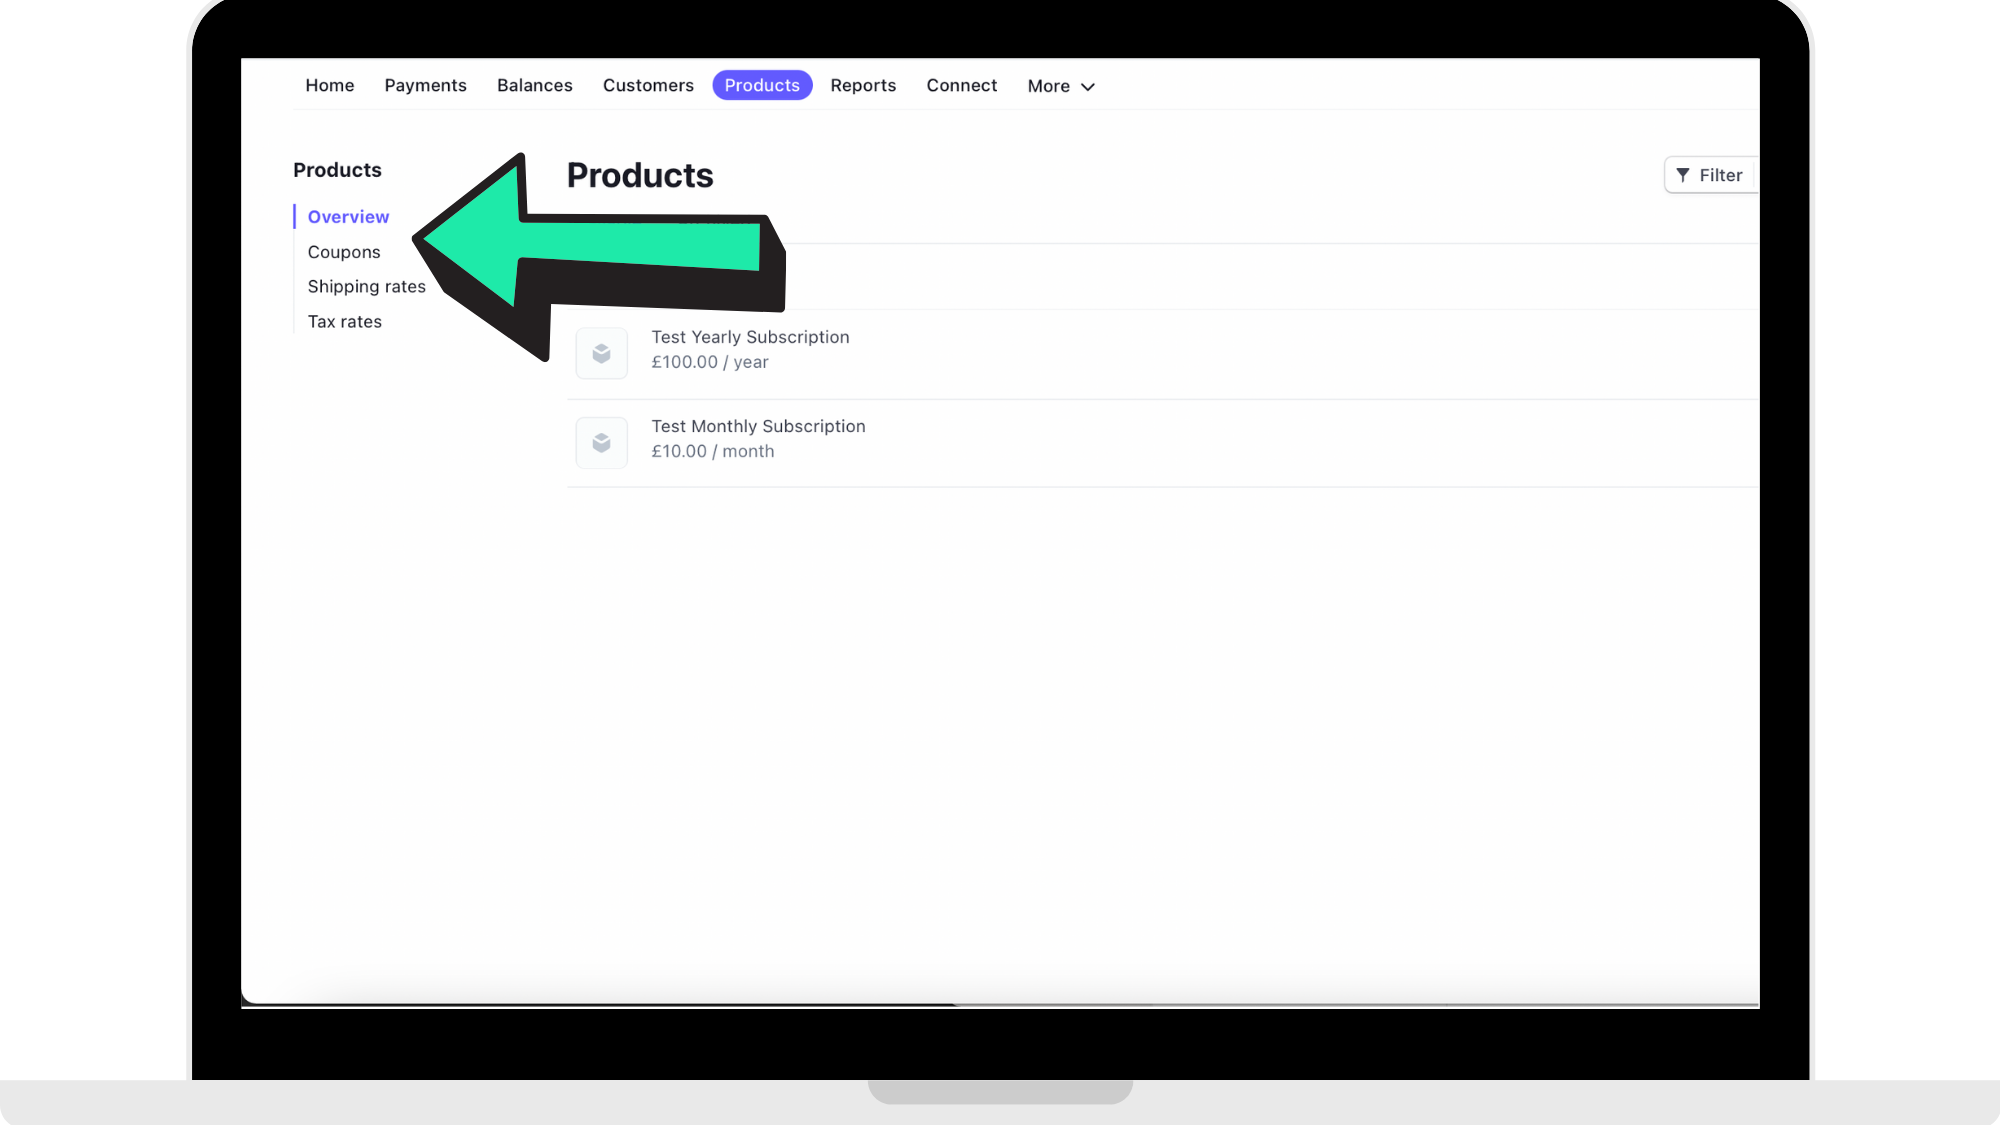
Step 3: Click 'Coupons'
In your 'Products' page, click 'Coupons' which is in the left drop down menu under 'Products'.
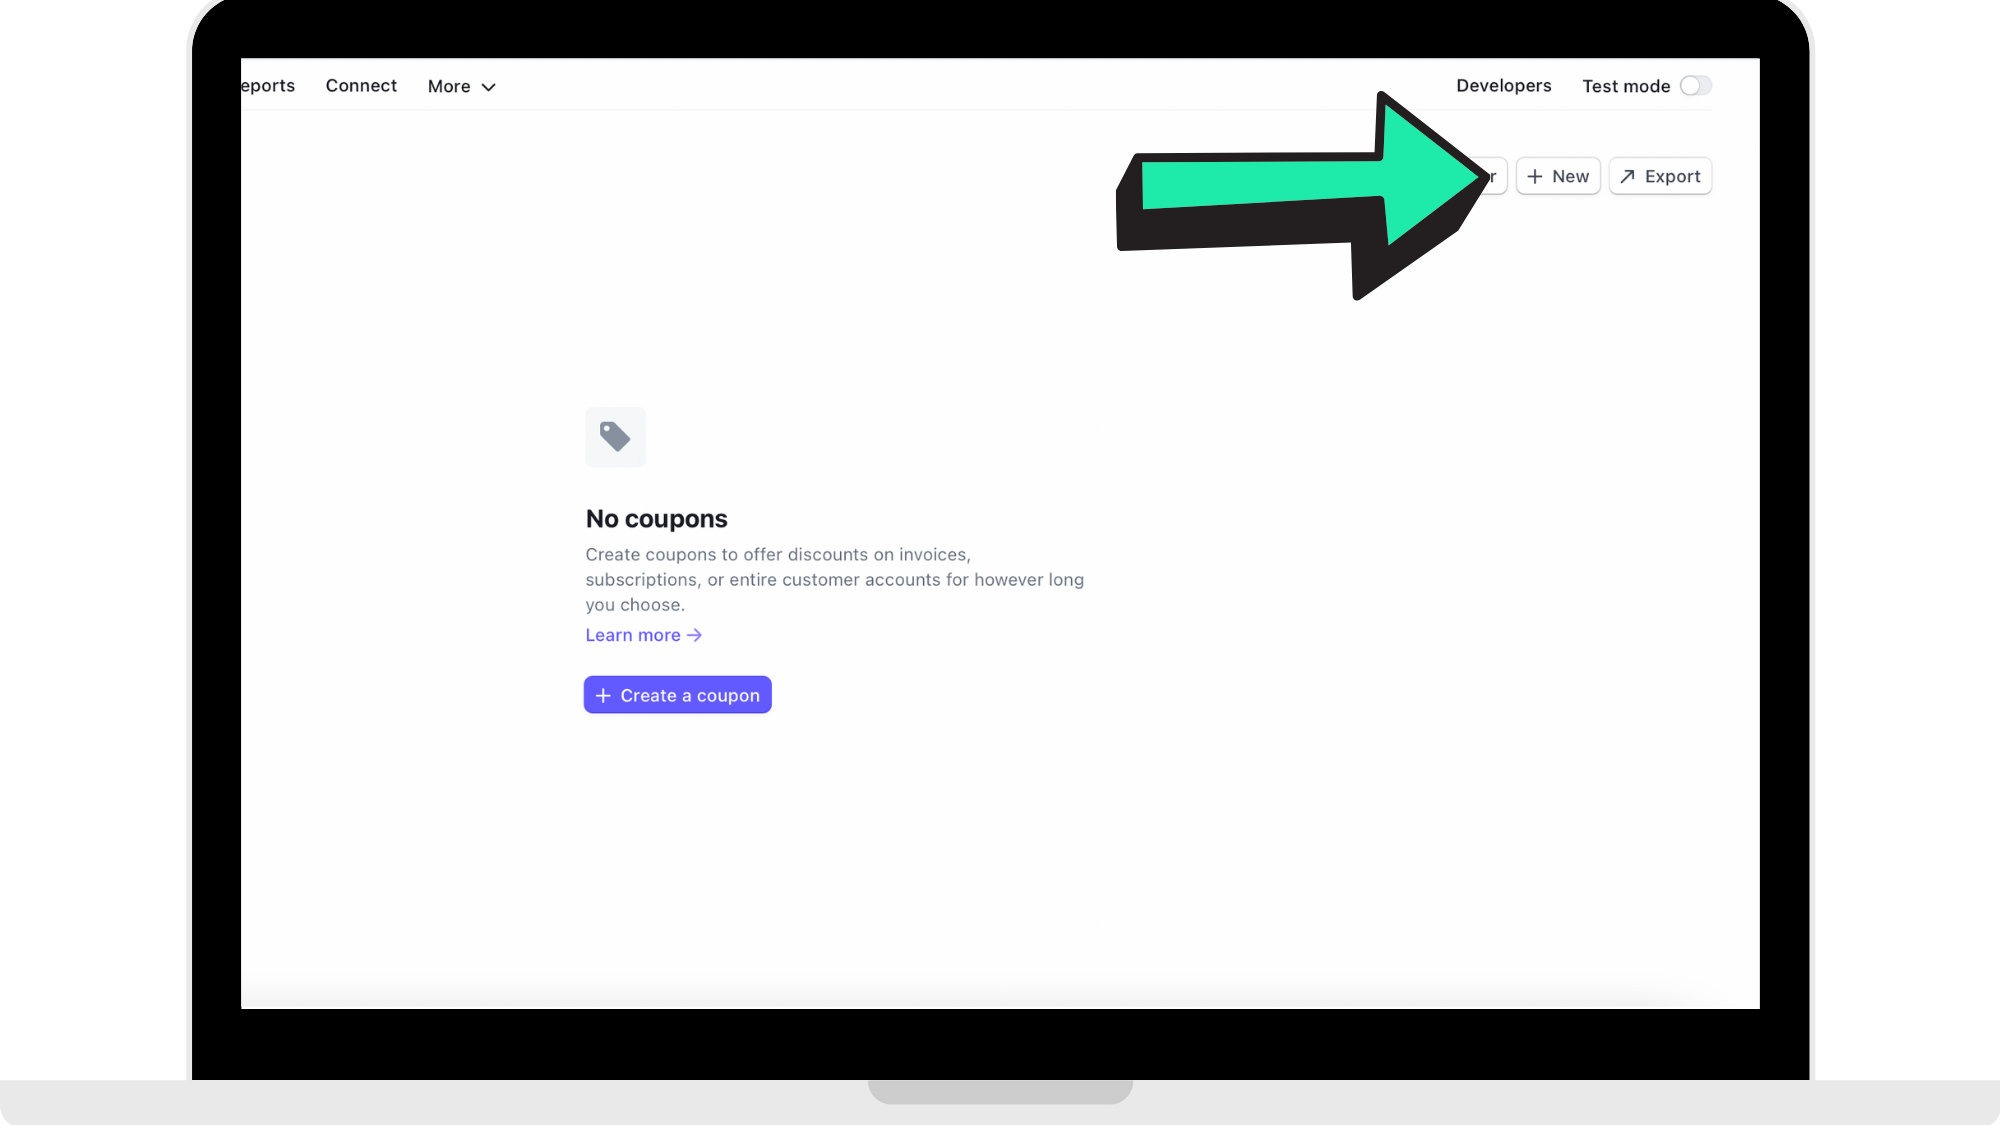
Step 4: Click '+ New' in the top right corner
You are able to see all the coupons you make with the terms, redemptions, and expiration in this page. To create a new coupon, click '+ New' in the top right corner.
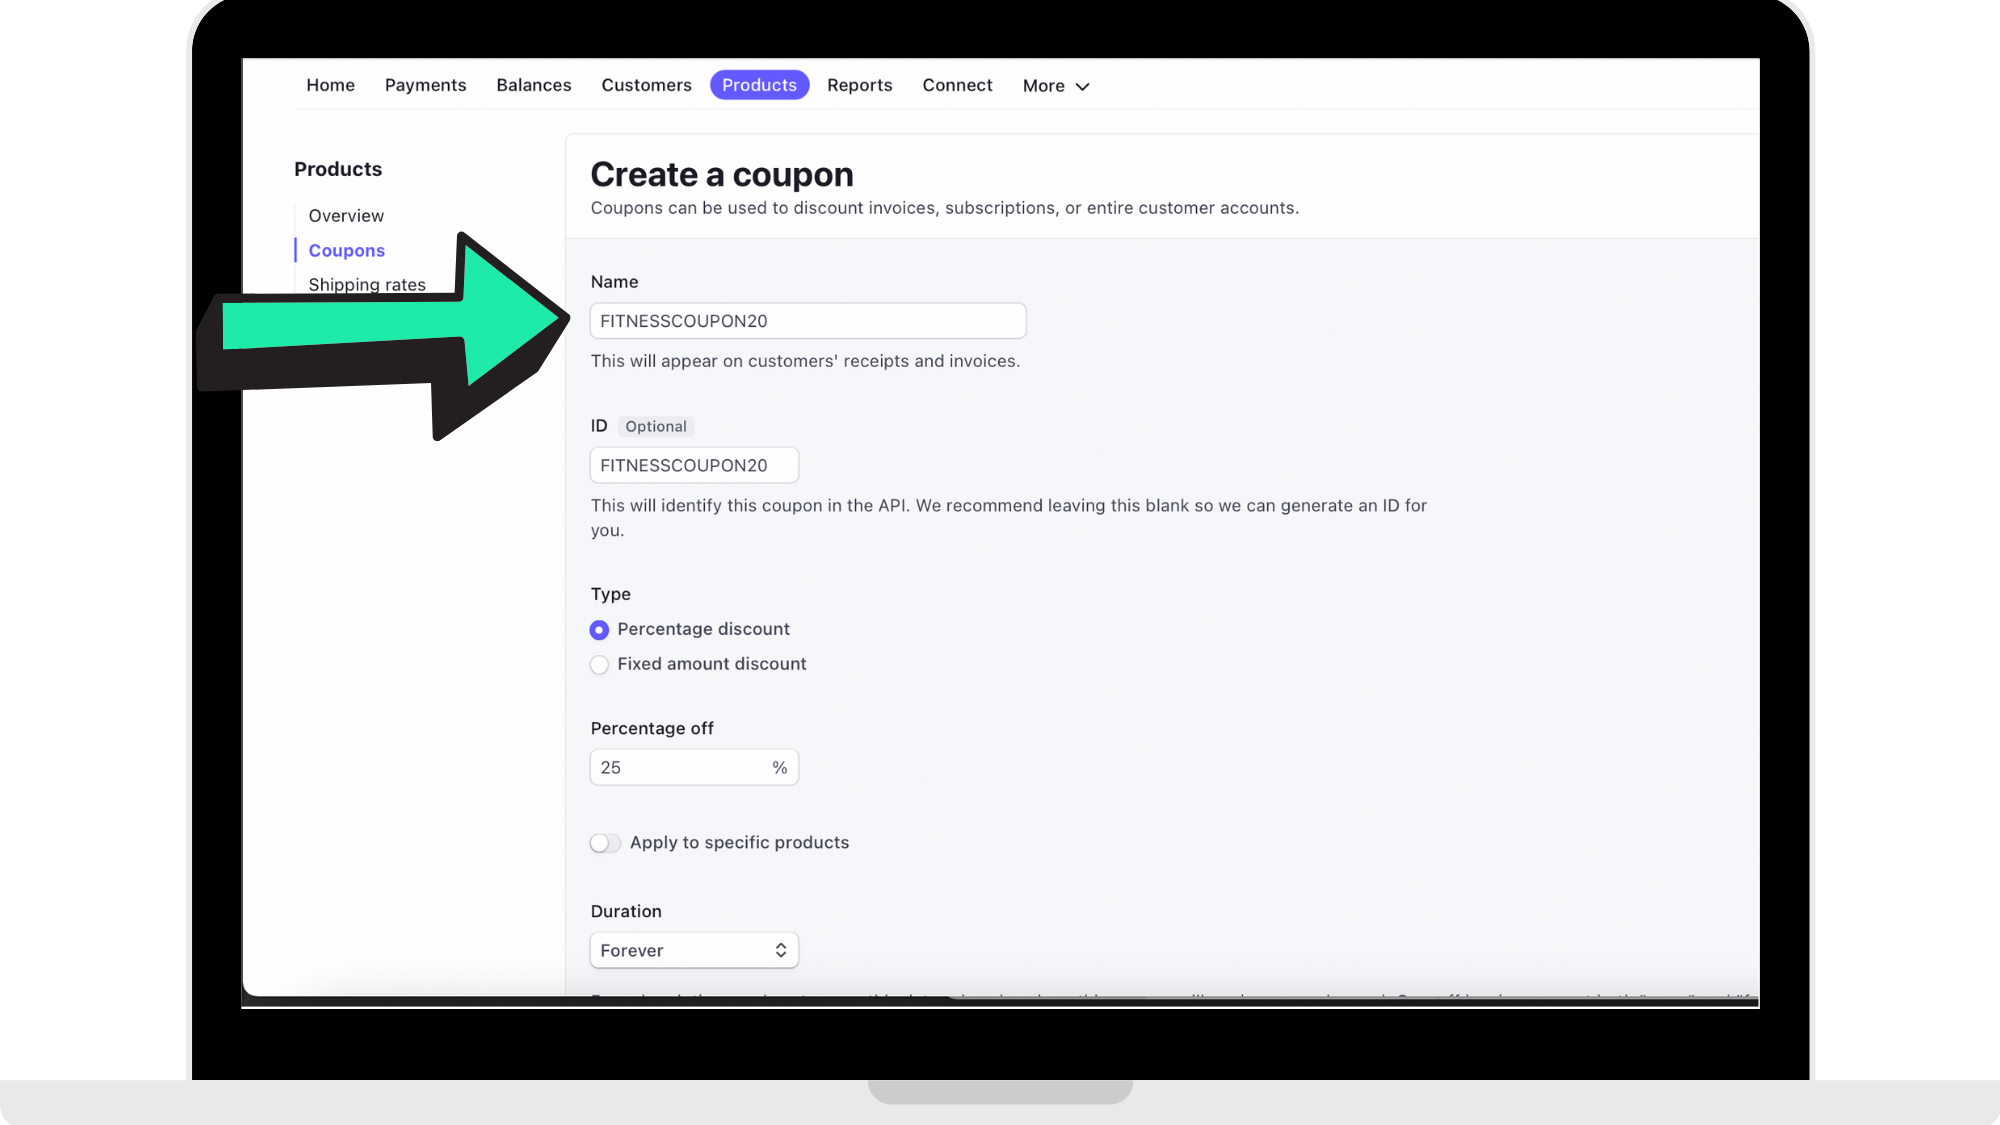
Step 5: Enter coupon information
Enter the coupon 'Name'
As you can see in the reference picture below, the coupon that is being created here is named 'FITNESSCOUPON20'. Enter in the name of your coupon you are creating here.
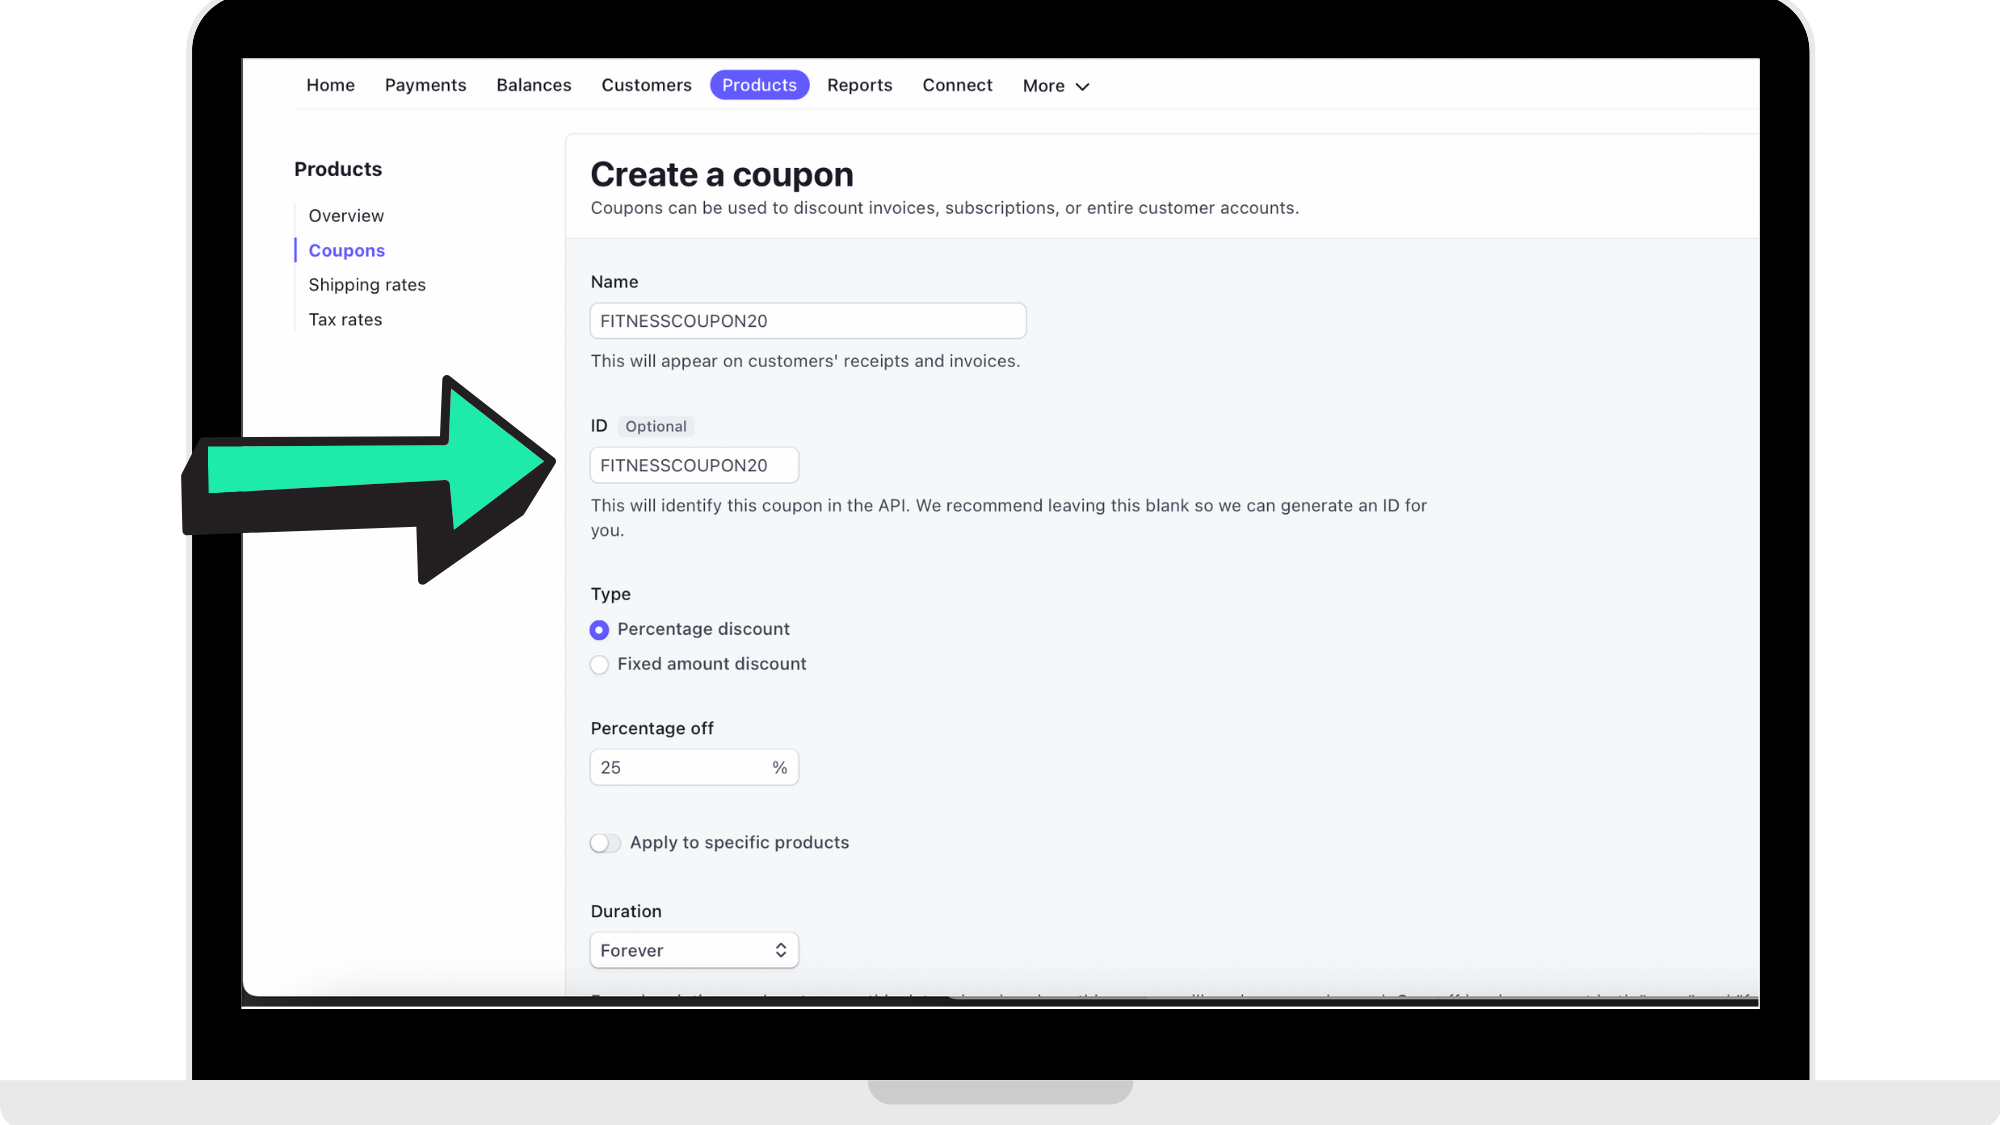
Enter 'ID'
Enter the coupon name exactly how it was entered in the previous step here.
Enter the 'Type'
You can set your discount code as a percentage off the standard subscription price, or a set discount amount.
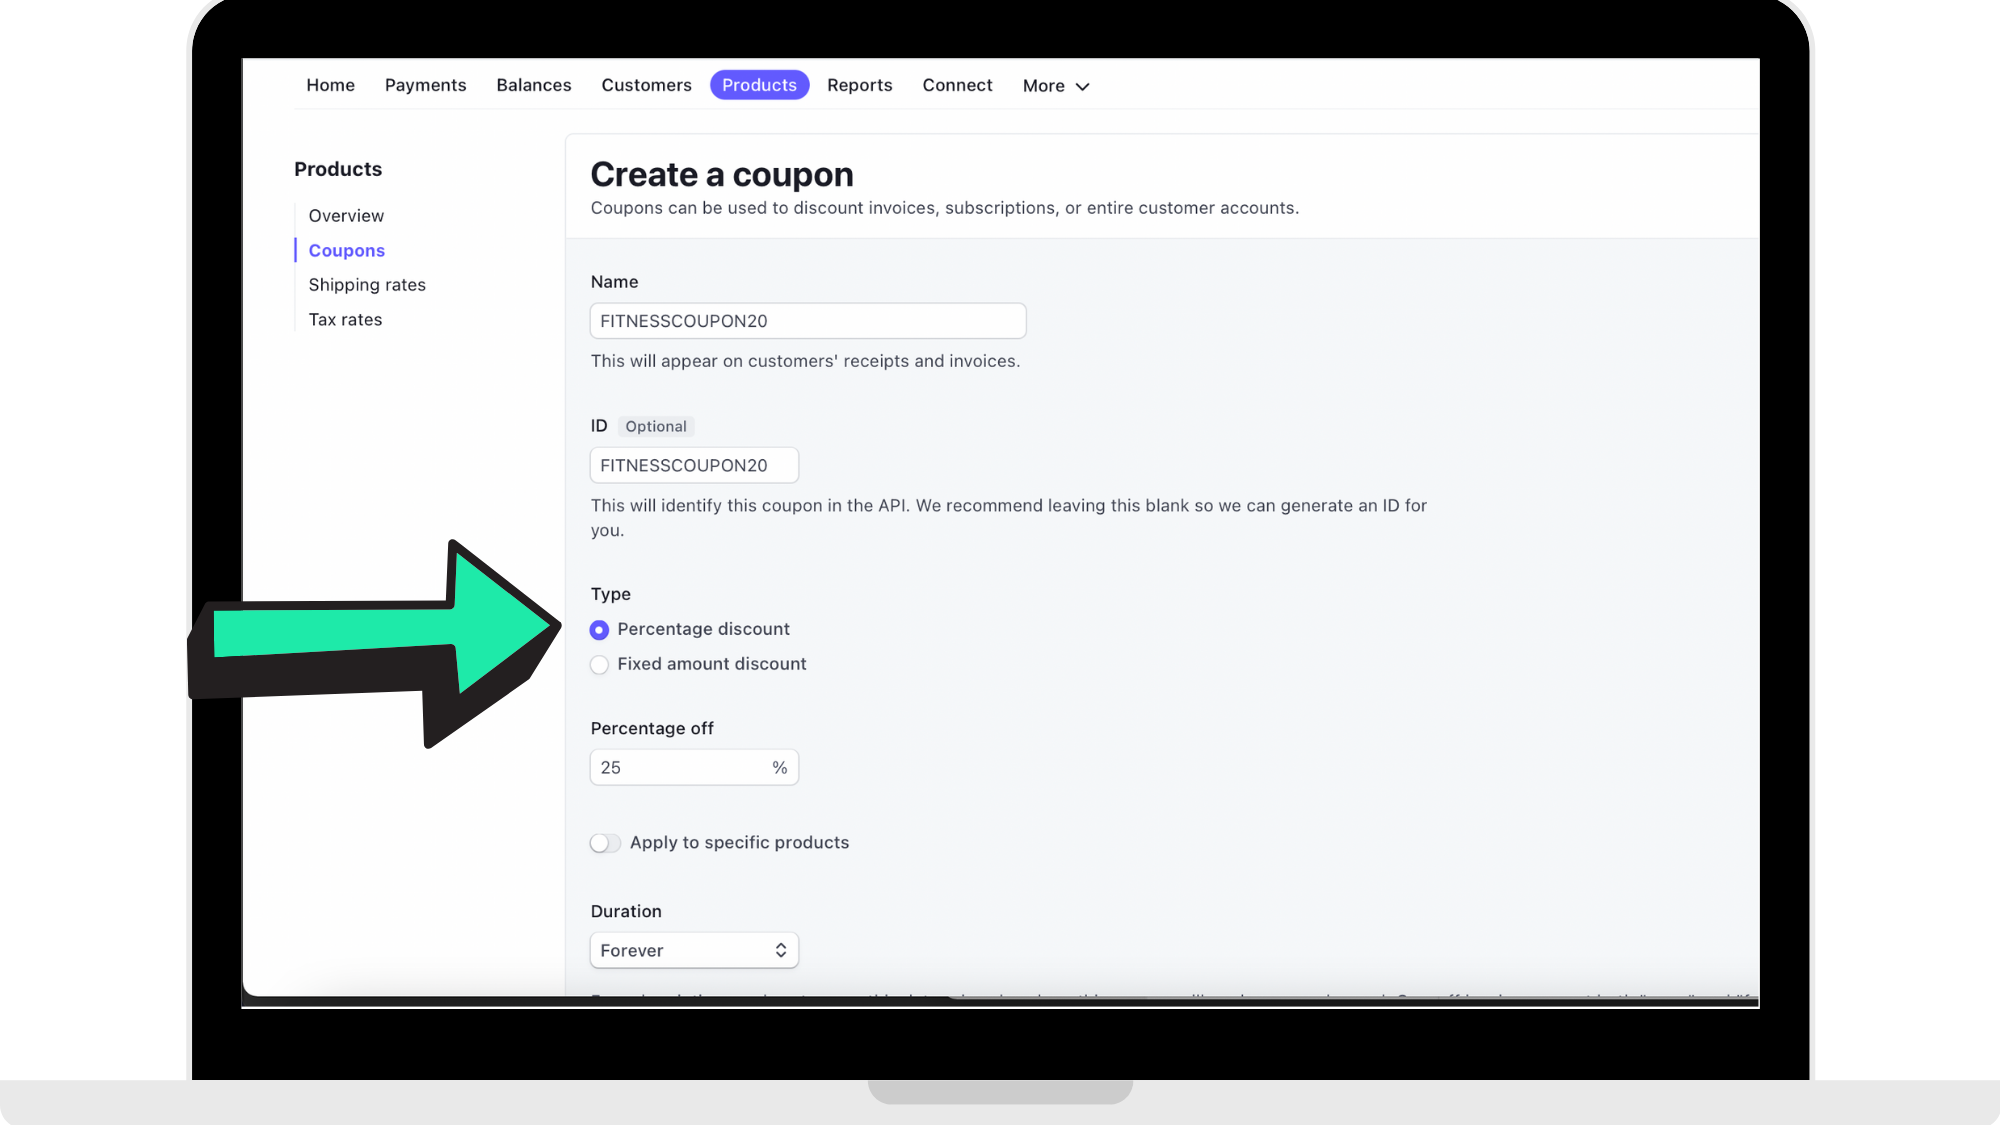
Percentage Discount
To set a percentage for a user to get a certain percentage off of the subscription price, click where the arrow is pointing in the reference image below. After this, enter in the number under 'Percentage off' of how much the discount is for.
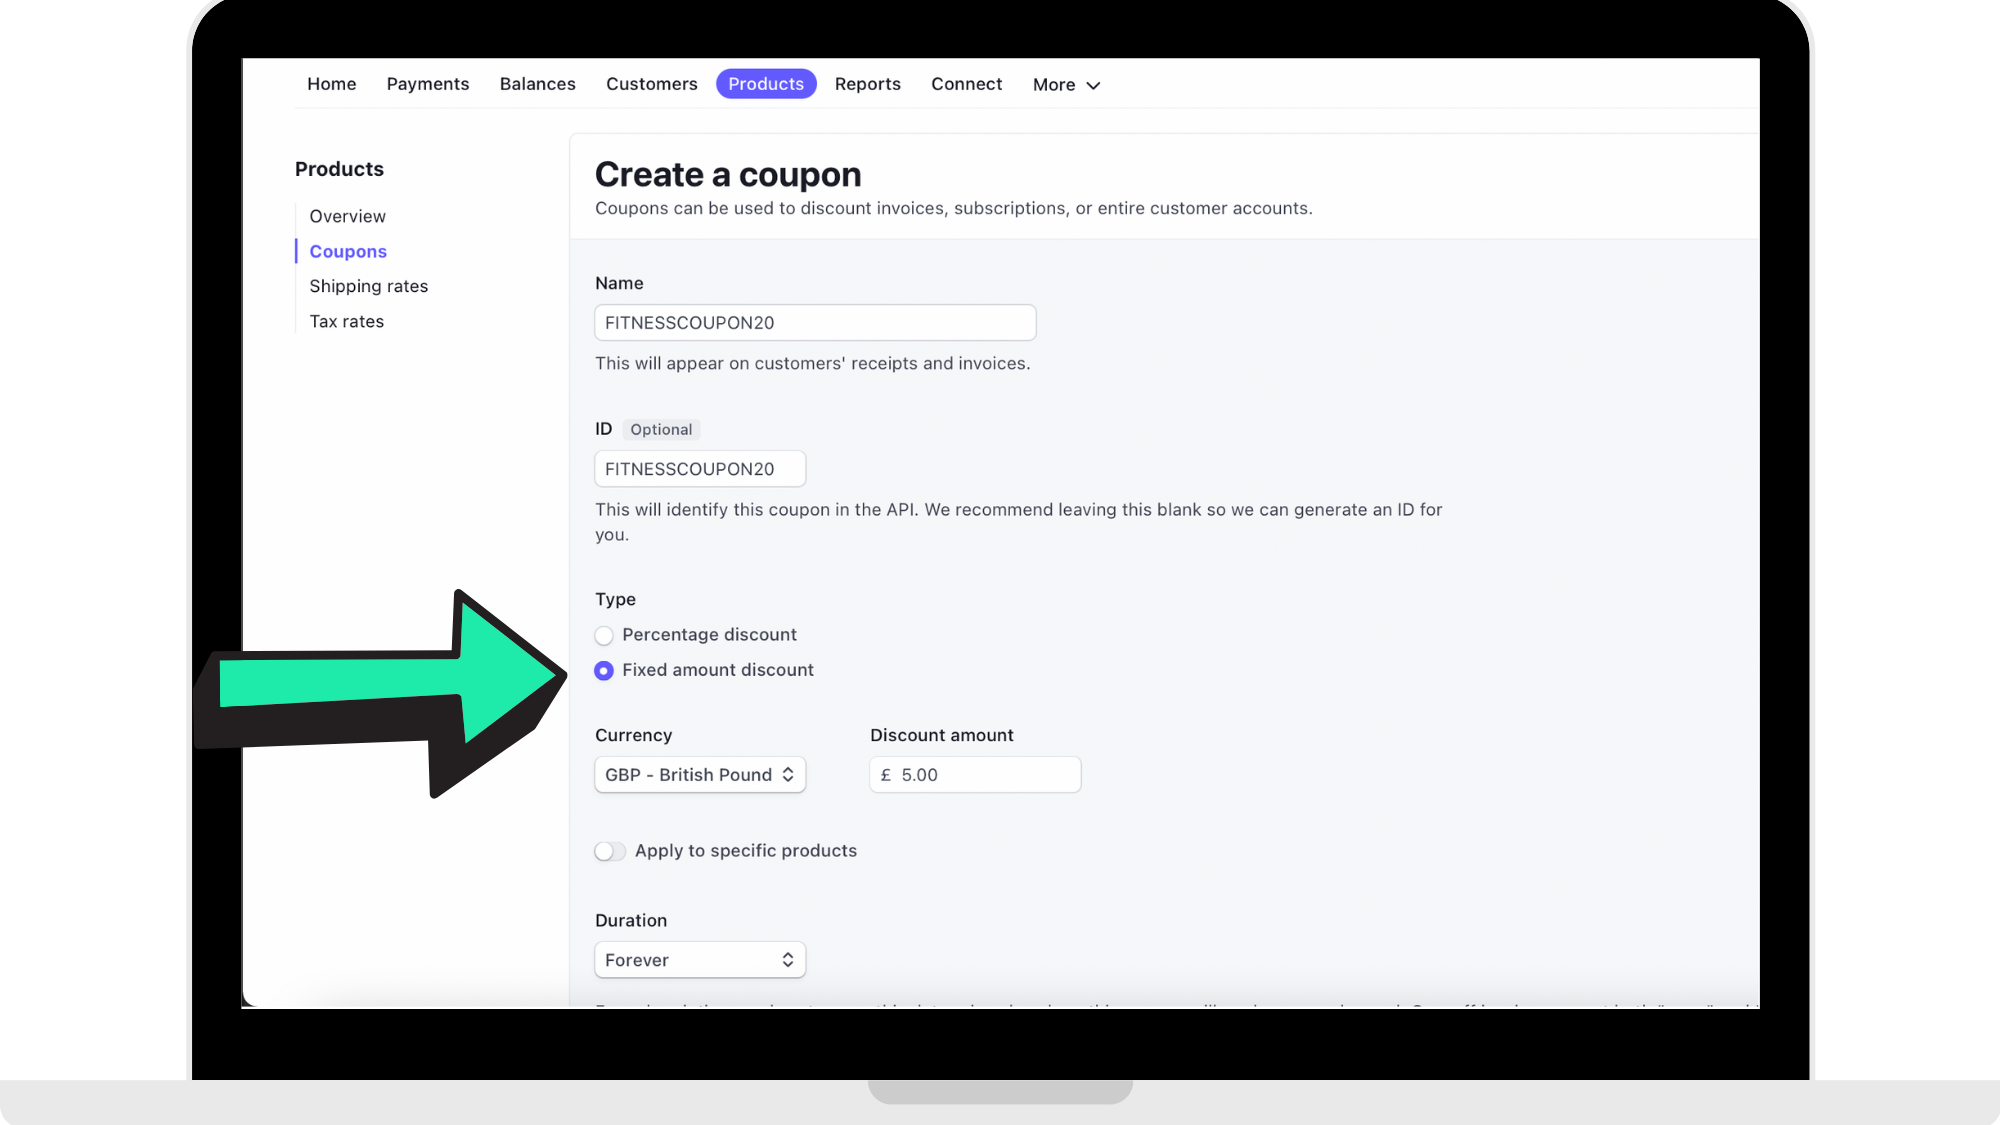
Fixed Amount Discount
For a fixed amount, click where the arrow is pointing in the reference image below. After this, you will enter in the money amount that the user will get off their subscription with this coupon. You are able to change the currency amount in the drop down menu.
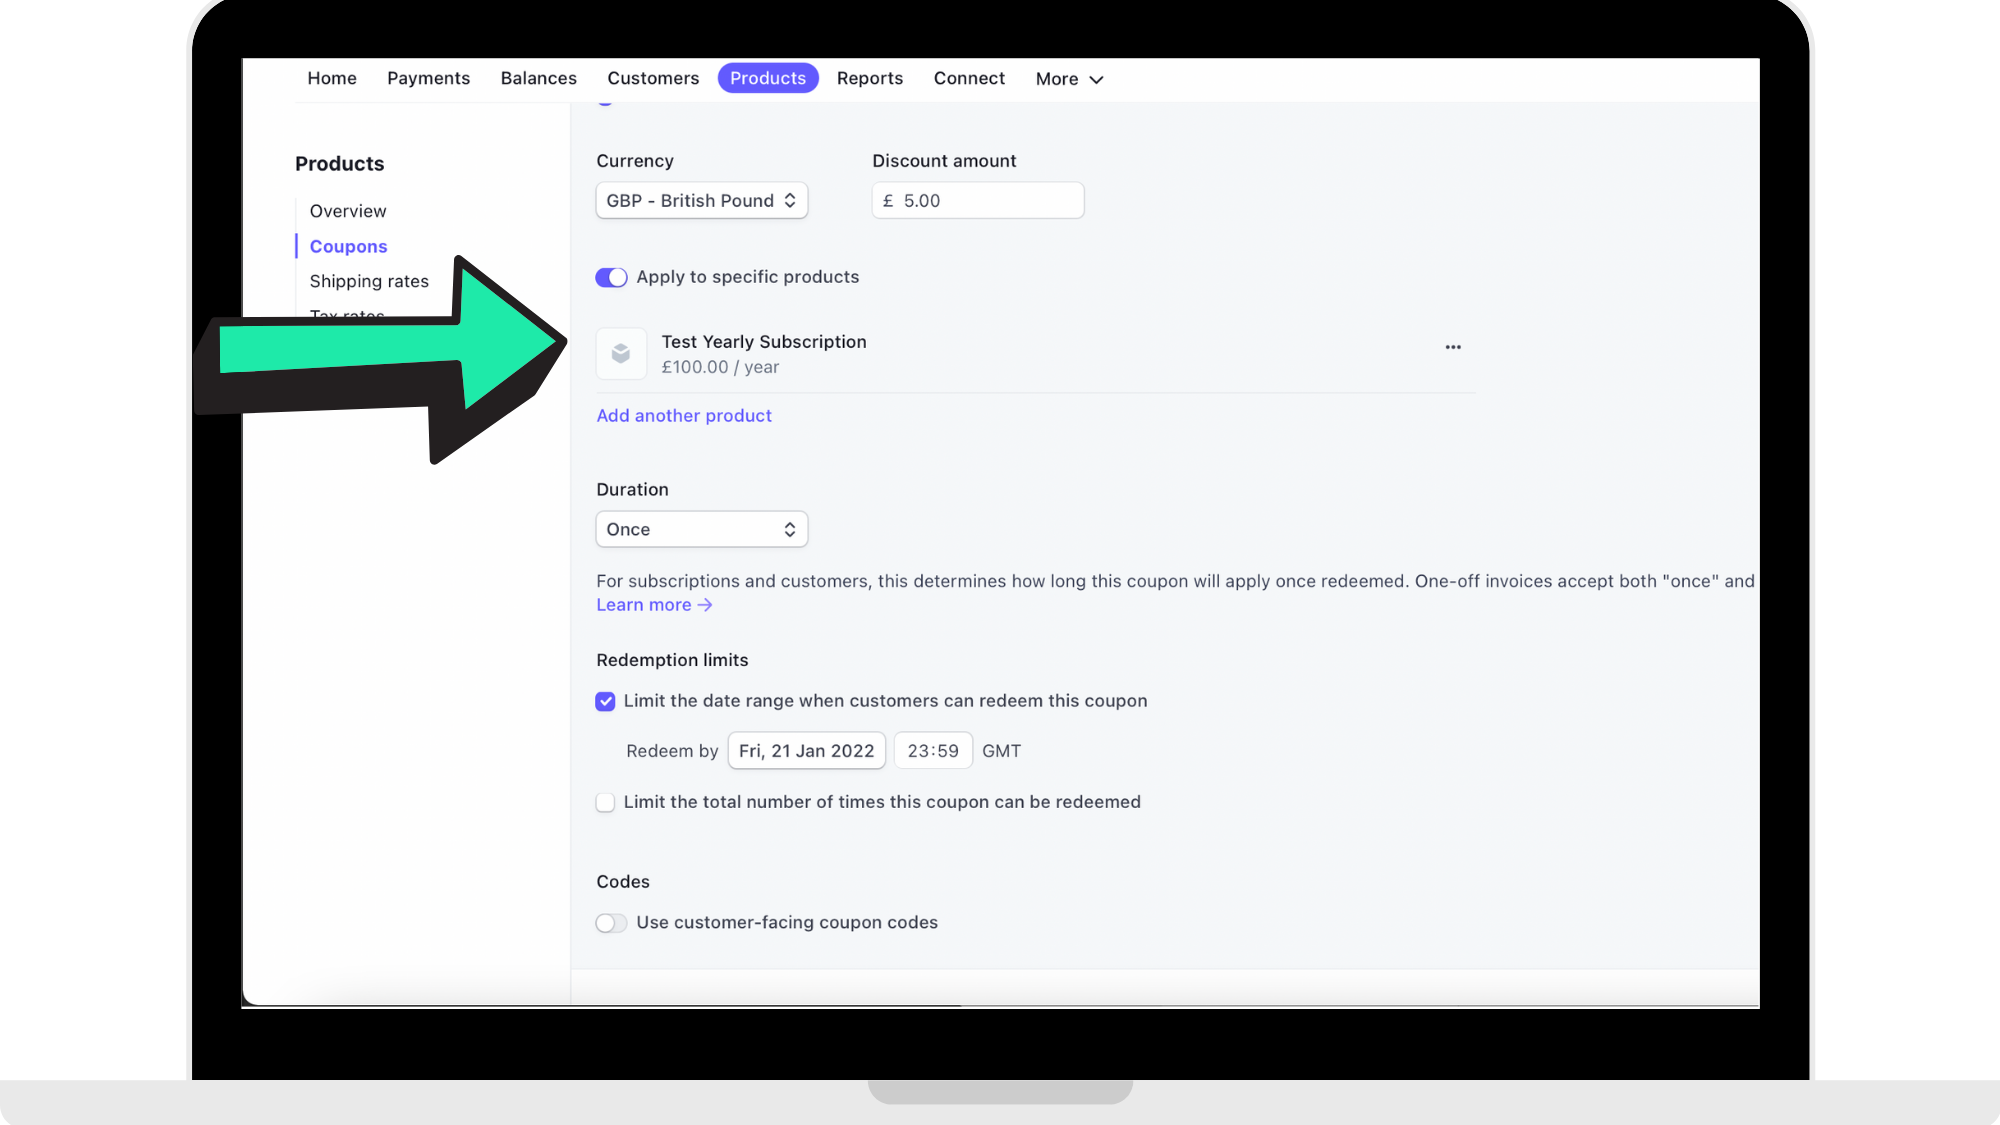
Apply to a 'Specific Product'
In order for the coupon to be used, it needs to be applied to a 'Product'. The product is the monthly or yearly subscription. Where the arrow is pointing in the reference image below, you click to see the products you have created (which should be a monthly subscription and a yearly subscription). You are able to add more than one type of subscription to the same coupon.
If you have not yet created a 'Product', please read the full support article here: https://hypeburst.zendesk.com/hc/en-gb/articles/4415857788049-Create-Stripe-Account-.
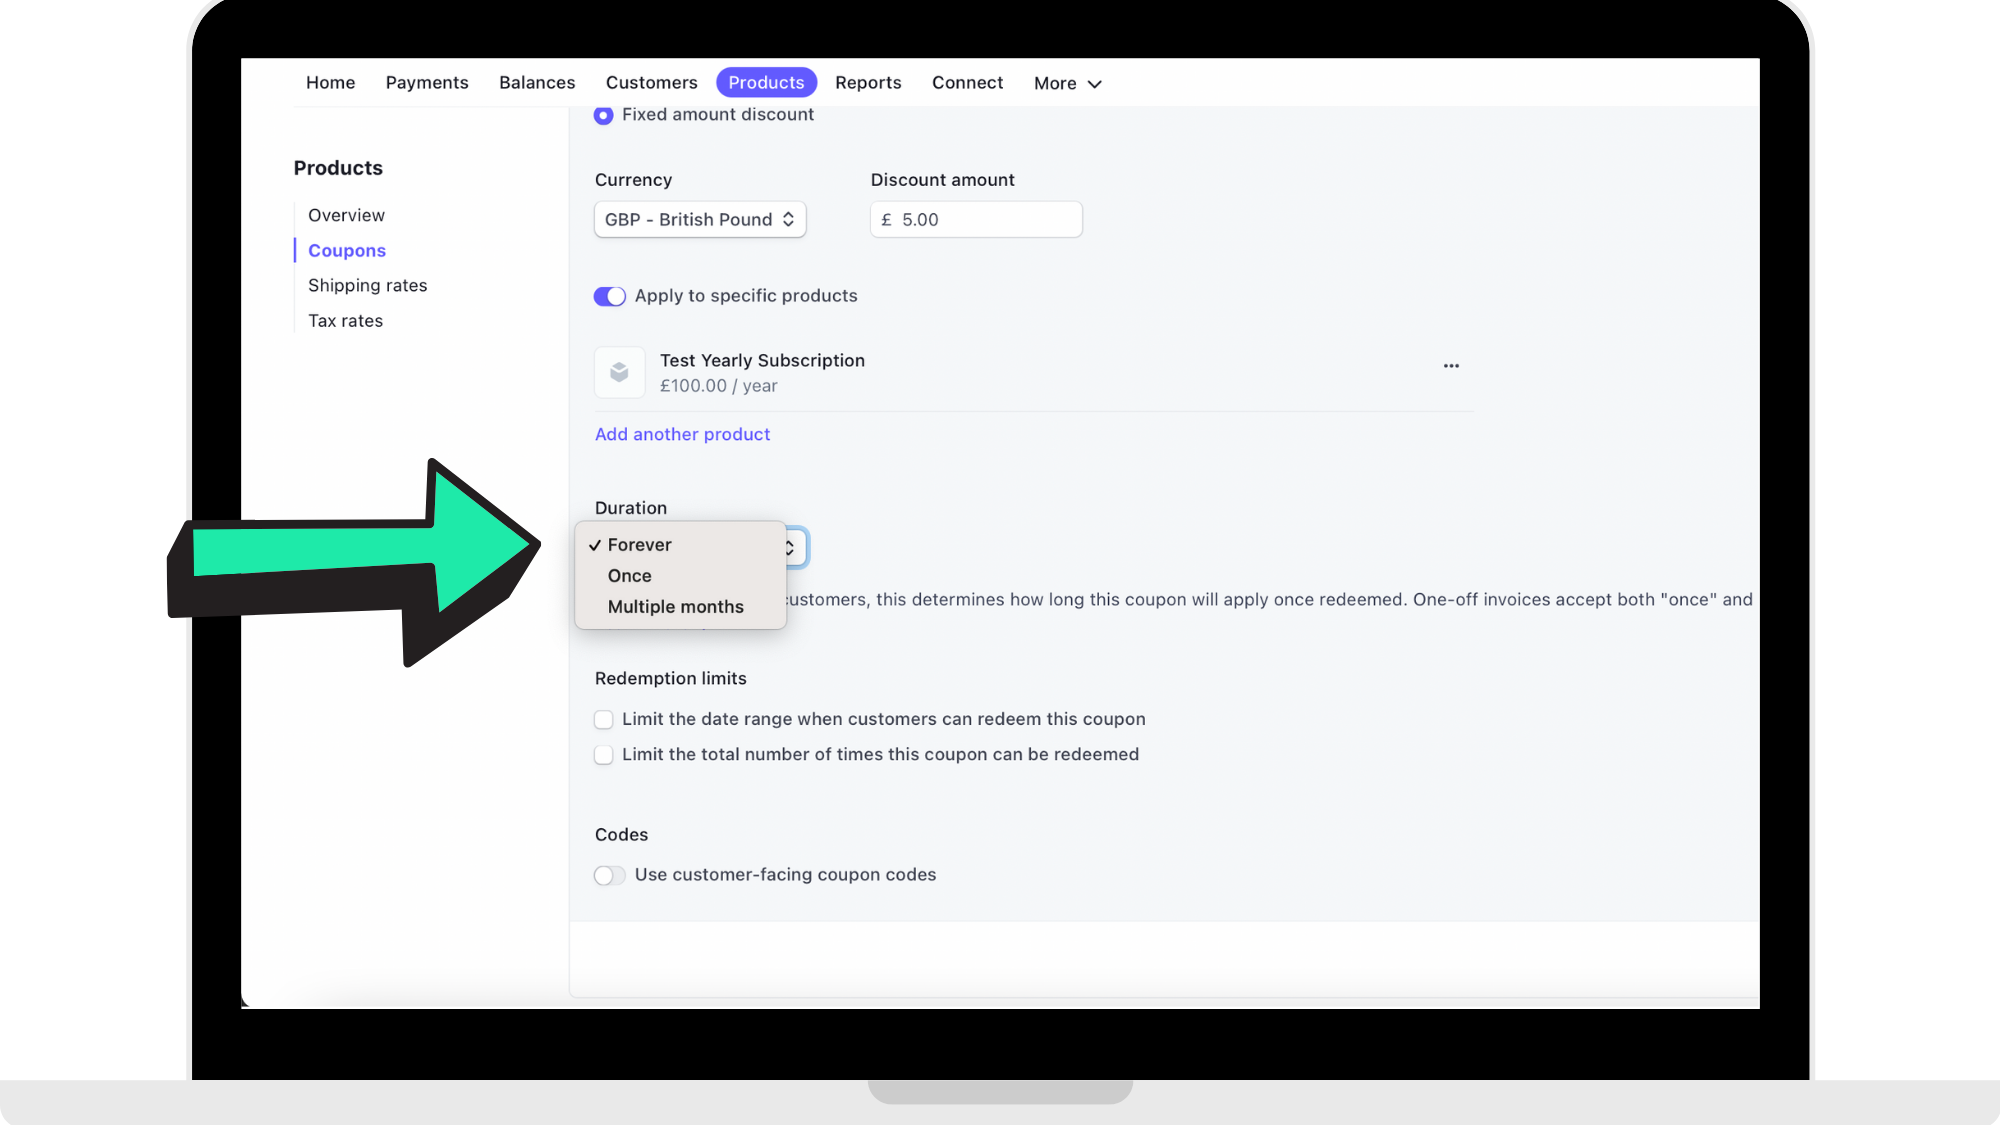
Apply 'Duration'
Choose how long you want the coupon to last for. As you can see in the reference image below, you are able to apply how long this coupon will last for.
If you wish for the coupon to only apply for a user's first billing period, then you would choose the option 'Once'. As an example, if the coupon applies to monthly subscriptions, it will only apply to the user's first month.
Add 'Redemption Limits'
Enter the maximum number that you want the coupon to be redeemed. You can do this two ways, through a date range or an amount of times it can be redeemed. You are able to do both.
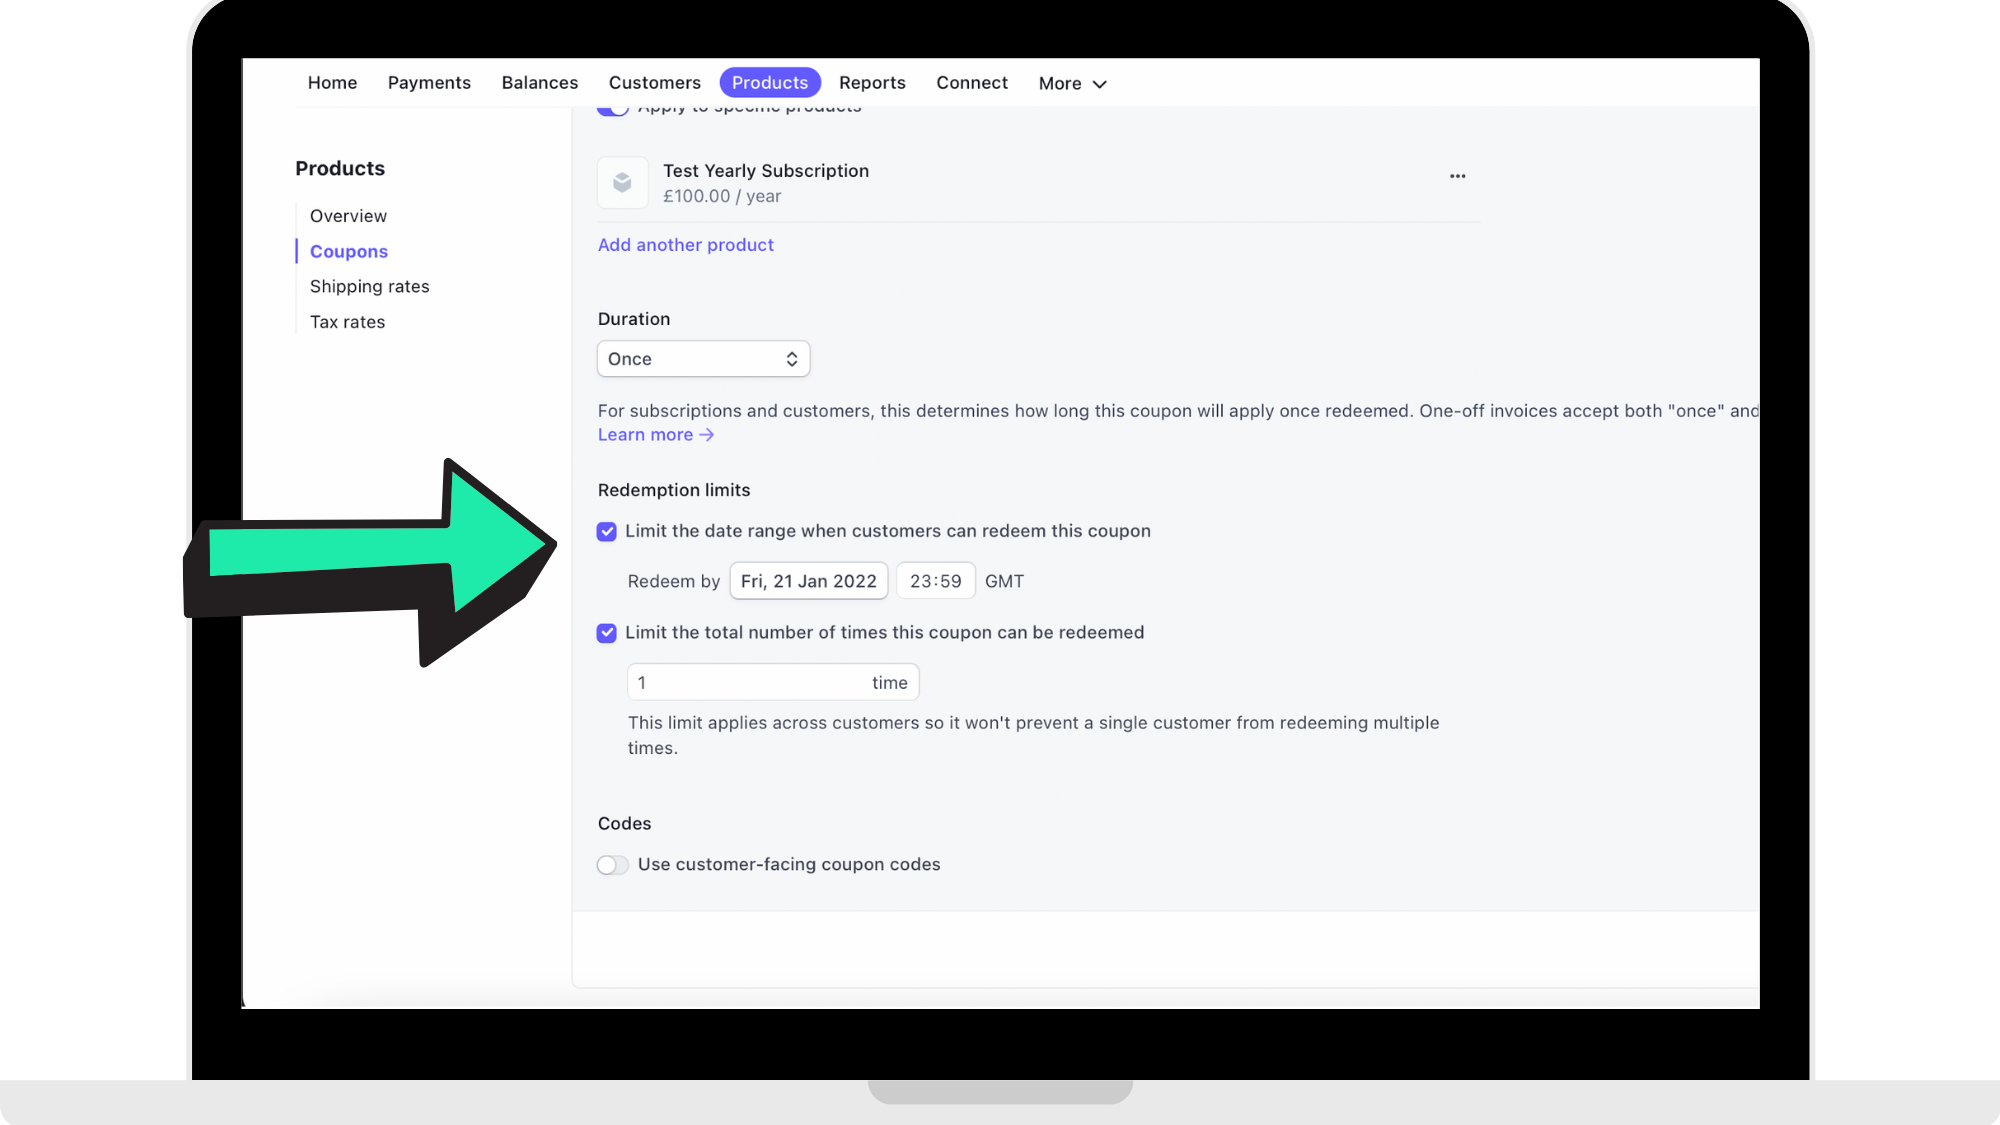
Date Range
If you are wanting the coupon to only be redeemed for a set amount of time, then click where the arrow is pointing in the reference image below and then proceed to enter the date range of how long the coupon will be redeemable for.
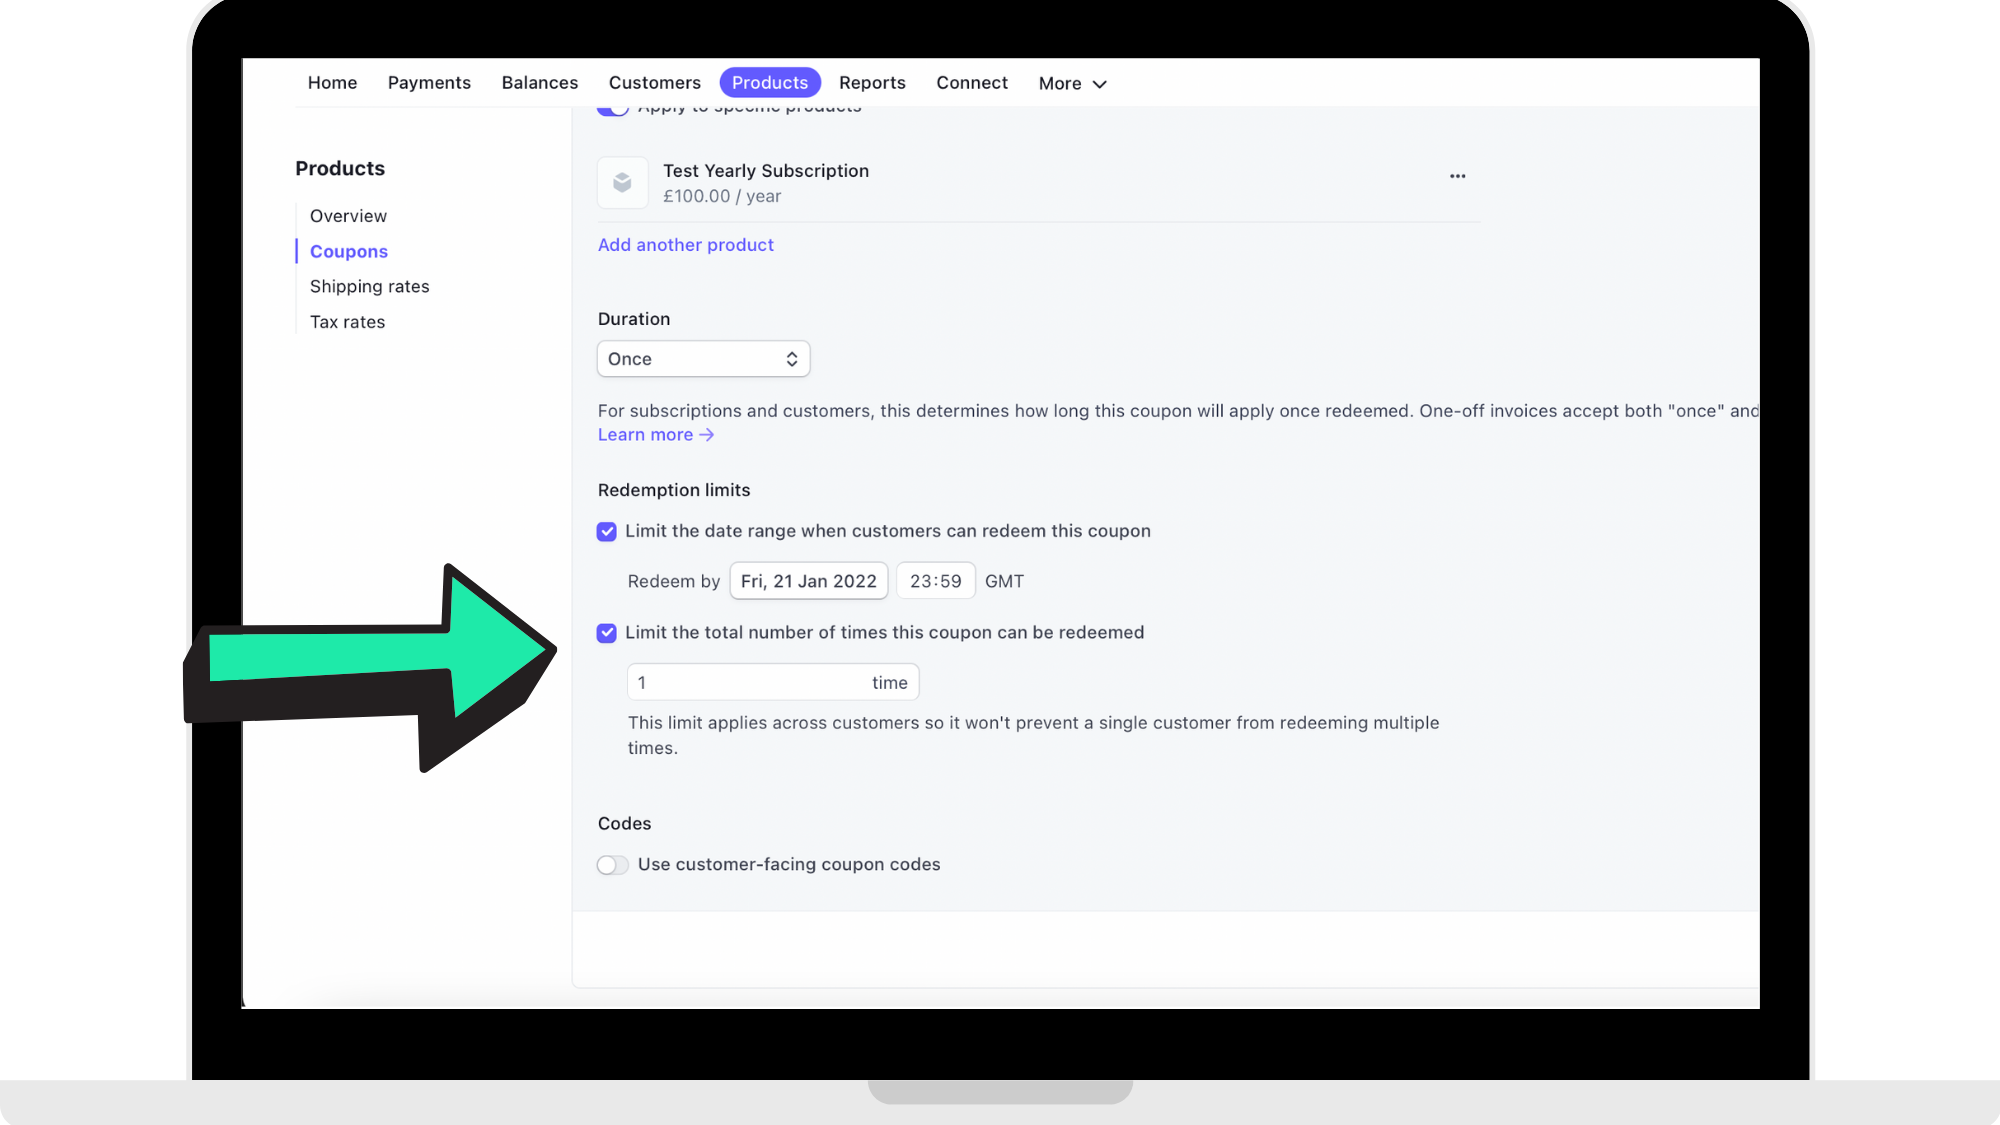
Number of times it can be redeemed
If you wish for the coupon to only be redeemed a set number of times, click where the arrow is pointing in the reference image below and then proceed to enter the amount of times you want the coupon to be redeemable for.
Step 6: Click 'Create Coupon'
Once you have filled in all the details for your coupon you are creating, click 'Create Coupon' in the bottom right corner of the screen.

How to get started
Head to https://dashboard.stripe.com to log into your Stripe account. Once you are logged in, head to your 'Products' page to create your coupons for your fitness app.
Comments
0 comments
Please sign in to leave a comment.