
In order to get paid through web subscriptions, you need to have a Stripe account. This will allow you to automatically get paid every time someone purchases a monthly or yearly subscription through your Hype Burst fitness account. You can read the guide on how to create your Stripe account here: https://hypeburst.zendesk.com/hc/en-gb/articles/4415857788049-Create-Stripe-Account-.
Once you have created your Stripe account and set it up, you must link it to your Hype Burst account.
Connecting Stripe to Hype Burst Dashboard
Before starting the process of connecting, make sure you are logged into your Stripe account and have it open in your tabs. Use the link https://dashboard.stripe.com to log into your account. You should have already completed all of the steps in the Create Stripe Account guide before starting the steps below.
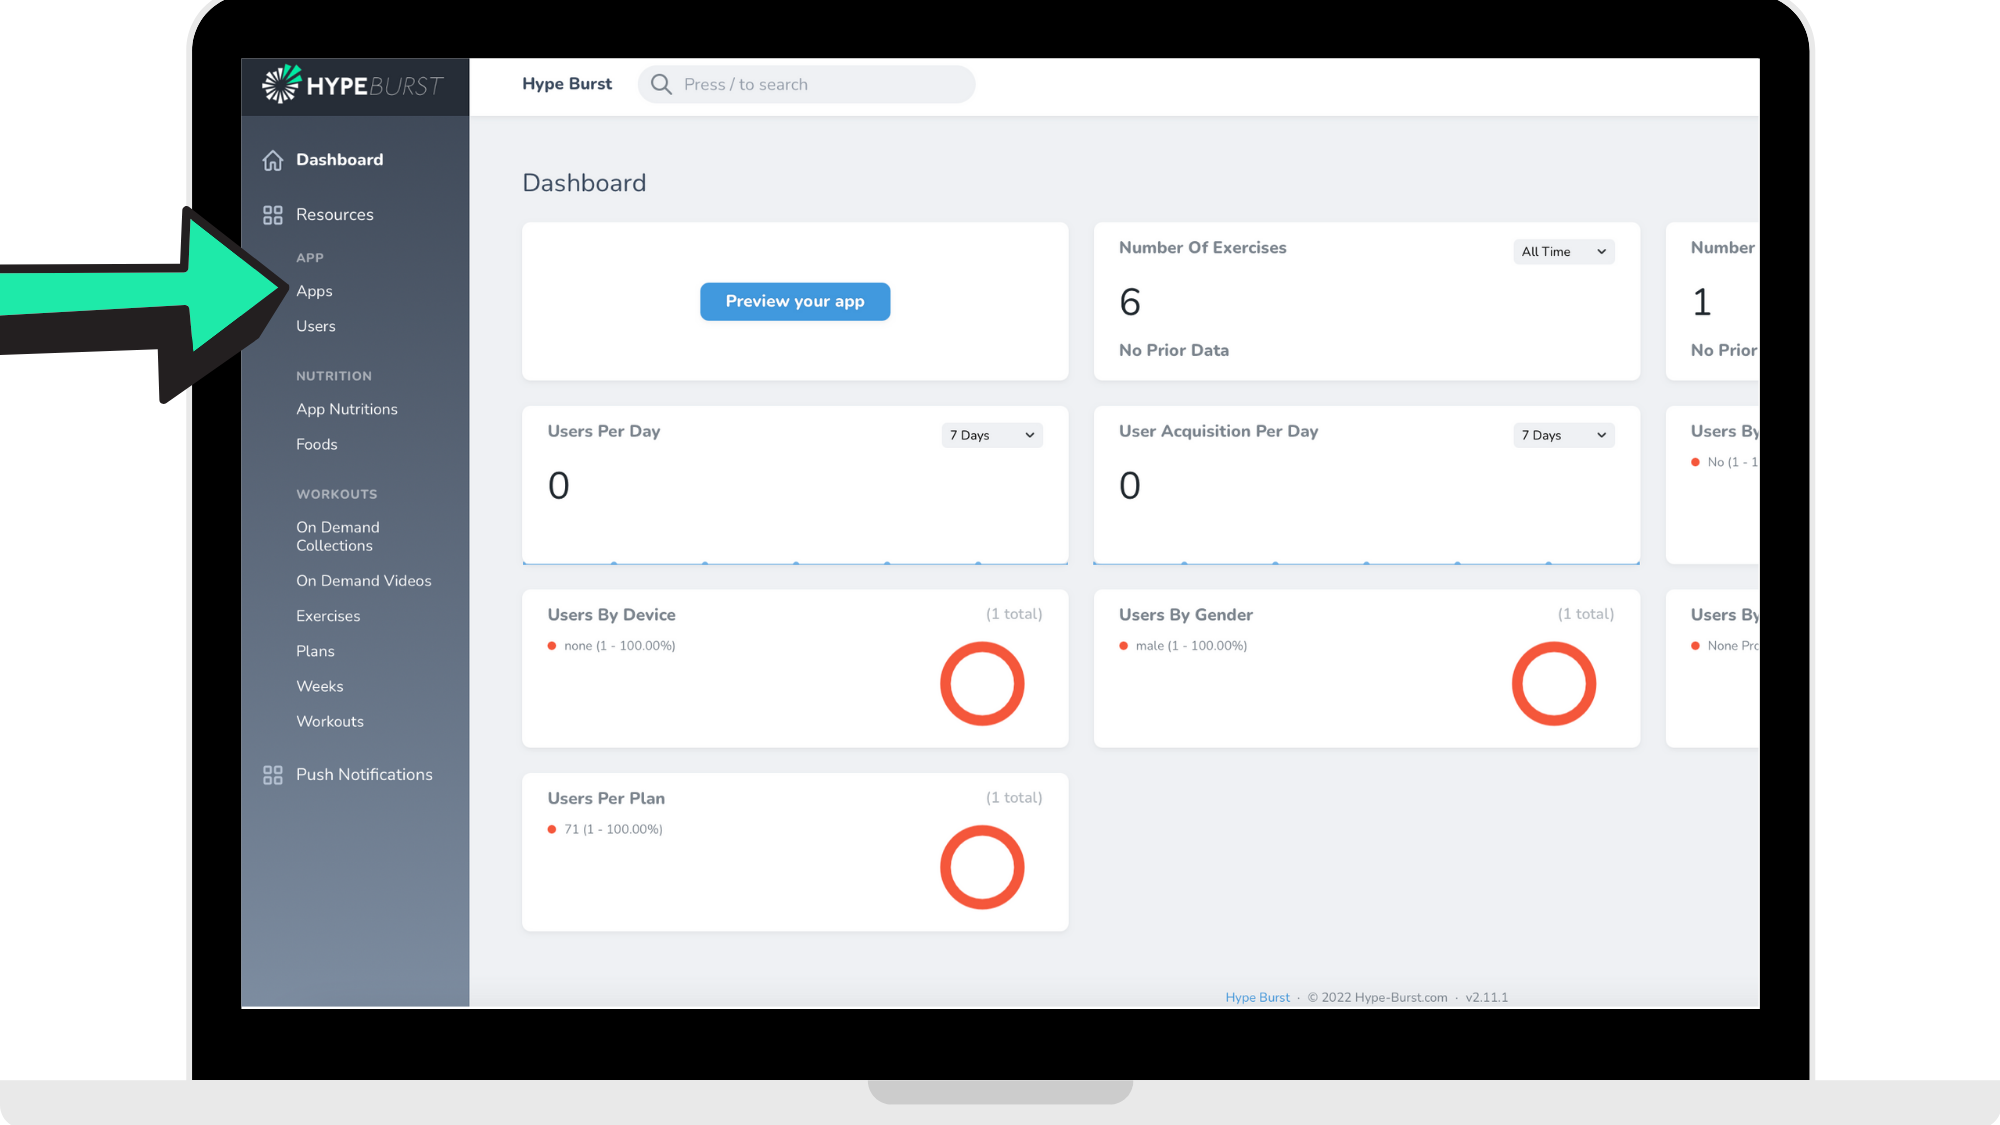
Step 1: Click the 'Apps' section in the Dashboard
Log into your dashboard at https://account.hype-burst.com/admin/login to view your Dashboard.
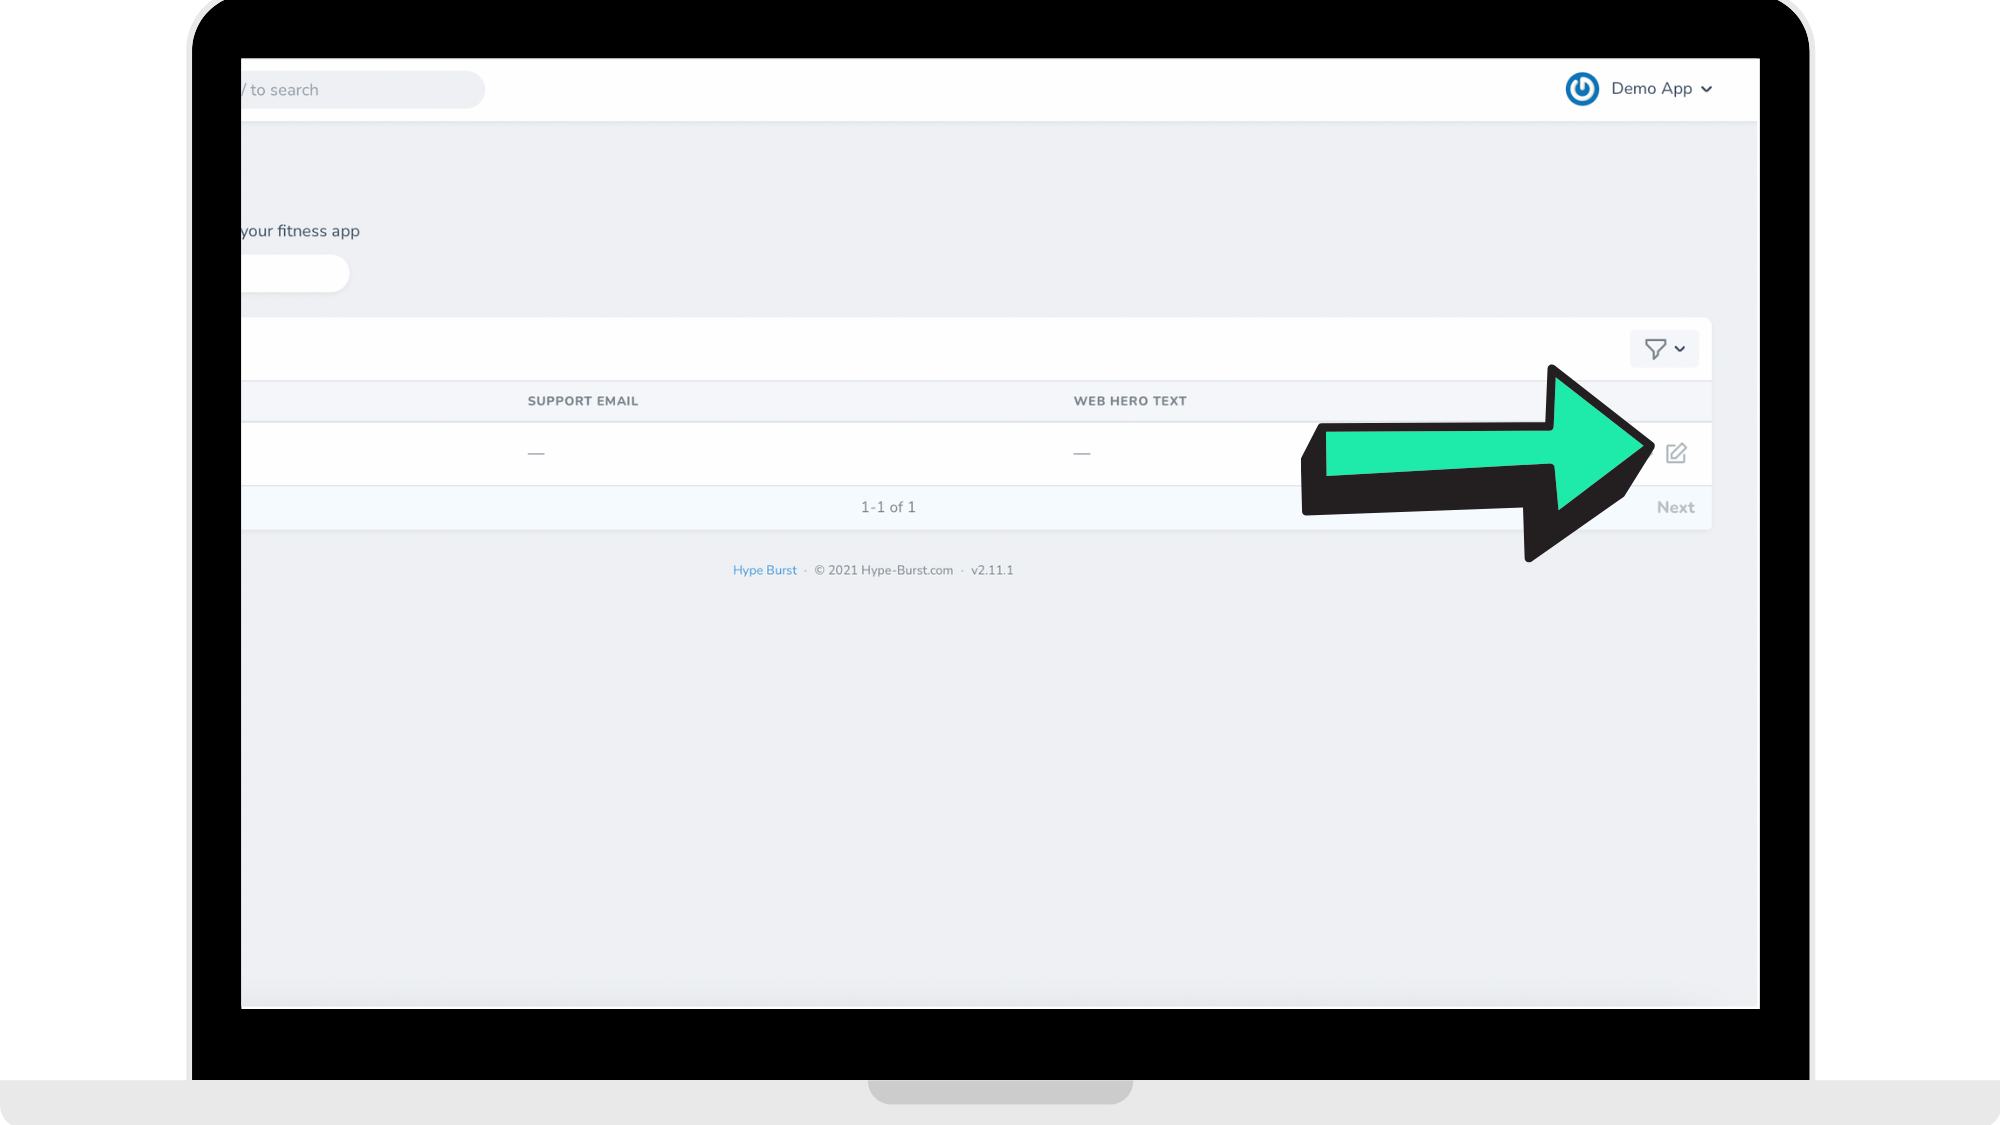
Step 2: Click the edit button by your app
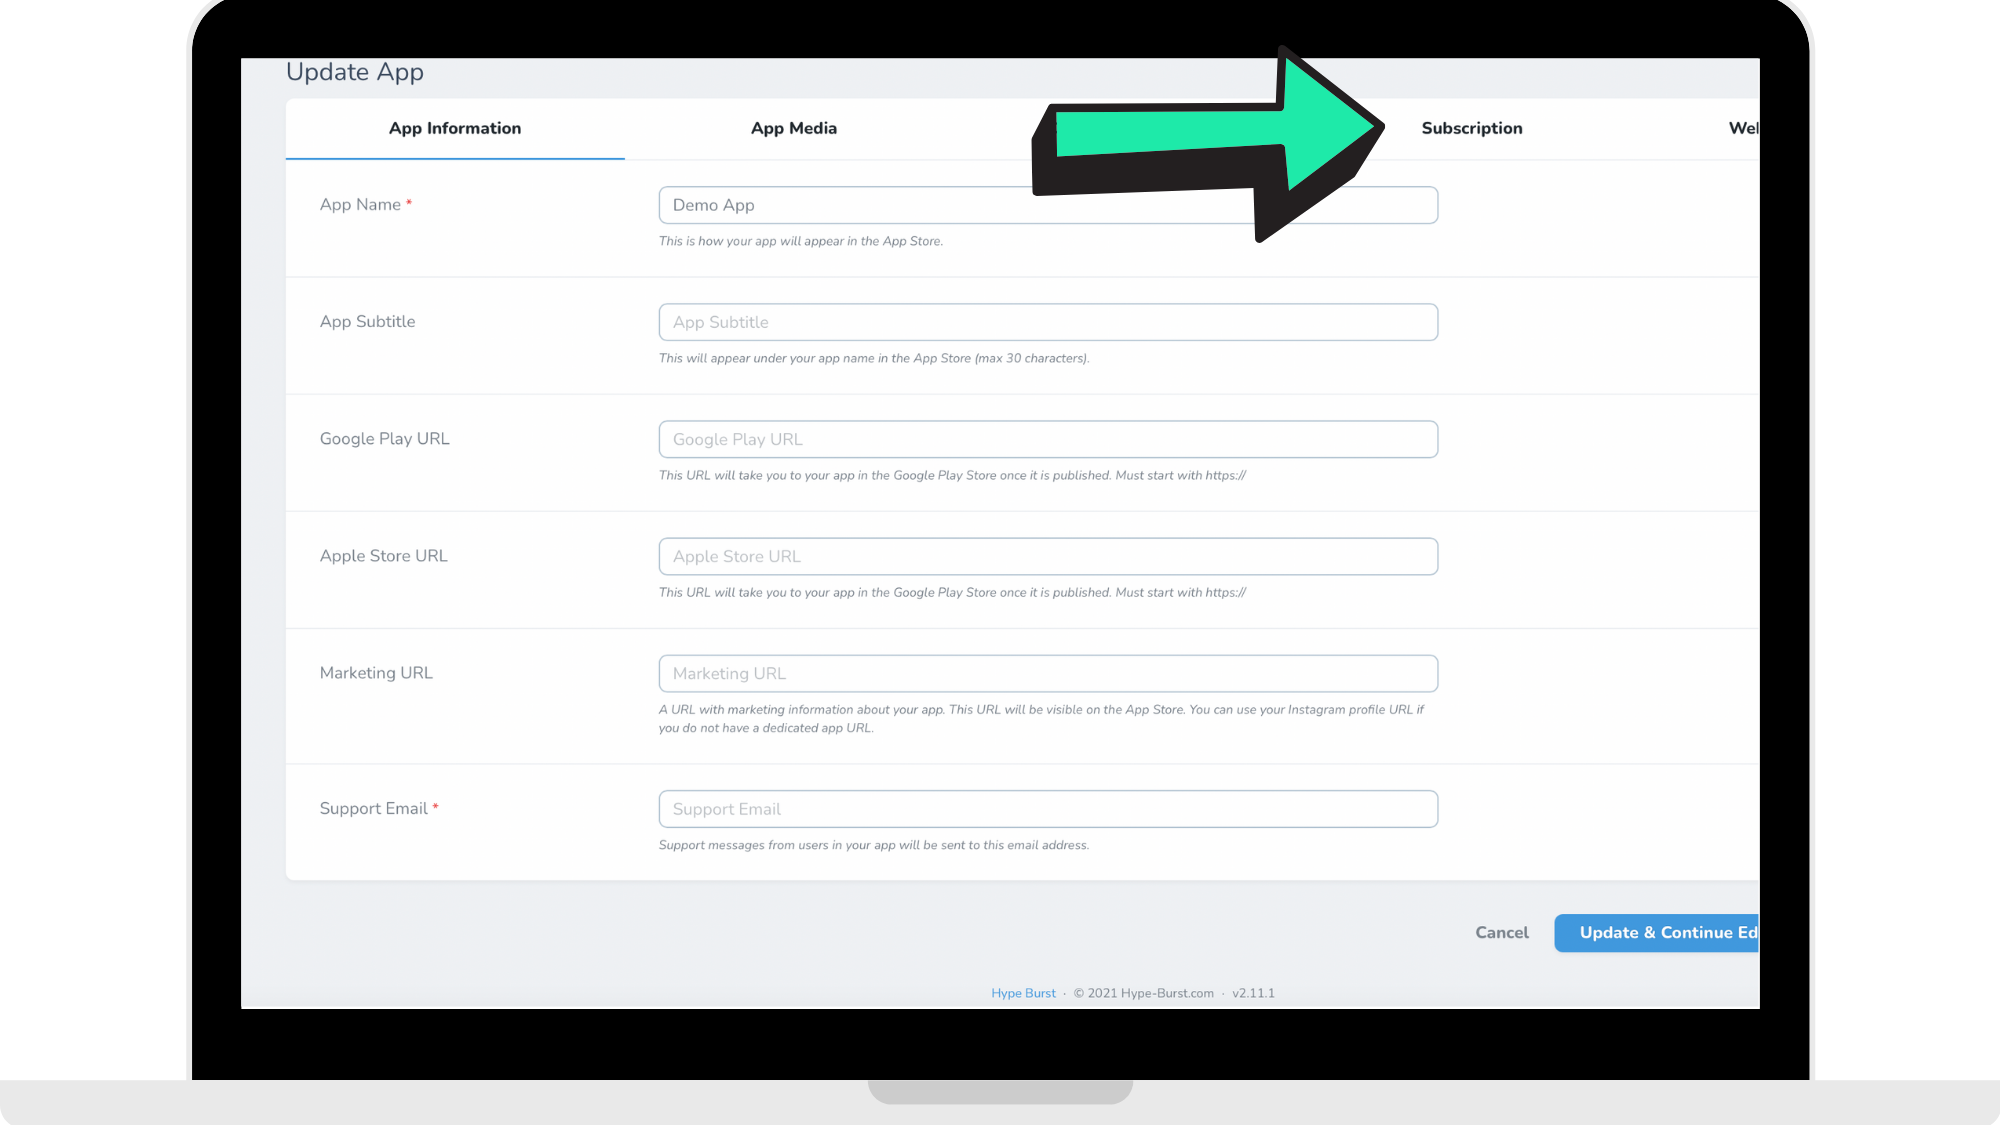
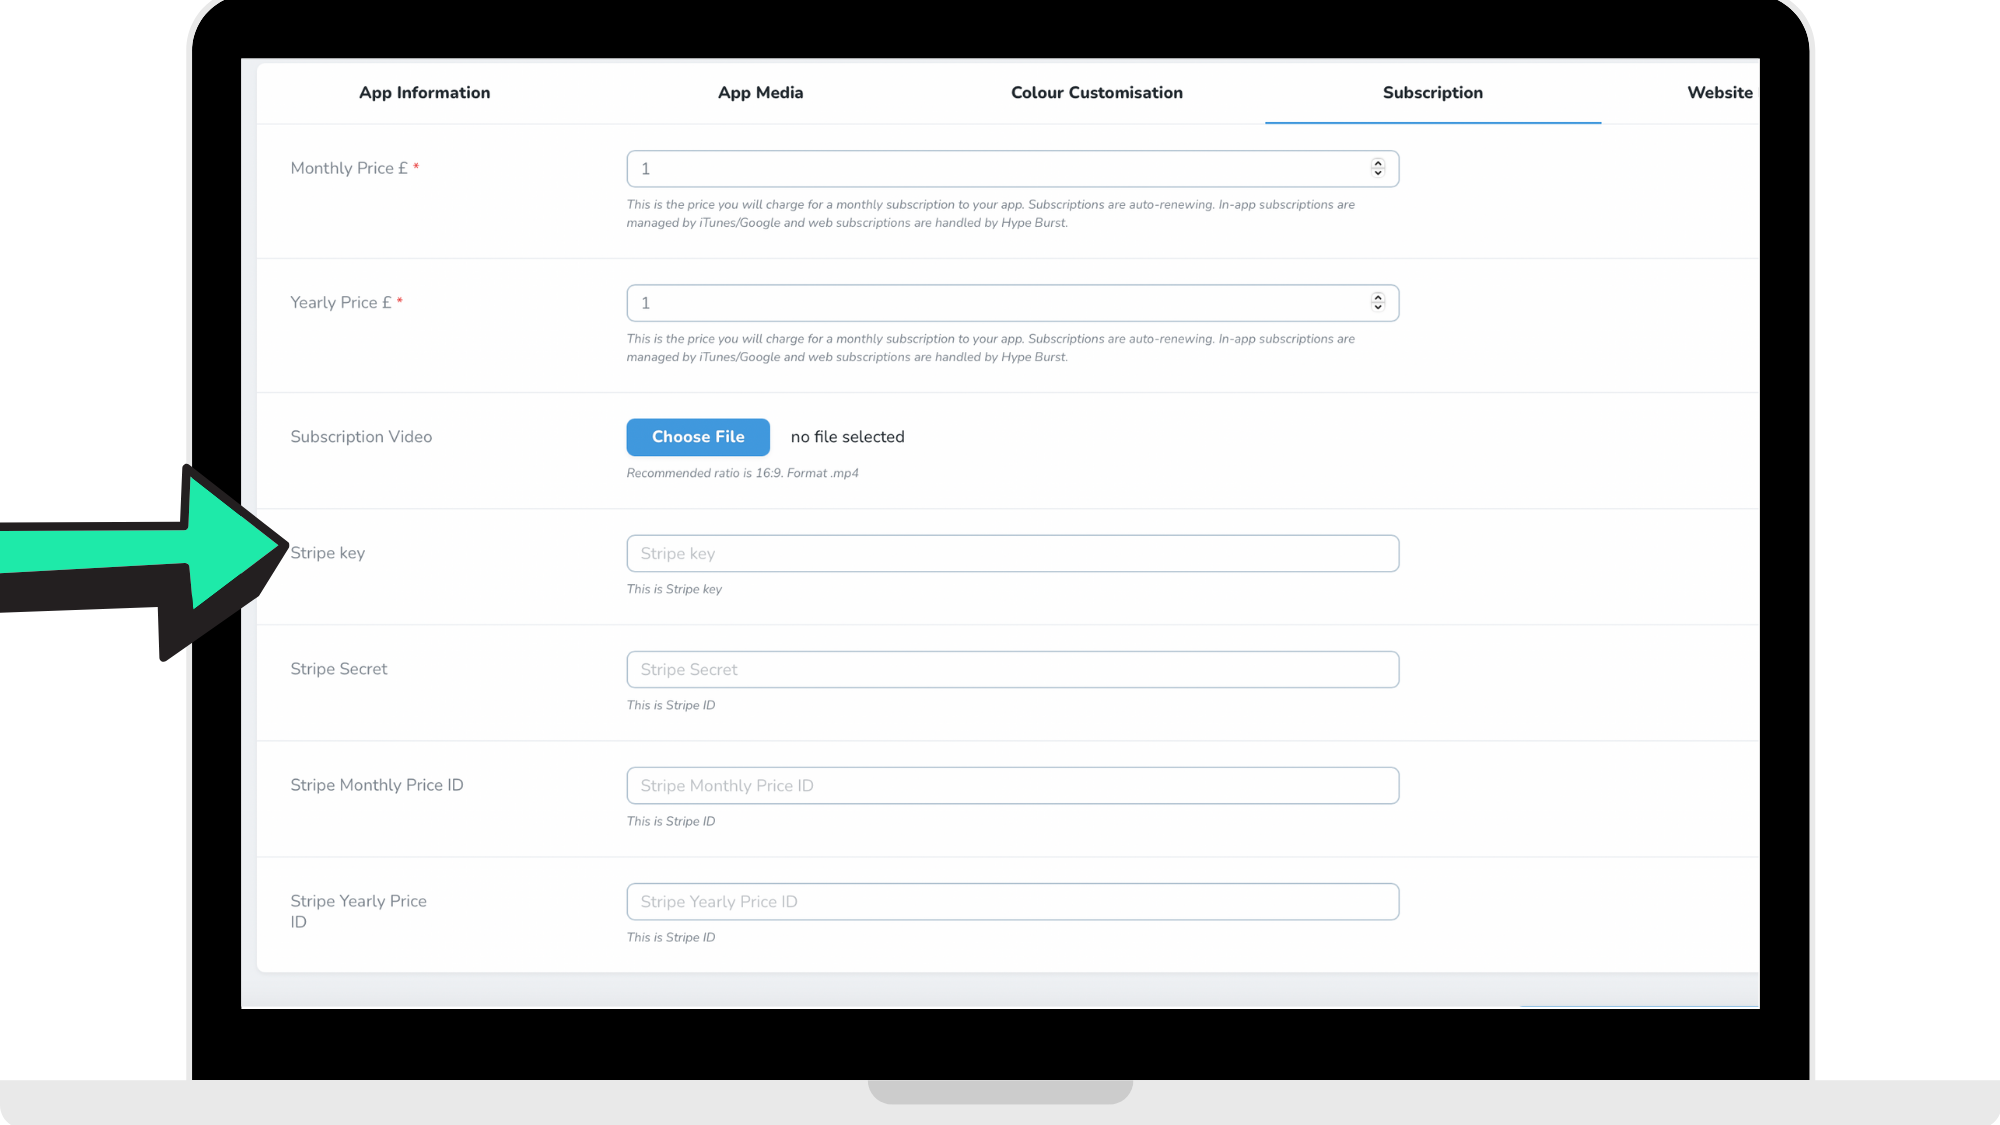
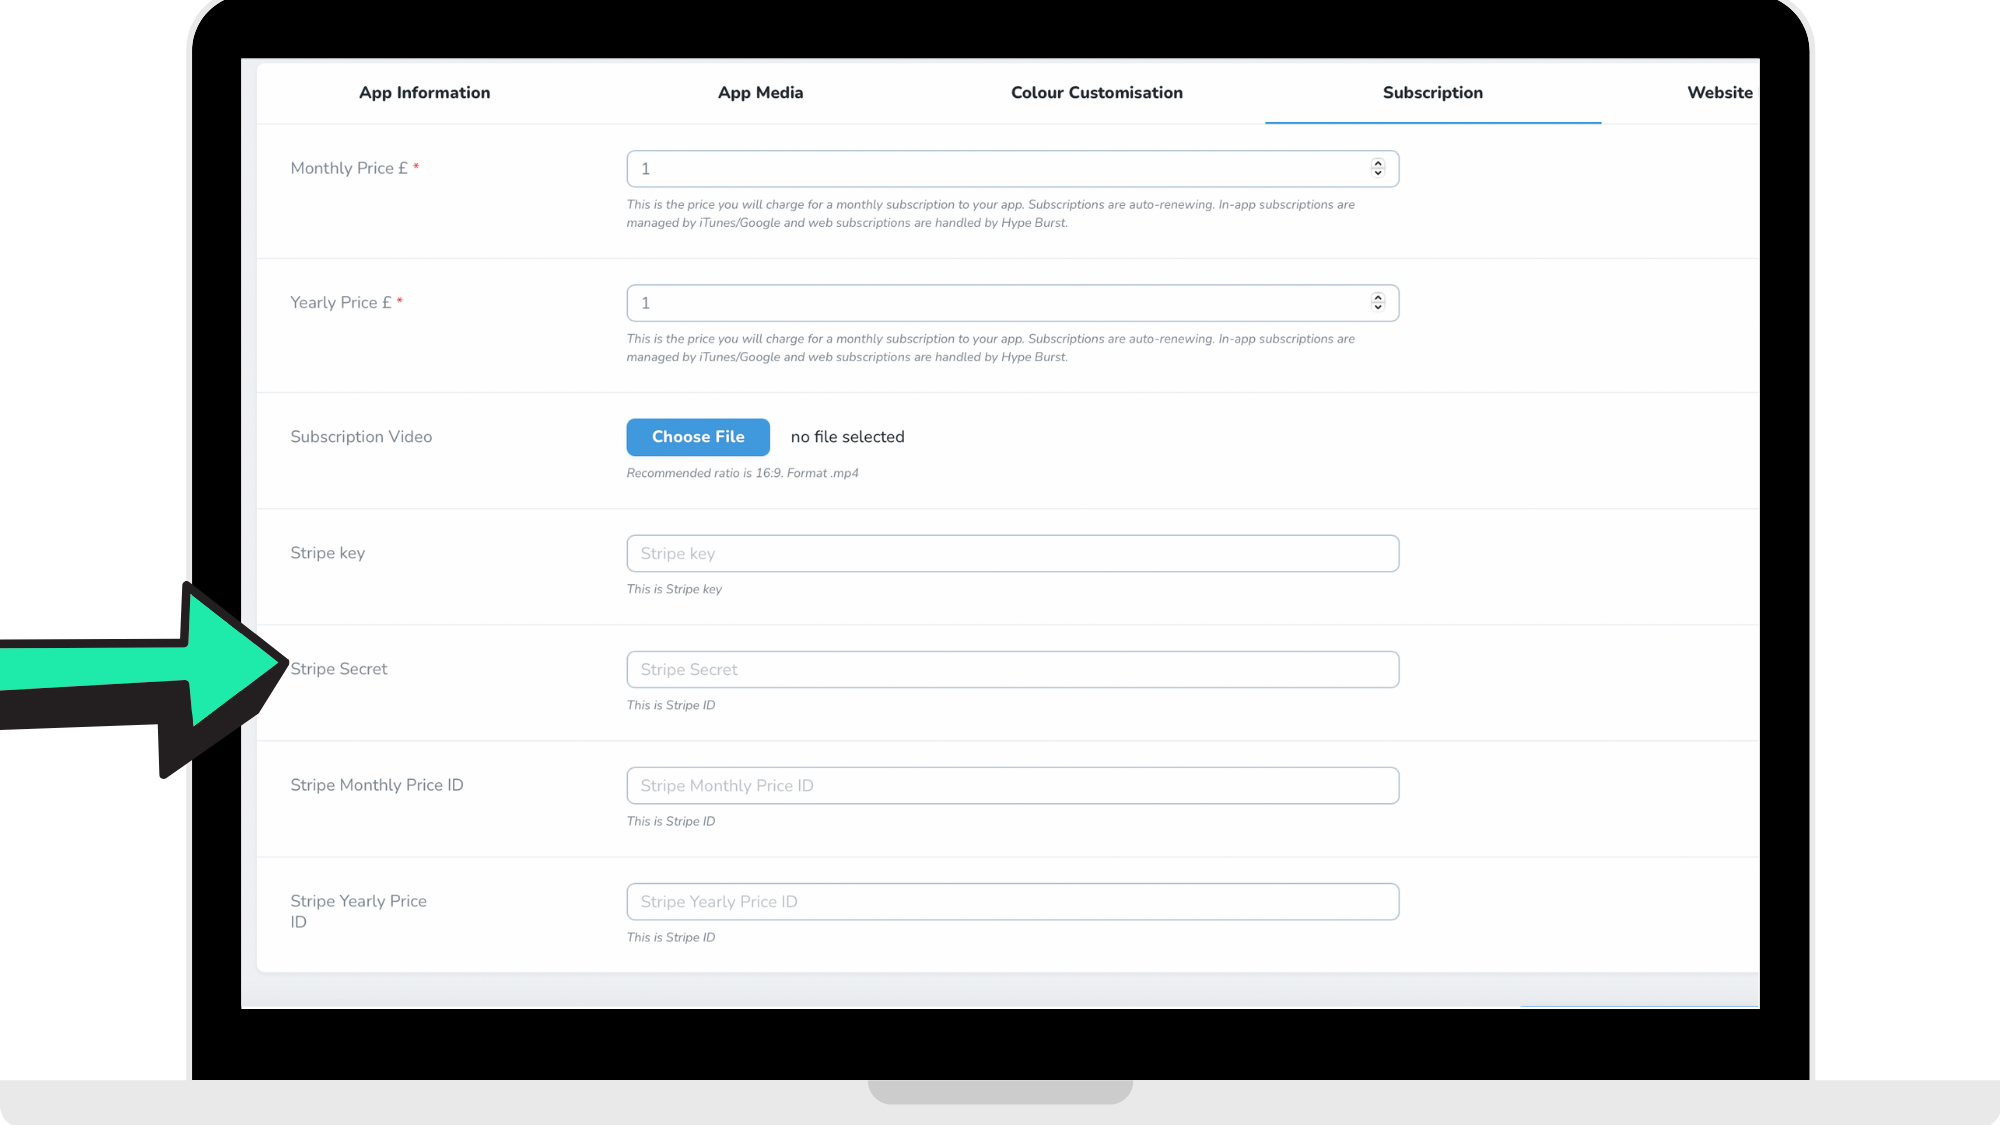
Step 3: Click the 'Subscription' section in the panel
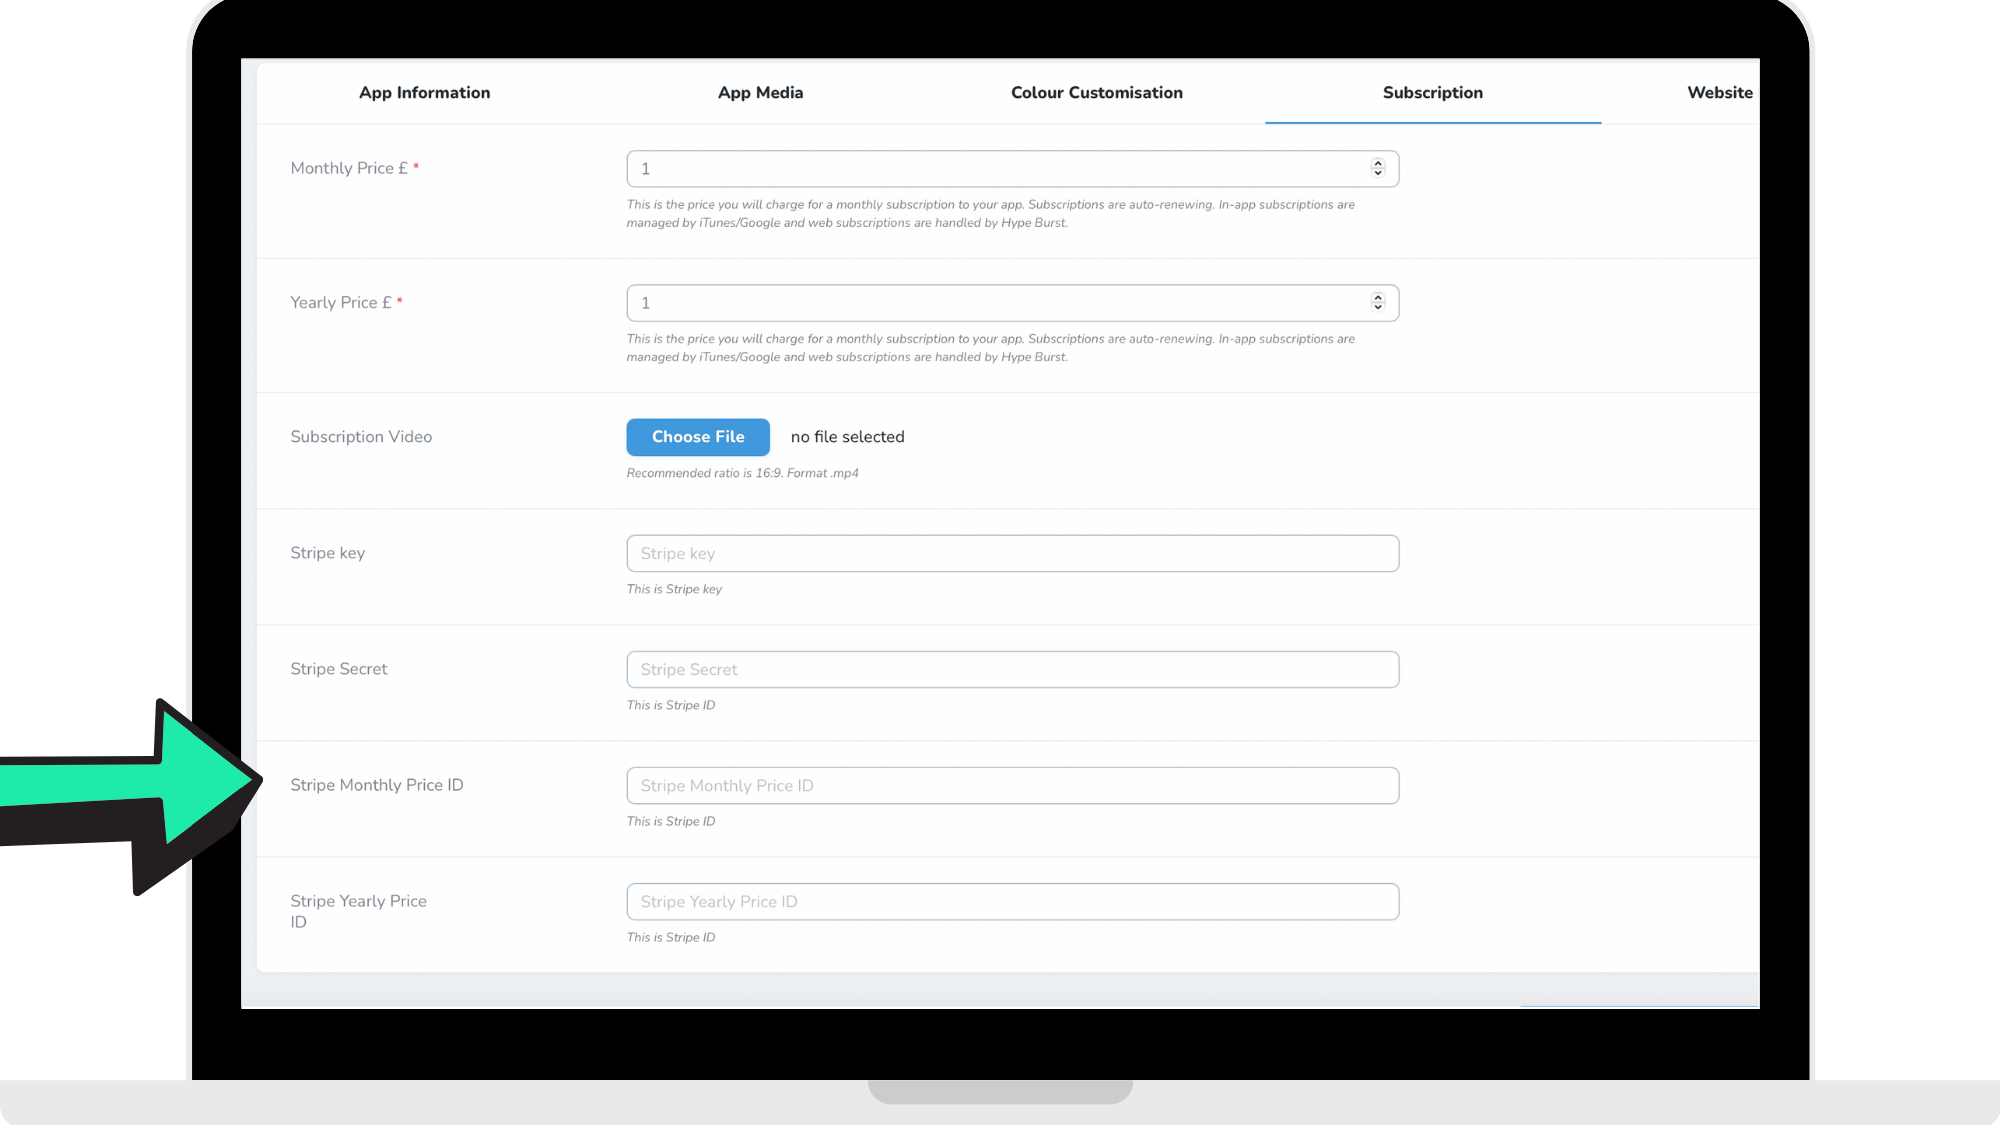
Step 4: Enter 'Stripe Monthly Price ID'
In your Stripe account, go under the 'Products' Dashboard where you will find the monthly and yearly subscriptions you set up. Locate the monthly product subscription you created and copy the 'API ID' which you can find where the arrow is pointing to in the reference picture below.
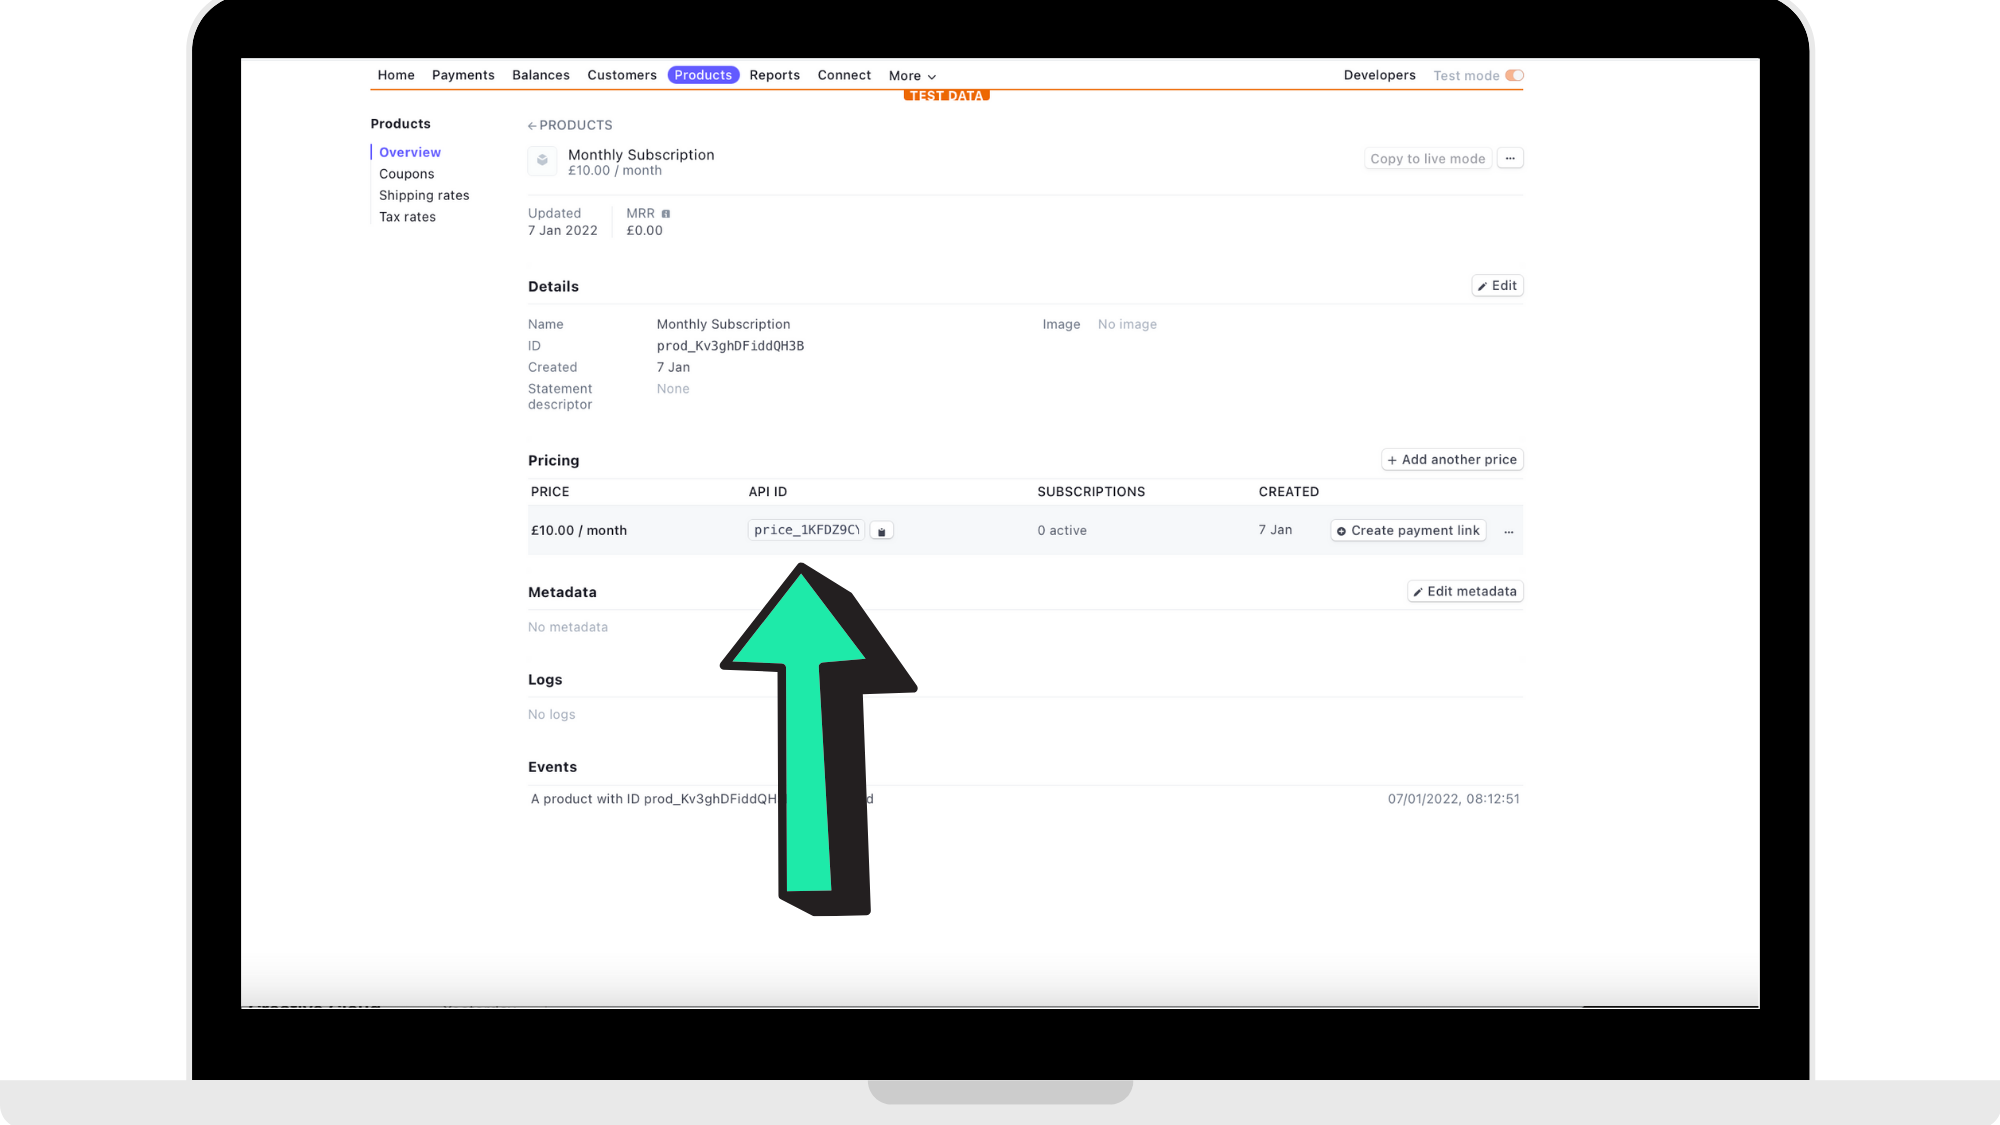
Once you have copied the 'API ID' of your monthly subscription, switch over to your Hype Burst tab where you will then paste the 'API ID' into the 'Stripe Monthly Price ID' section where the arrow is pointing to in the reference picture below.
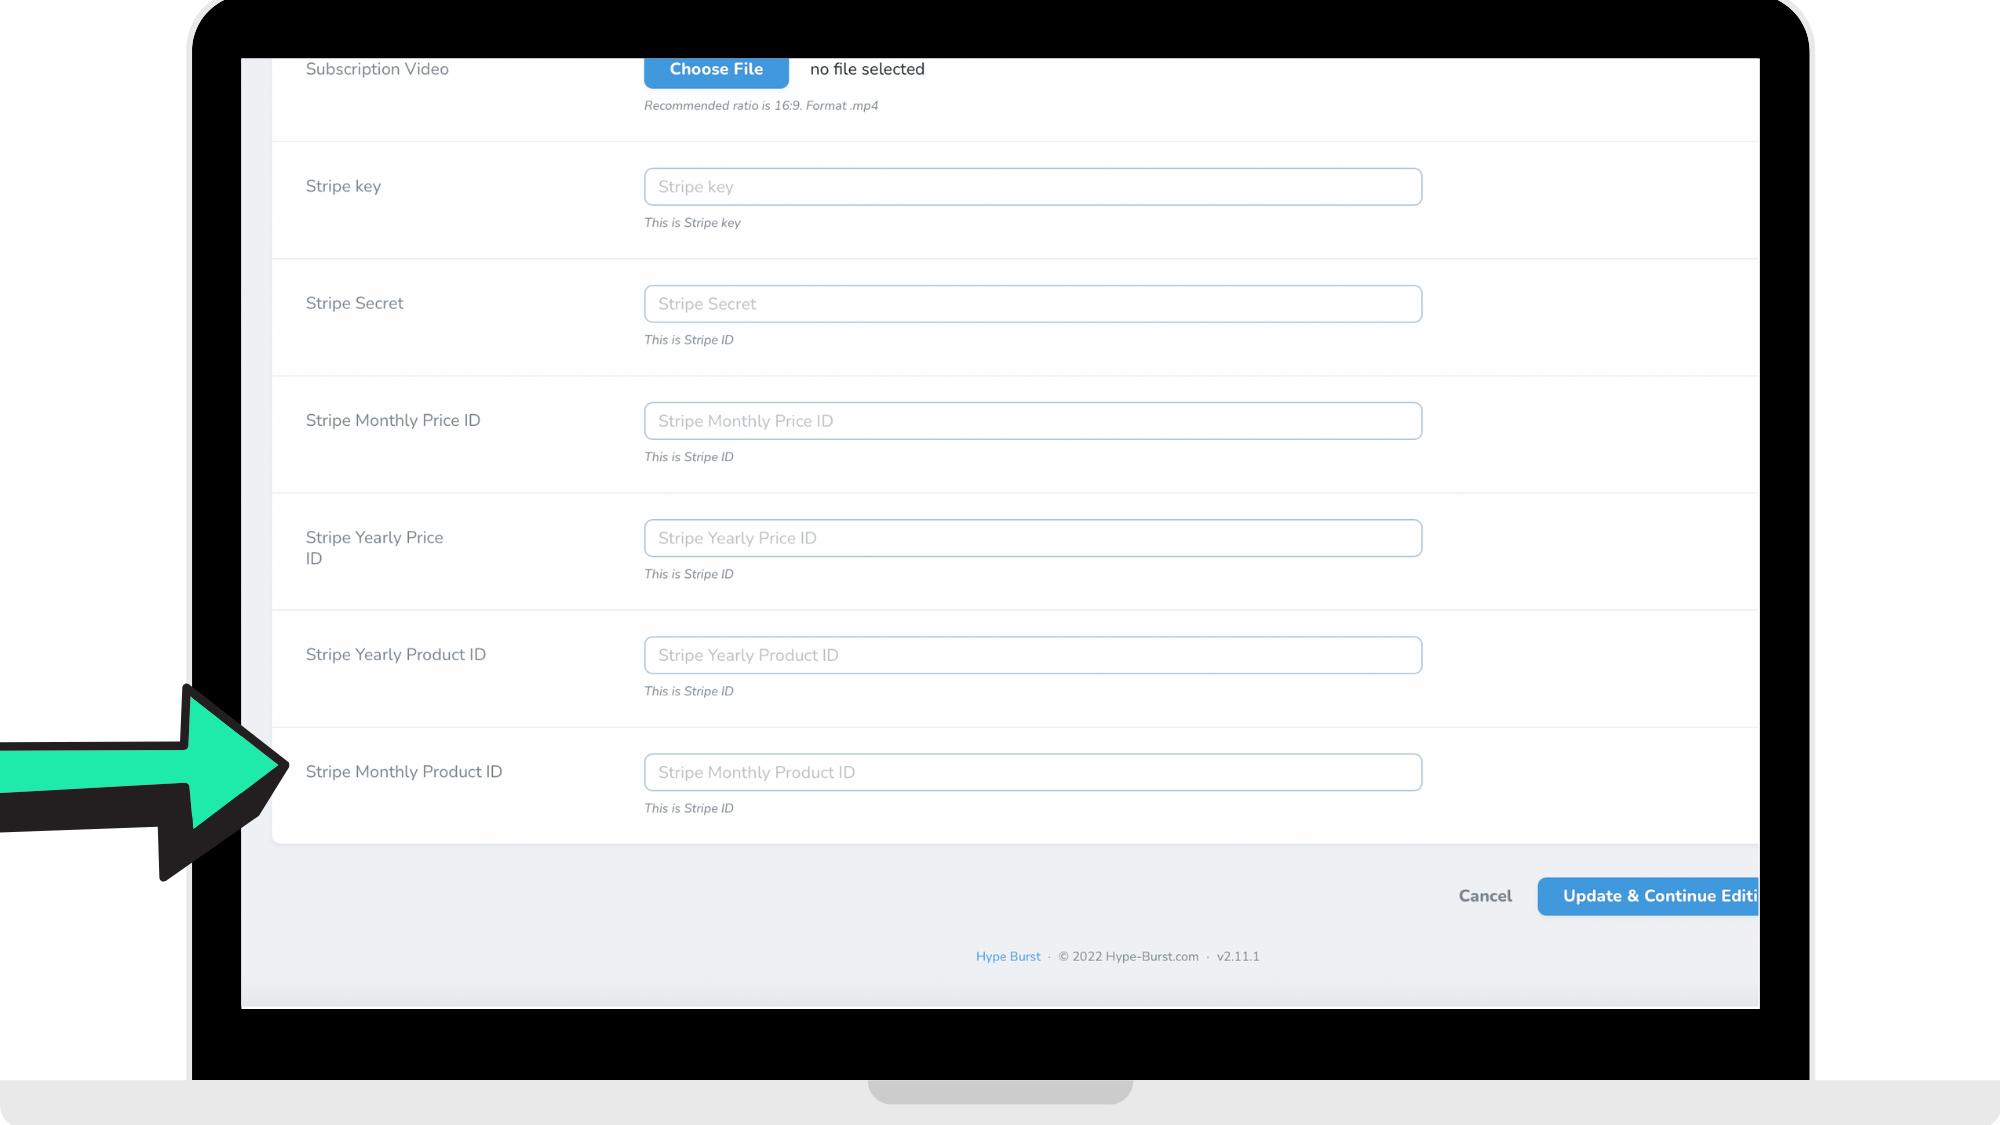
Step 5: Enter 'Stripe Monthly Product ID'
In your Stripe account, go under the 'Products' Dashboard where you will find the monthly and yearly subscriptions you set up. Locate the monthly product subscription you created and copy the 'Product ID' which you can find under details of the product and where the arrow is pointing to in the reference picture below.
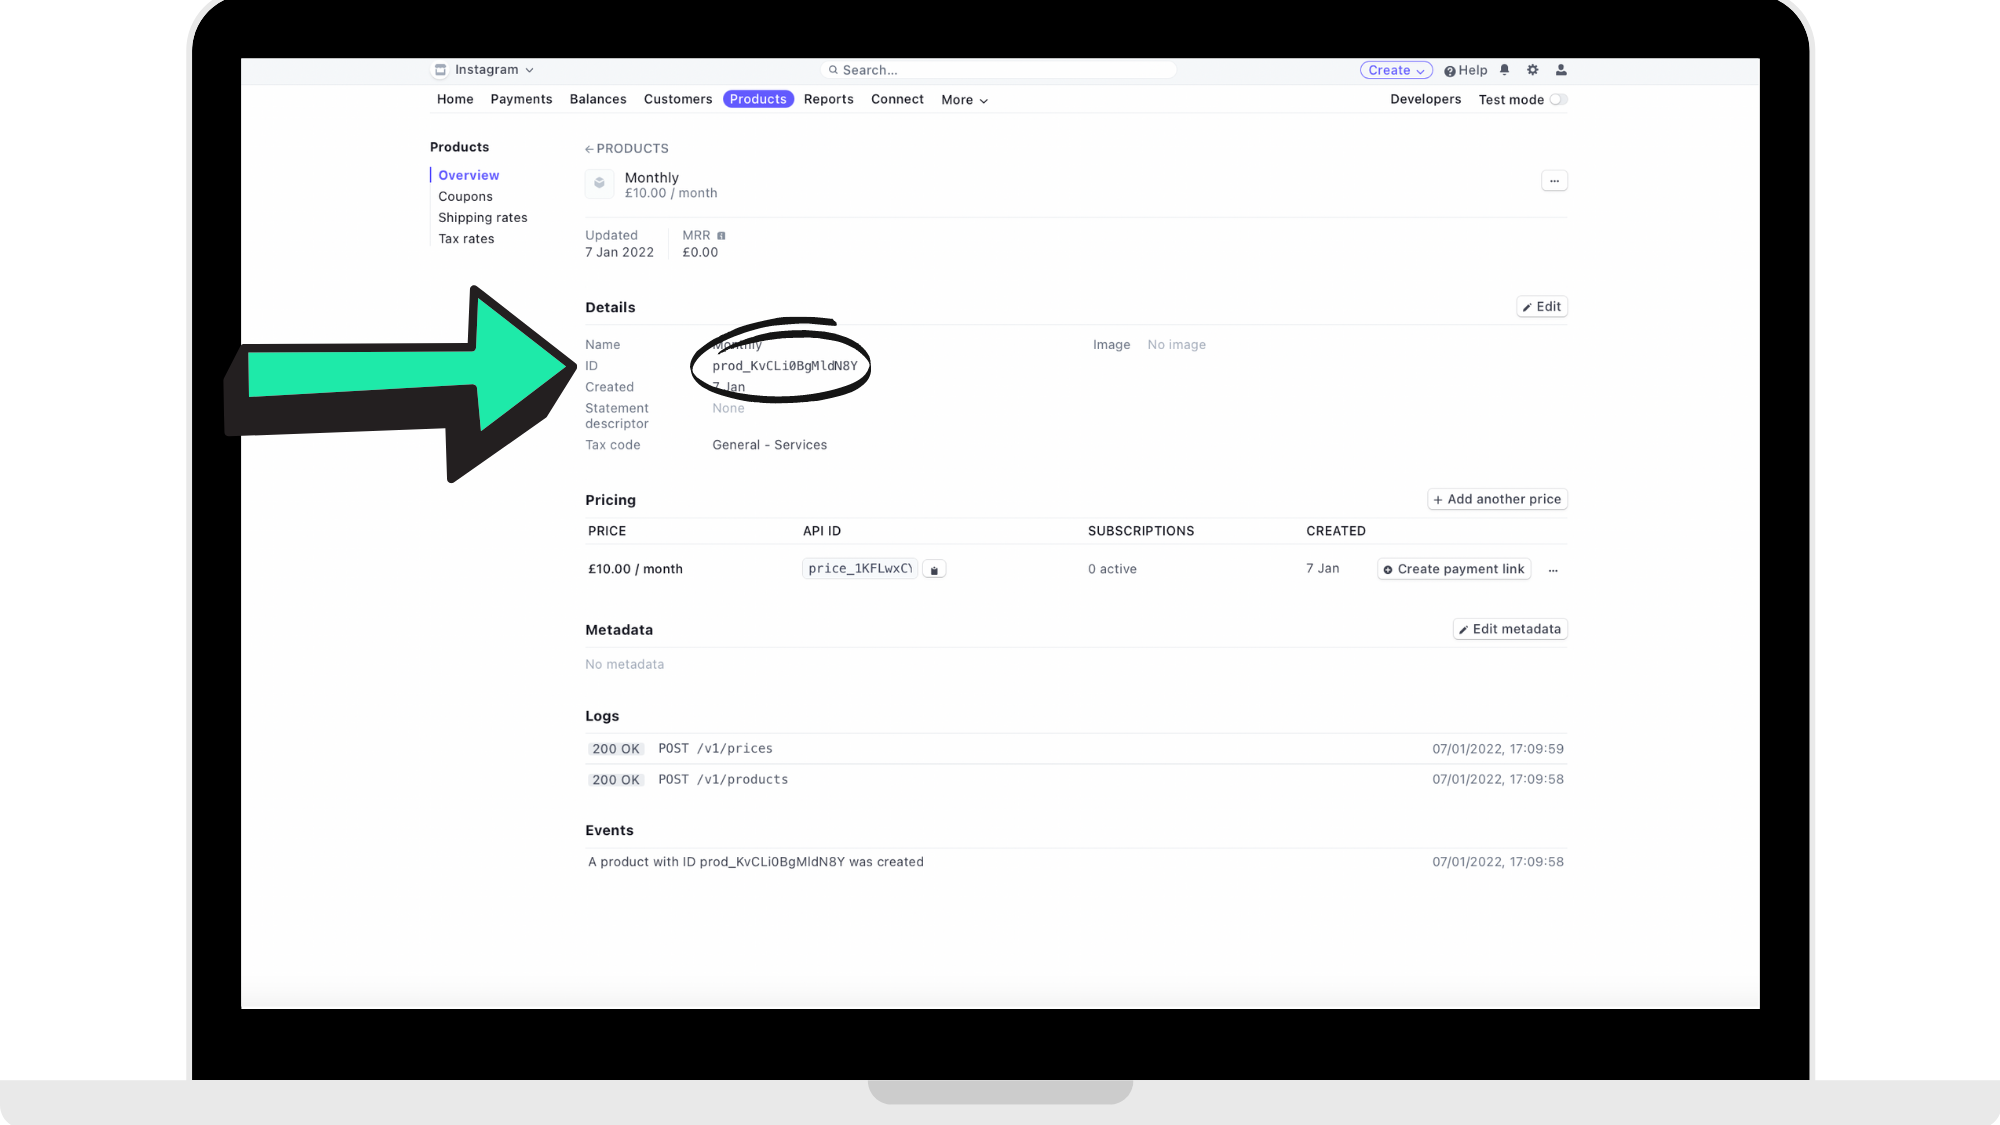
Once you have copied the 'Product ID' of your monthly subscription, switch over to your Hype Burst tab where you will then paste the 'Product ID' into the 'Stripe Monthly Product ID' section where the arrow is pointing to in the reference picture below.
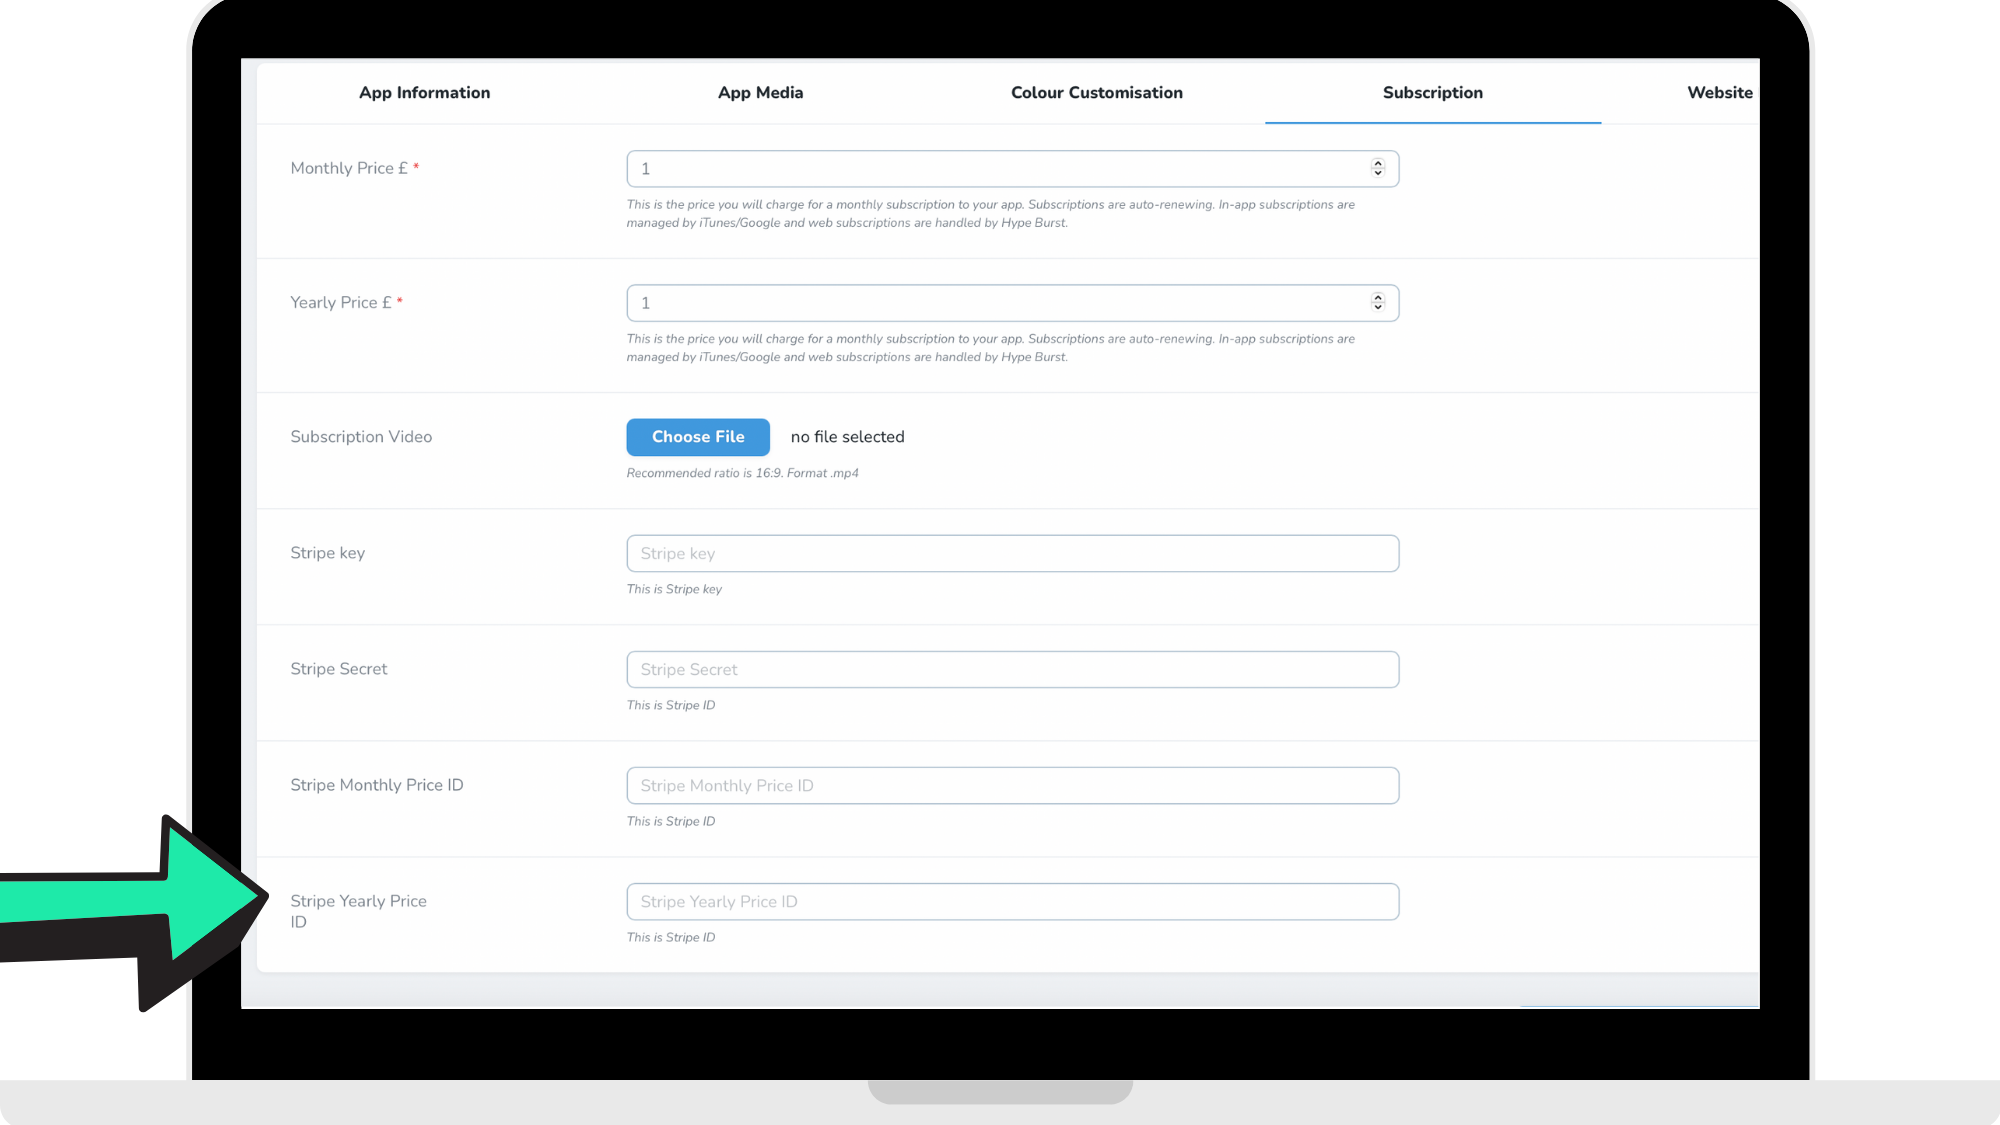
Step 6: Enter 'Stripe Yearly Price ID'
In your Stripe account, go under the 'Products' Dashboard where you will find the monthly and yearly subscriptions you set up. Locate the yearly product subscription you created and copy the 'API ID' which you can find where the arrow is pointing to in the reference picture below.
Once you have copied the 'API ID' of your yearly subscription, switch over to your Hype Burst tab where you will then paste the 'API ID' into the 'Stripe Yearly Price ID' section where the arrow is pointing to in the reference picture below.
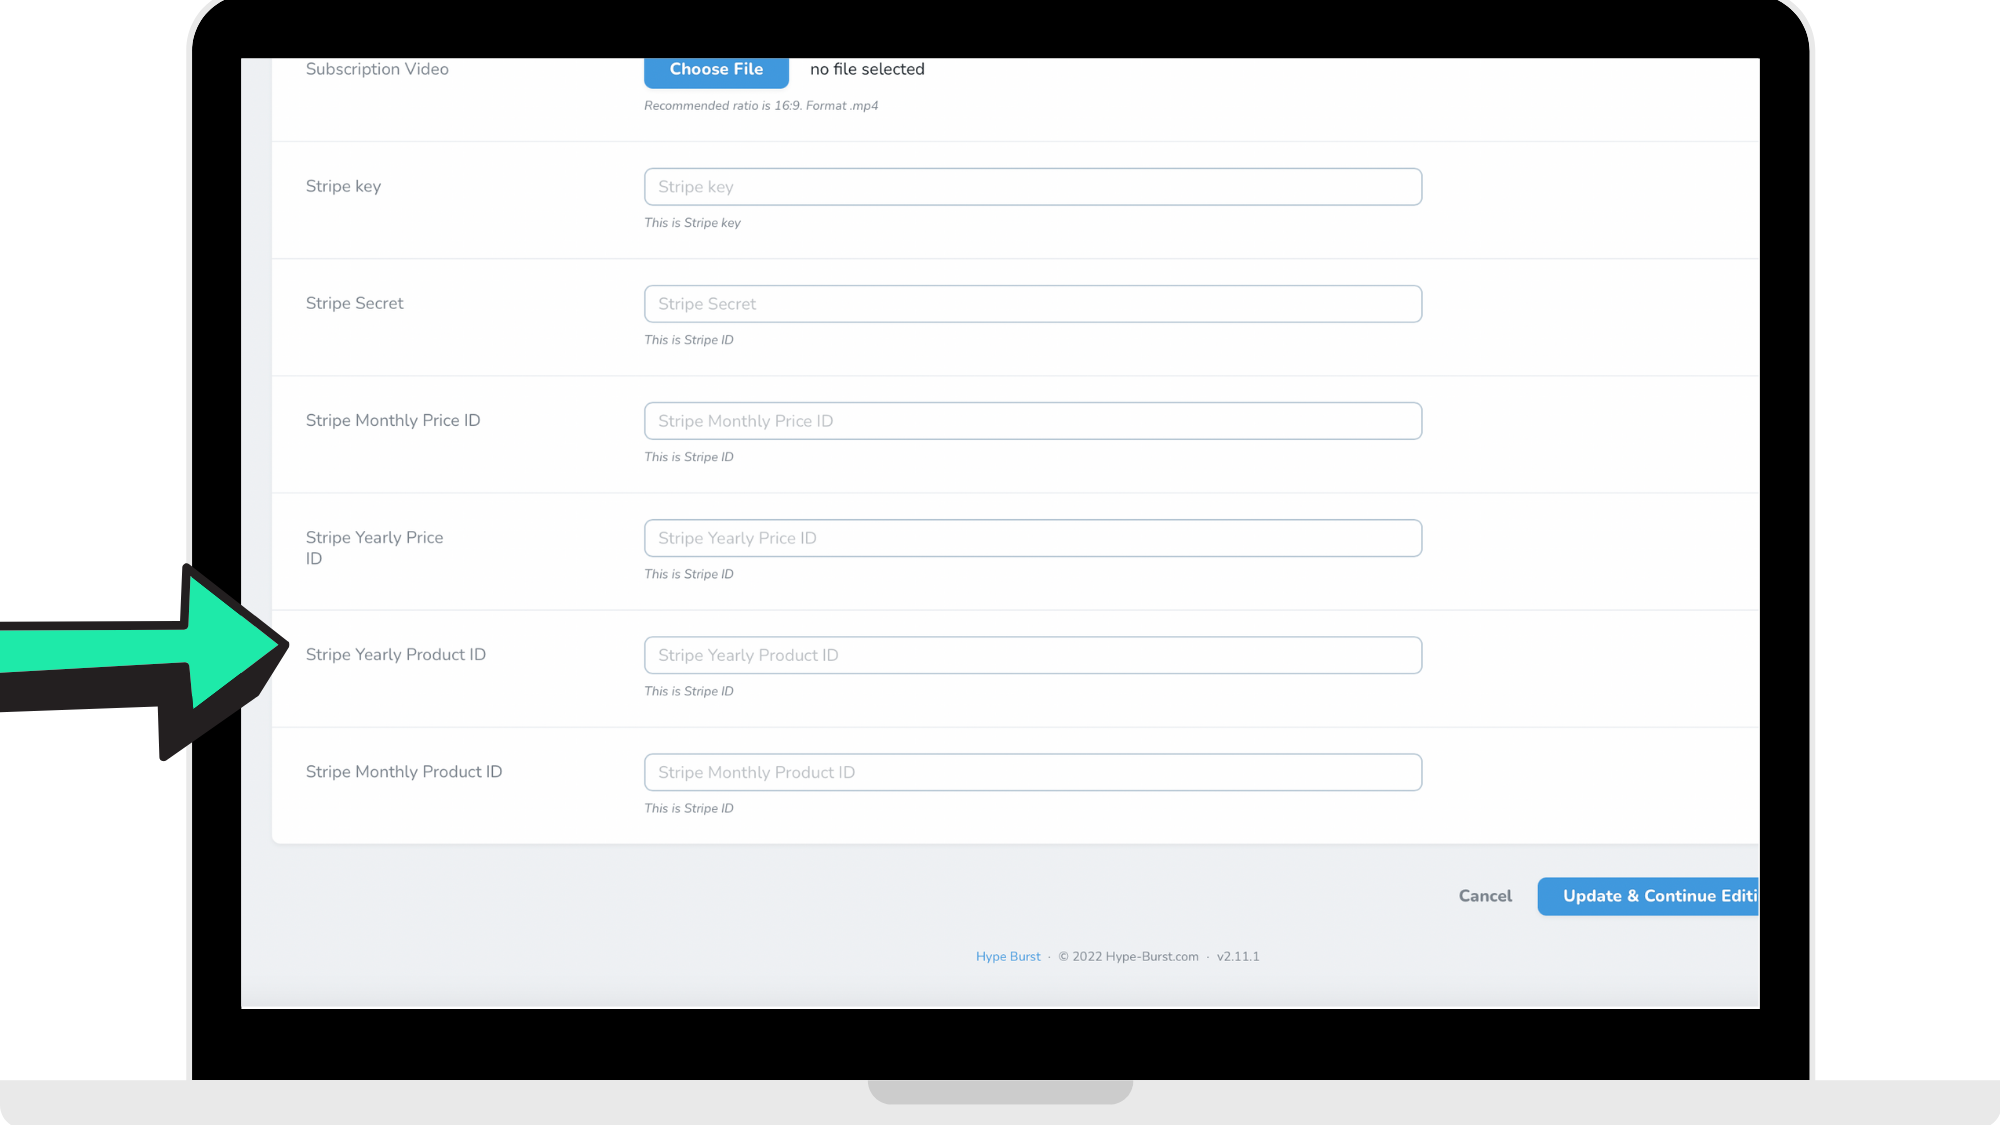
Step 7: Enter 'Stripe Yearly Product ID'
In your Stripe account, go under the 'Products' Dashboard where you will find the monthly and yearly subscriptions you set up. Locate the monthly product subscription you created and copy the 'Product ID' which you can find under details of the product and where the arrow is pointing to in the reference picture below.
Once you have copied the 'Product ID' of your monthly subscription, switch over to your Hype Burst tab where you will then paste the 'Product ID' into the 'Stripe Monthly Product ID' section where the arrow is pointing to in the reference picture below.
Step 8: Enter 'Stripe Key'
In your Stripe account, go under the 'Home' Dashboard where you will find your publishable key and also your secret key codes. Locate the 'Publishable Key' and copy the code which you can find where the magnifying glass is focusing in on in the reference picture below.
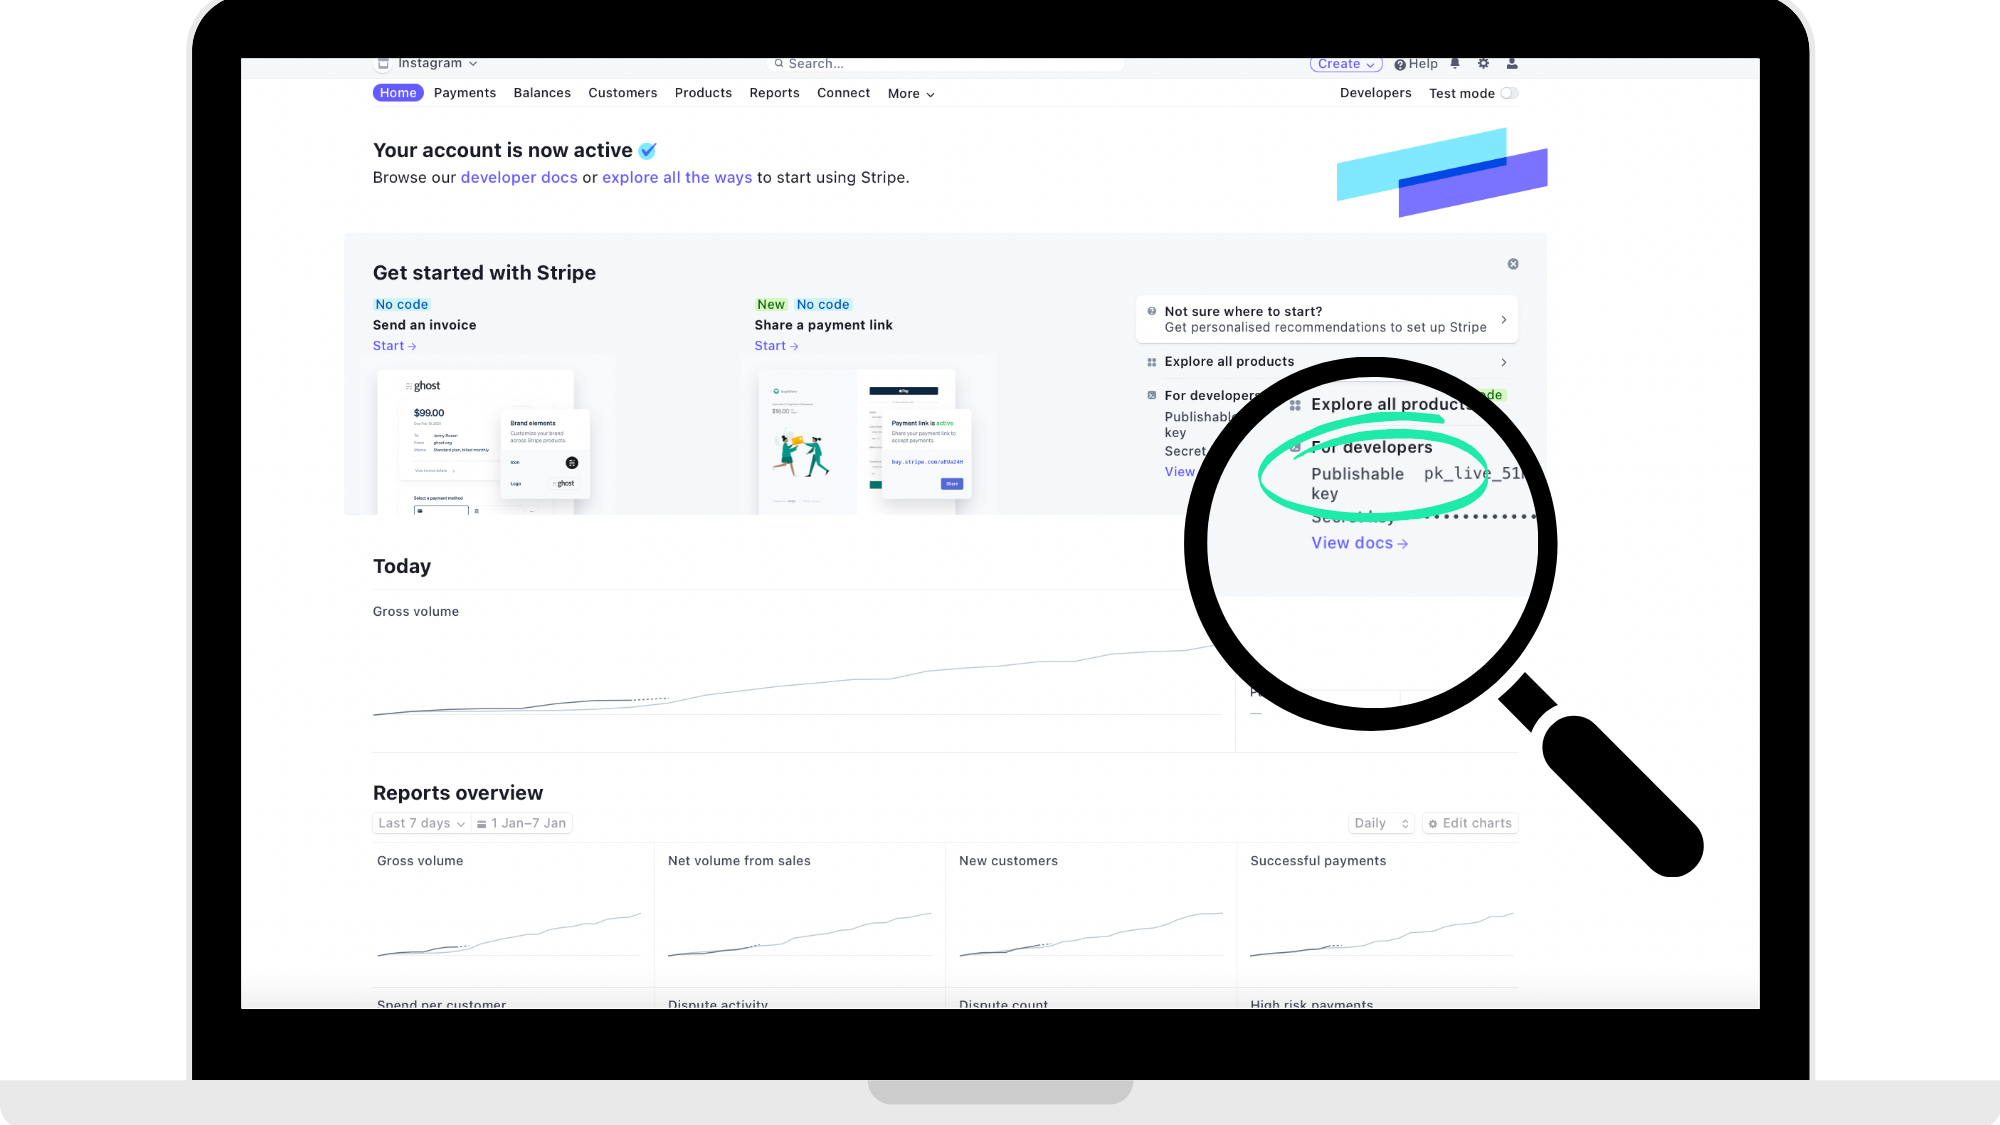
Once you have copied the 'Publishable Key' from your Stripe account, switch over to your Hype Burst tab where you will then paste the 'Publishable Key' into the 'Stripe Key' section where the arrow is pointing to in the reference picture below.
Step 9: Enter 'Secret Key'
In your Stripe account, go under the 'Home' Dashboard where you will find your publishable key and also your secret key codes. Locate the 'Secret Key', click to show the code, and copy the code which you can find where the magnifying glass is focusing in on in the reference picture below.
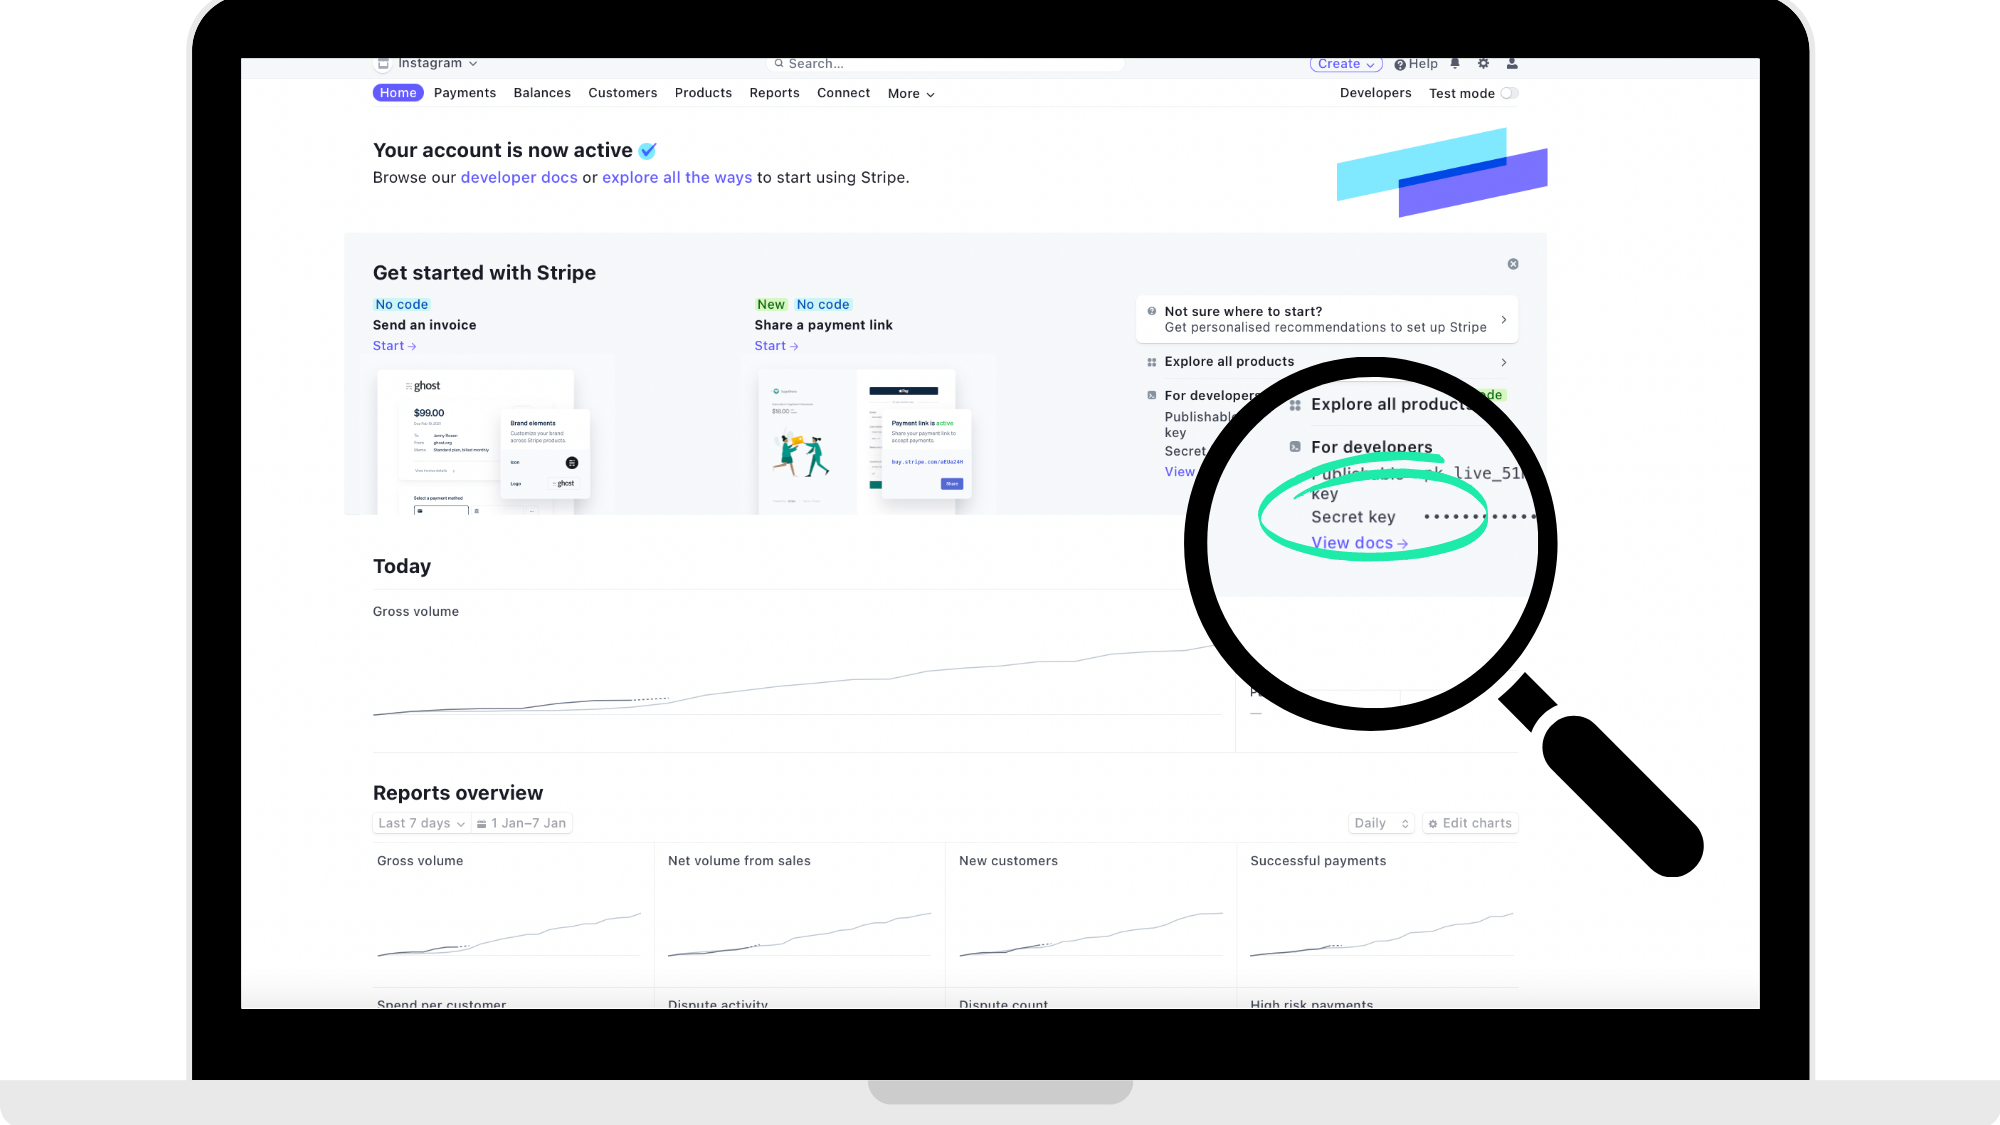
Once you have copied the 'Secret Key' from your Stripe account, switch over to your Hype Burst tab where you will then paste the 'Secret Key' into the 'Stripe Secret' section where the arrow is pointing to in the reference picture below.
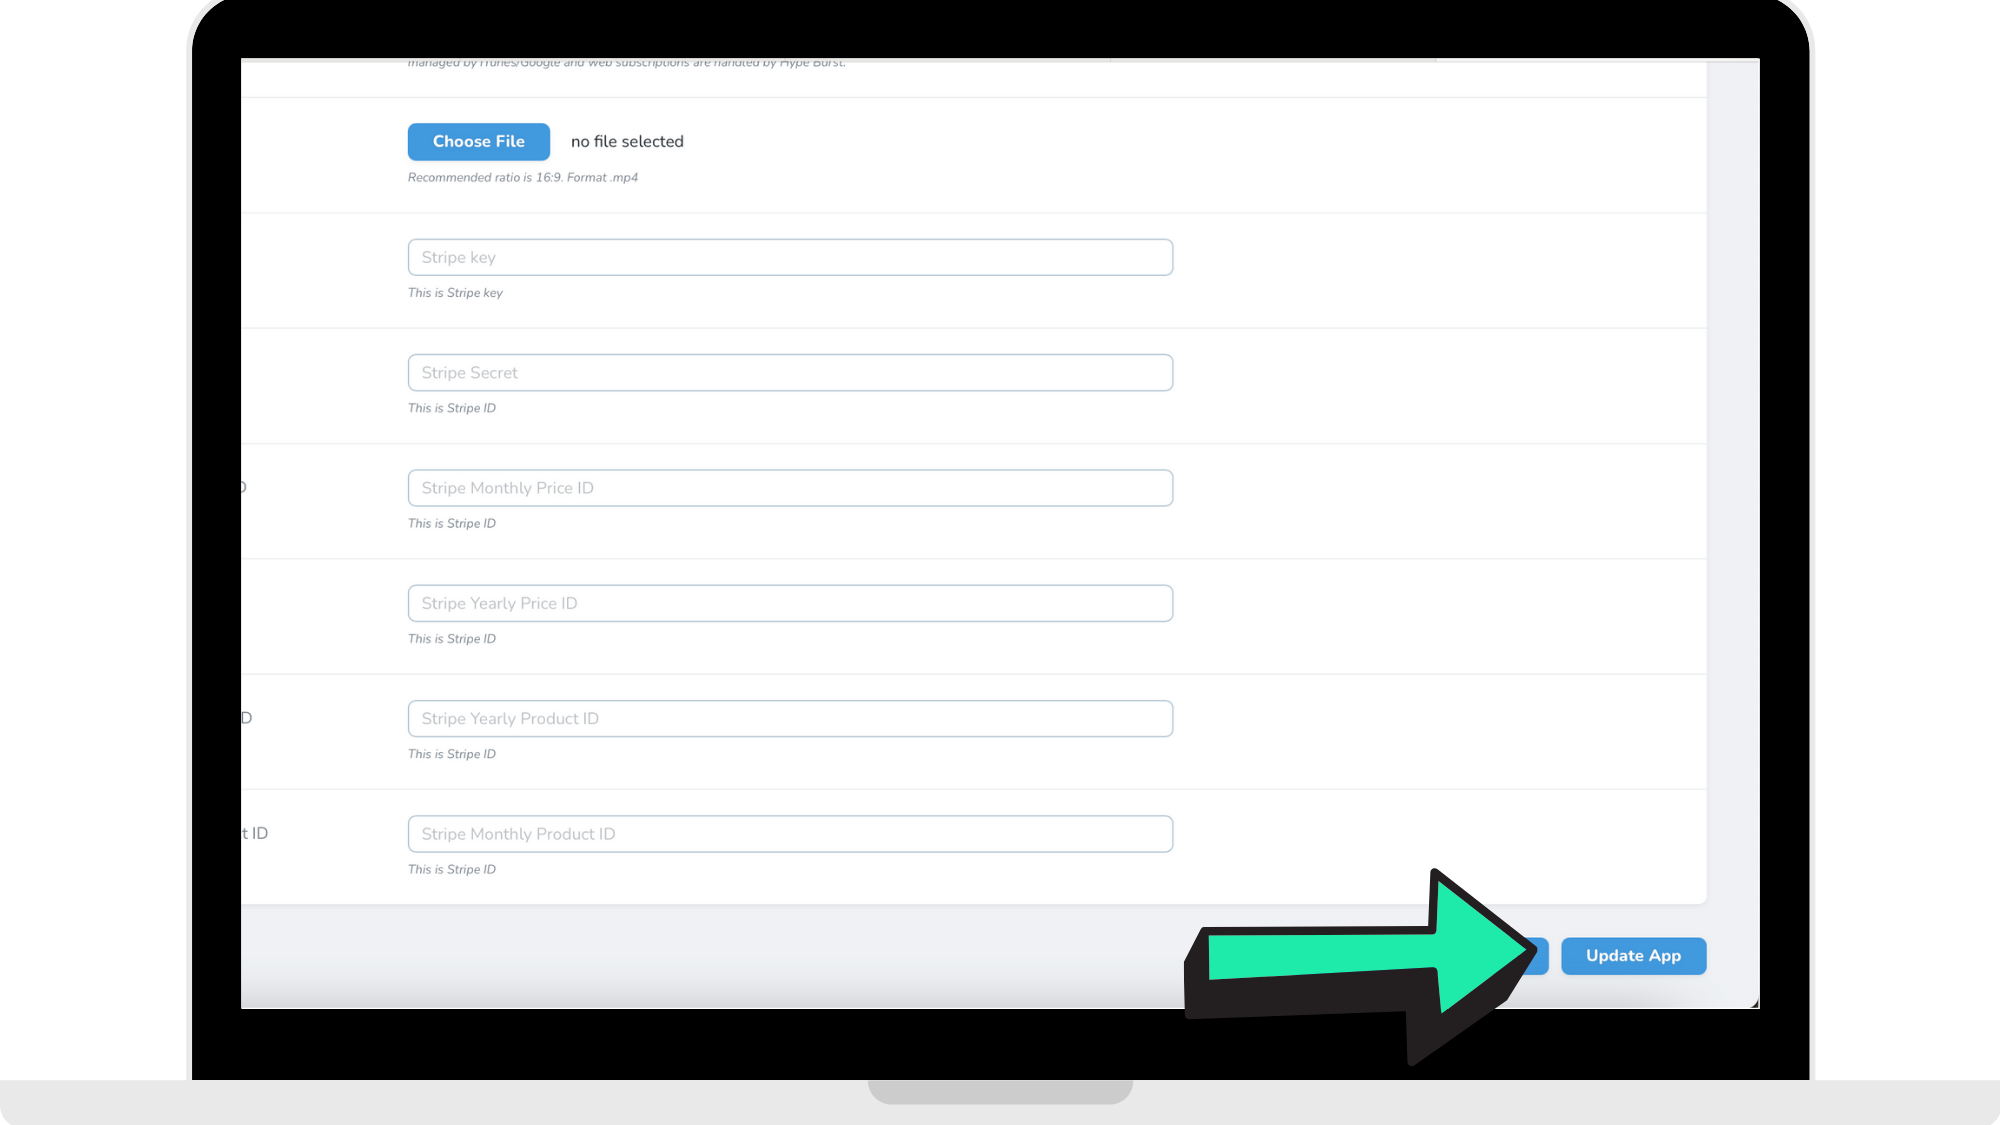
Step 10: Click 'Update App' in bottom right corner
Once you have entered in all 4 key codes from your Stripe account into your Hype Burst account, you can click the button 'Update App' in the bottom right corner, which finalises the link between your Stripe account to your Hype Burst account.
What now?
Now that you know the steps into linking your Stripe account to your Hype Burst account, log into your dashboard at https://account.hype-burst.com/admin/login to get started!
Comments
0 comments
Please sign in to leave a comment.